
Puzzle Design
- Tool: Half-Life 2, Hammer
- Platform: PC
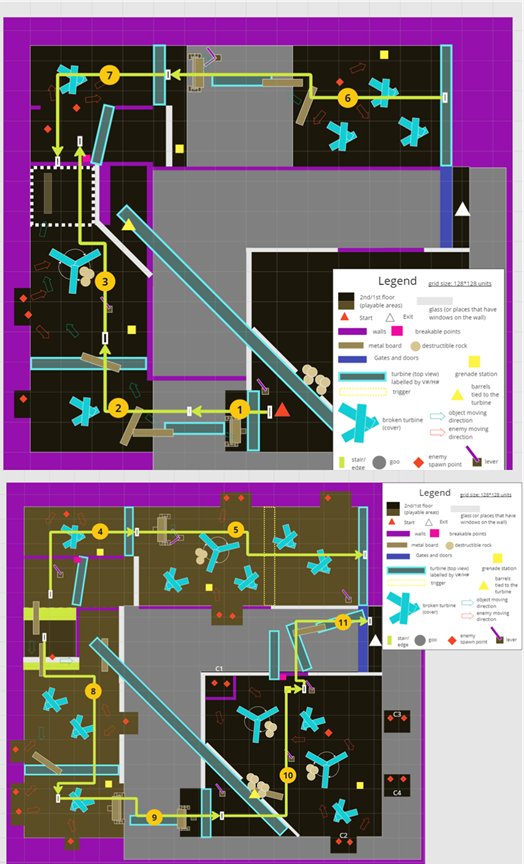
- Level Size: 3 interior areas and 3 exterior areas.
- Gameplay time: ~10minutes.
- Team Size: Individual.
- Development time: 5 weeks, ~120 hours in total.
Trailer
Summary
“Turbine Ruins” is a single-player level in Half-life 2. It takes place at seaside Lighthouse Point, where the player faces an invading combat with Combine soldiers in dropships. To reach the lighthouse to help, the player, acting as Gordon Freeman, must get through the turbine ruins to find his way out.
There, the player needs to traverse through turbine doors and bridges, encountering Ravenholm-trap themed challenges, while moving around Metal Sheets to solve navigation puzzles, fighting with metro police, and combine soldiers, and utilizing the rotating turbines to kill enemies at the same time.
Design Goals
Play with Turbine: Navigating yourself among the turbine doors and bridges, while using them to clear obstacles or even kill enemies, keep an eye to avoid hurting yourself!
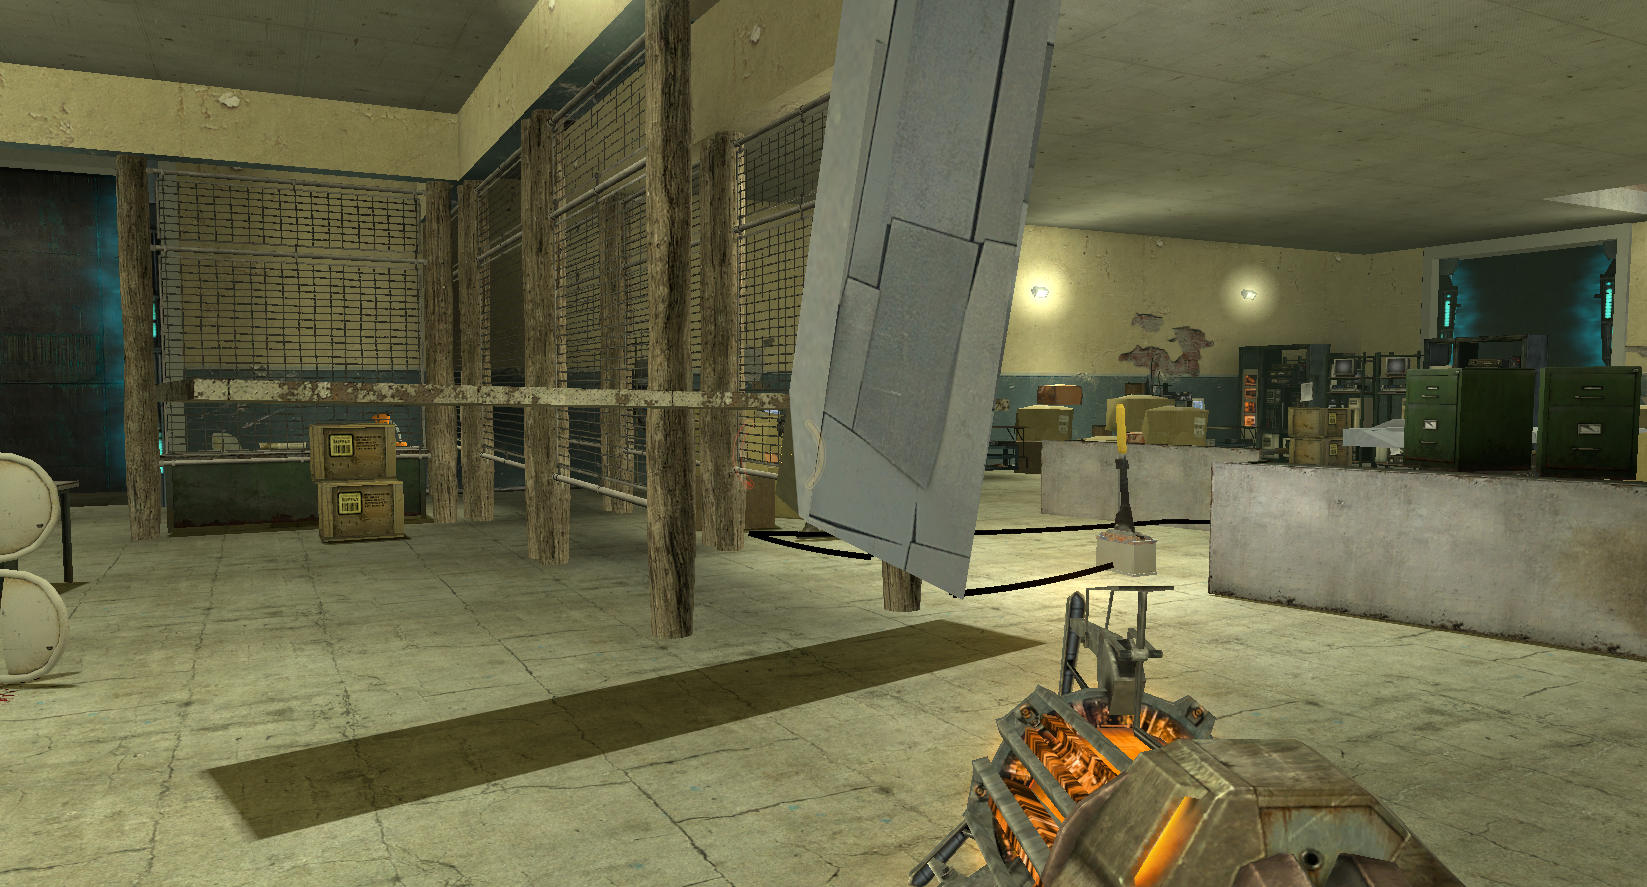
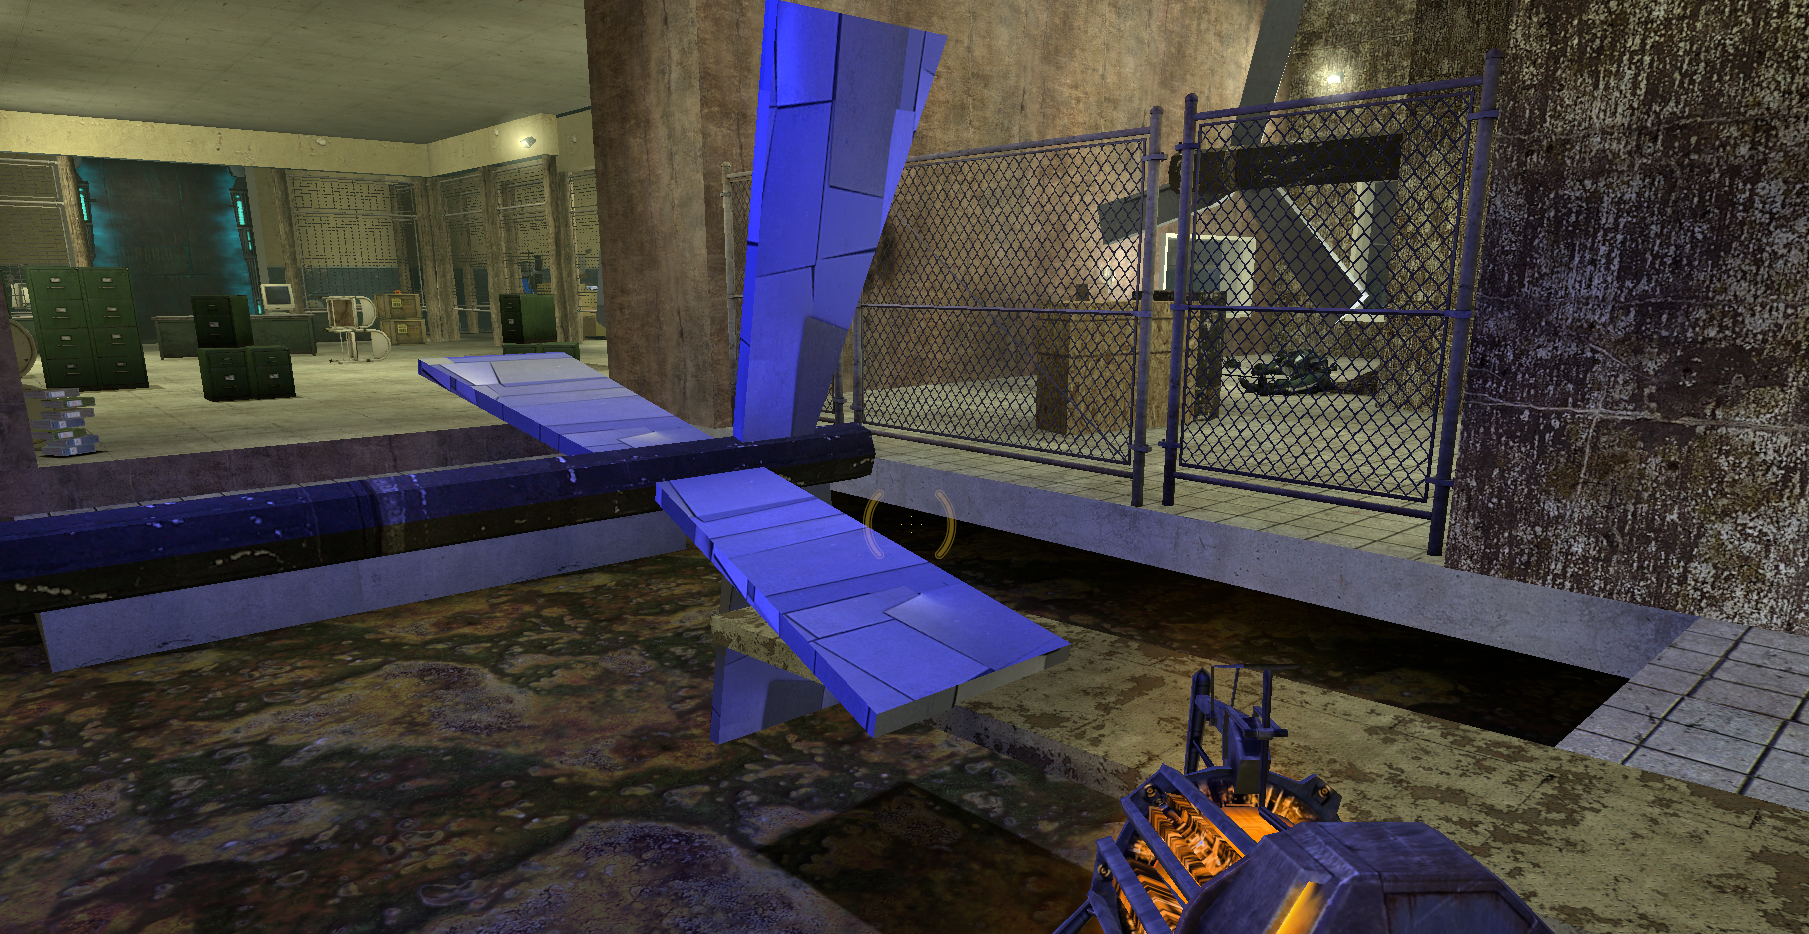
Multi-functional Metal Sheet: as stairs and platforms, as jamming blockers for the turbines. Carry it with you!
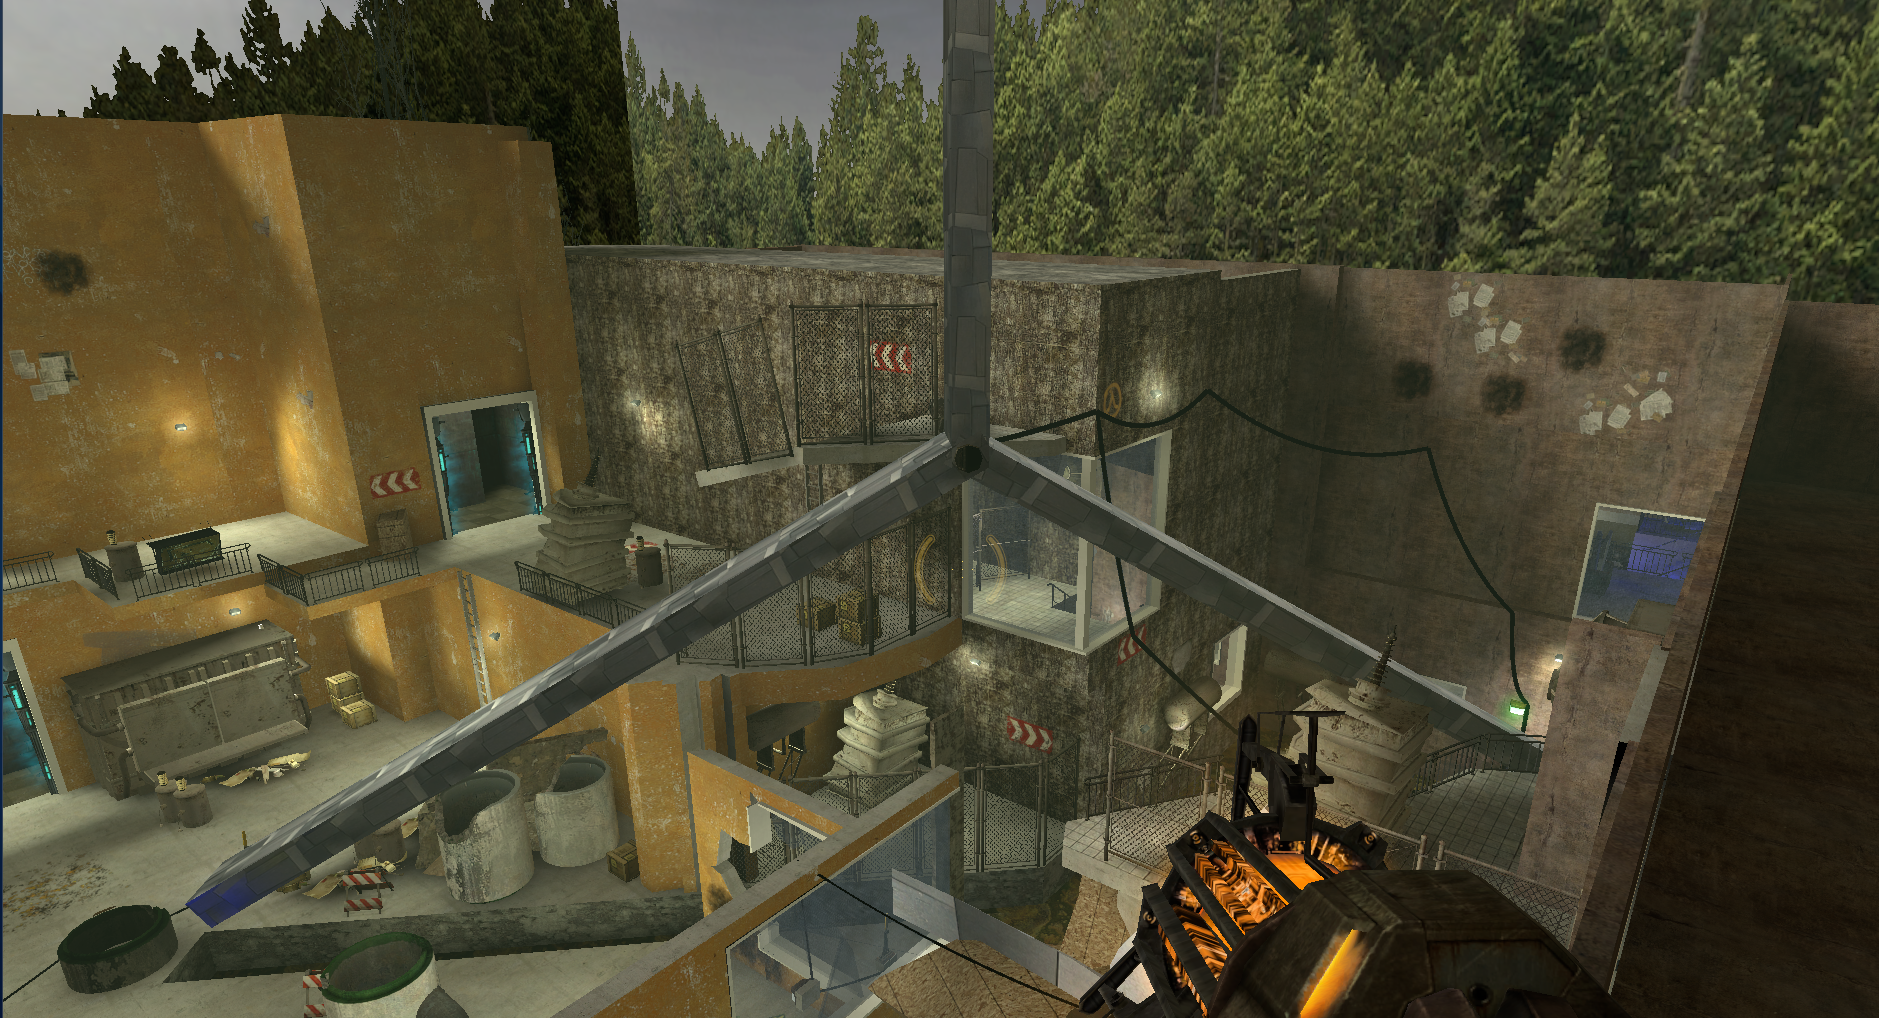
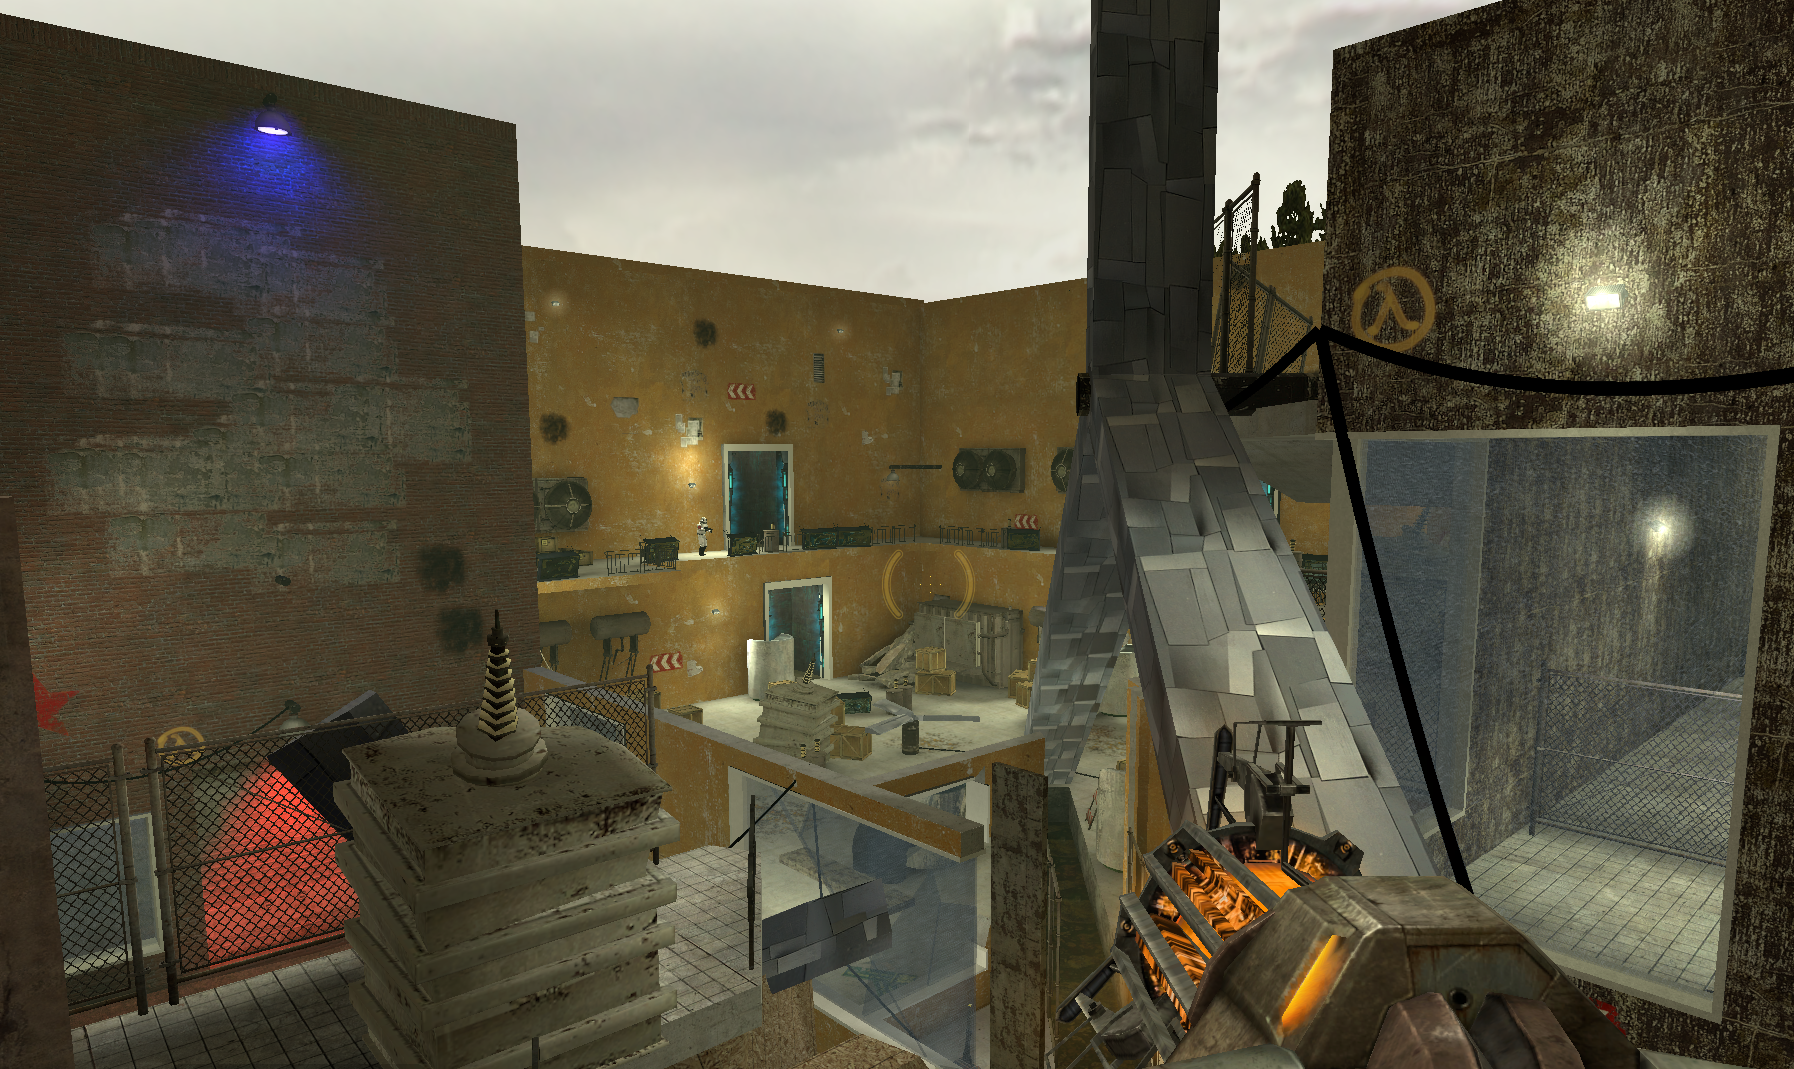
Giant turbine as landmark: in the middle of the level the giant turbine serves as a bridge to connect areas. You always get a sightline of it to know where you are and when you are finally standing on it, take a breath with the scenery beneath you and prepare for the last fight!
Reuse of space: clearing out the wood obstacles provides shortcuts to previous areas, use the metal sheets there to help you get to the goal, or if you missed opening the gate, get back through the ladder. You can always find a way out!
Design Discussion
Turbine Mechanics w/ Conveyance
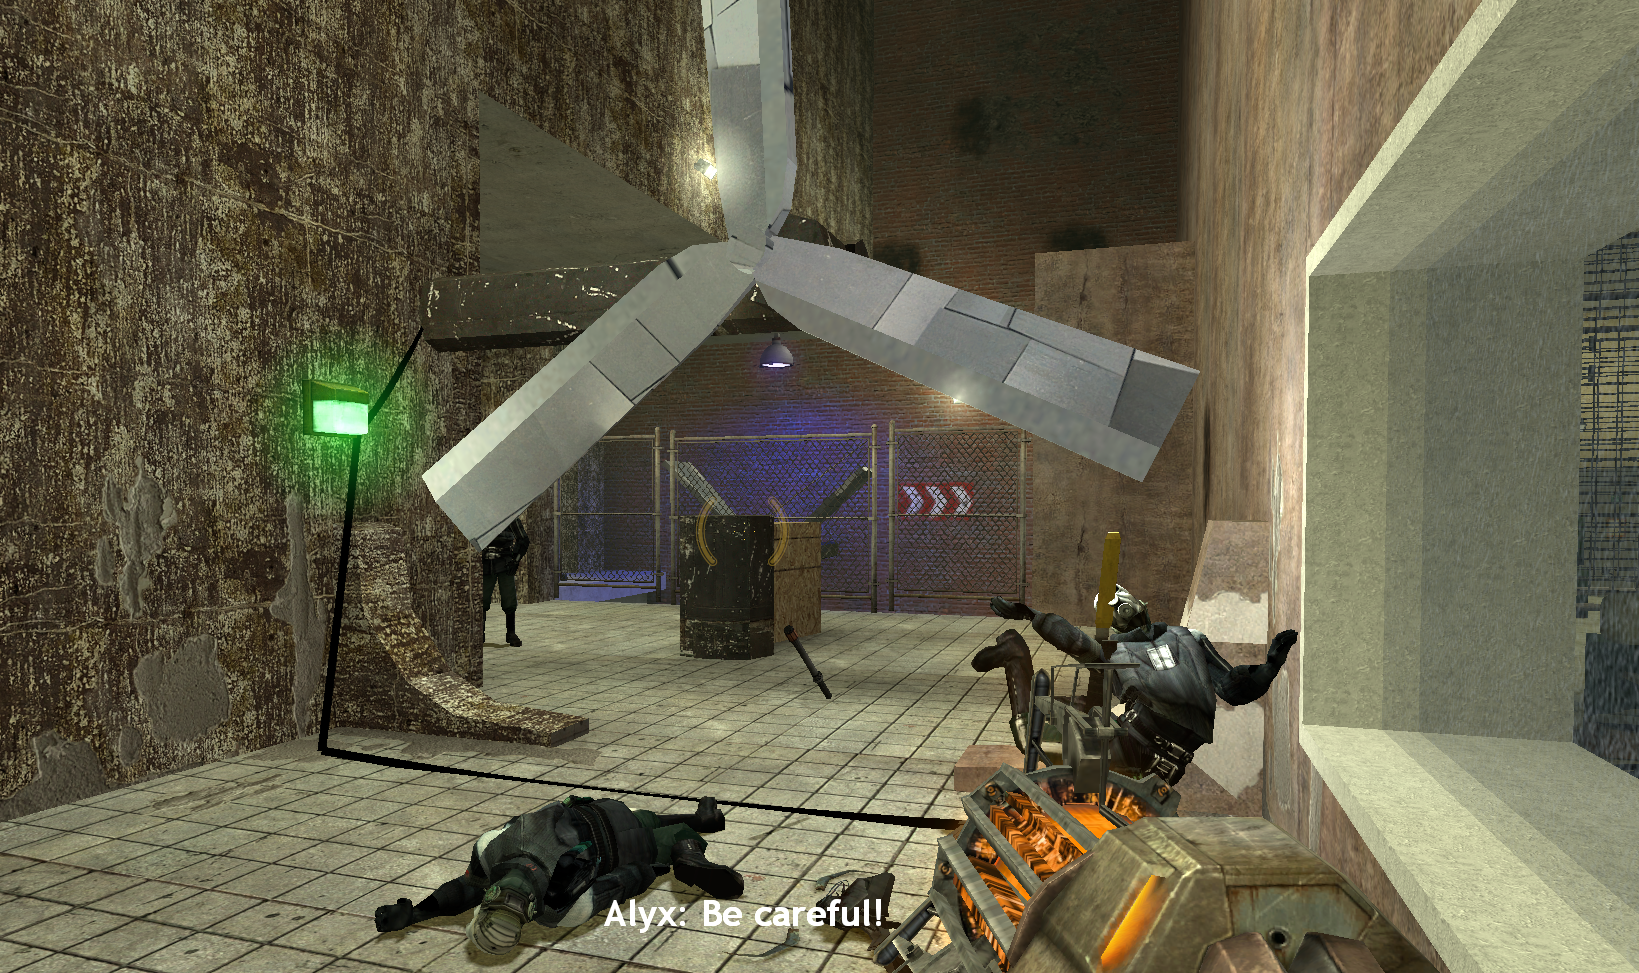
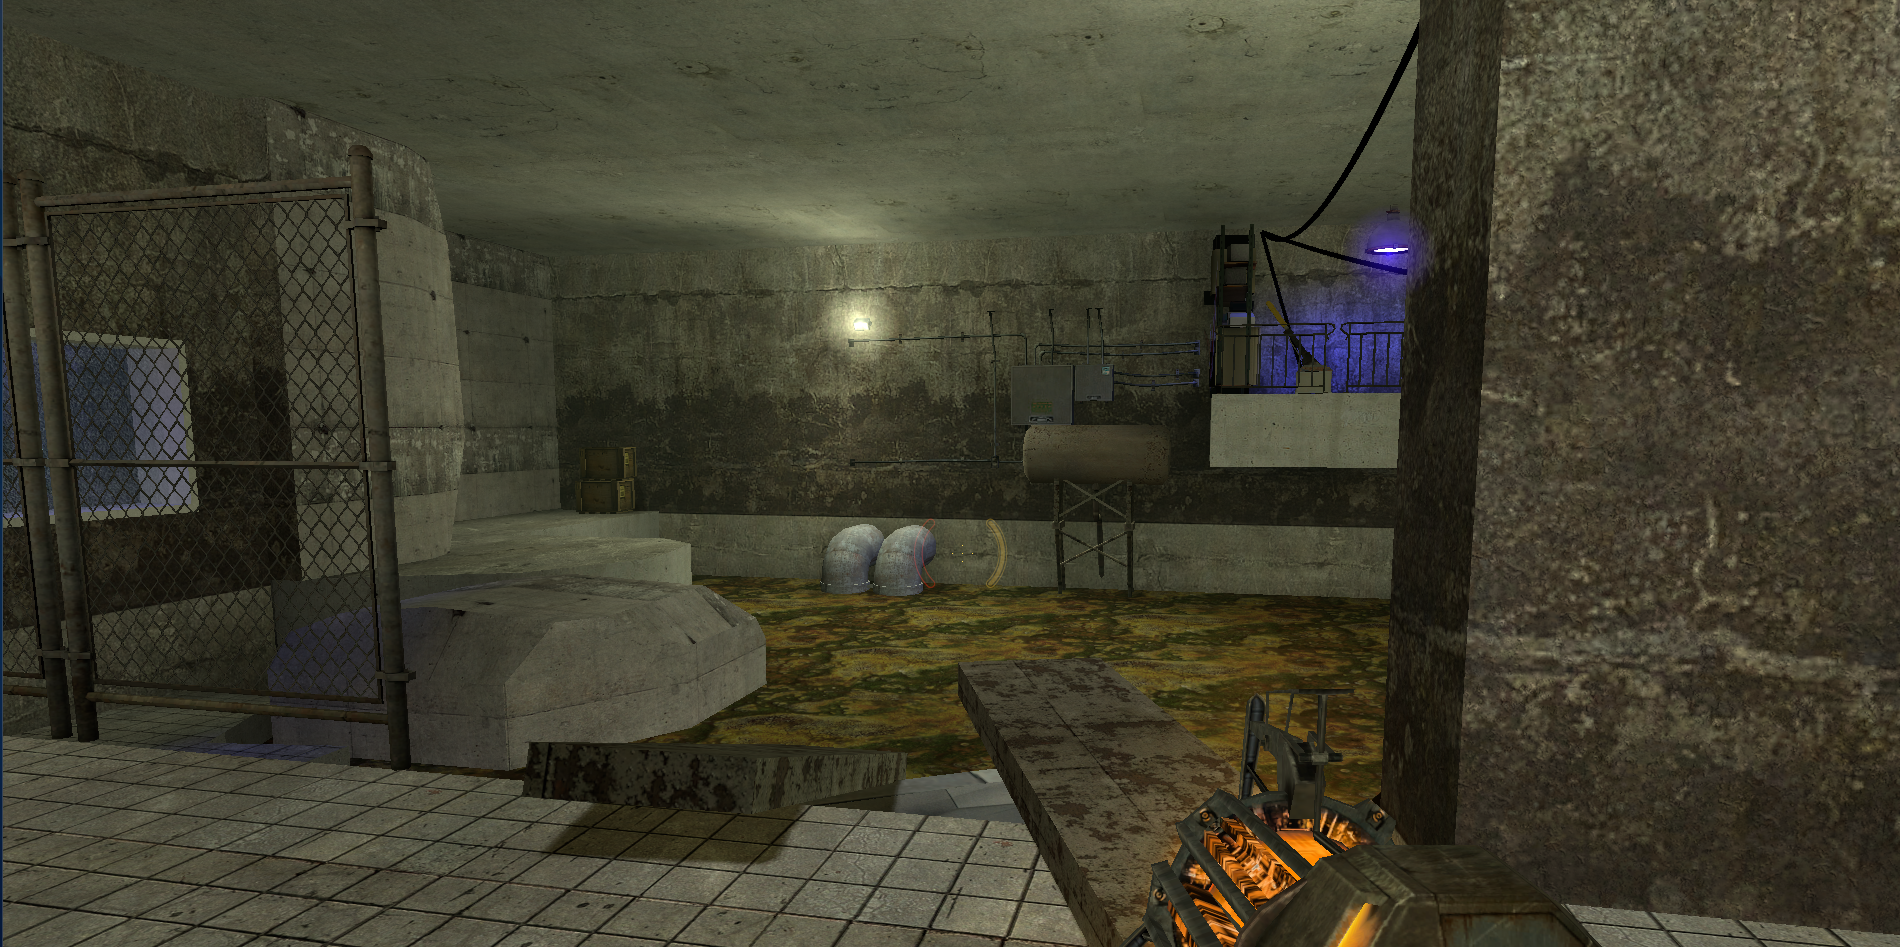
The turbines in the level vary in size and function. The smaller horizontal ones are primarily used as environmental hazards during combat. Some vertical turbines start active, serving as blocking doors that the player must jam to pass through. Others, both horizontal and vertical, are combined with wooden barriers, requiring the player to activate them to clear obstacles and progress.
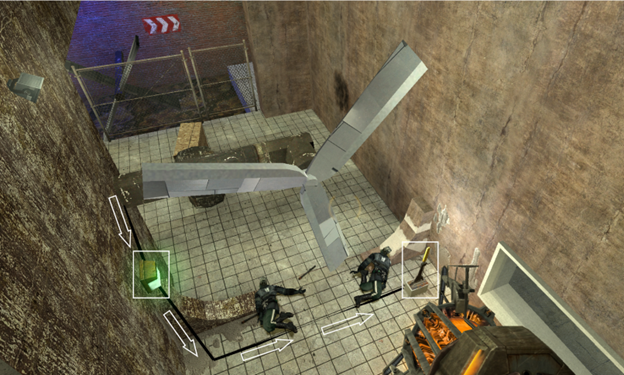
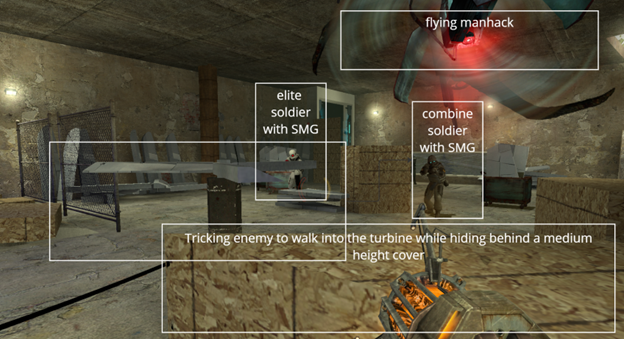
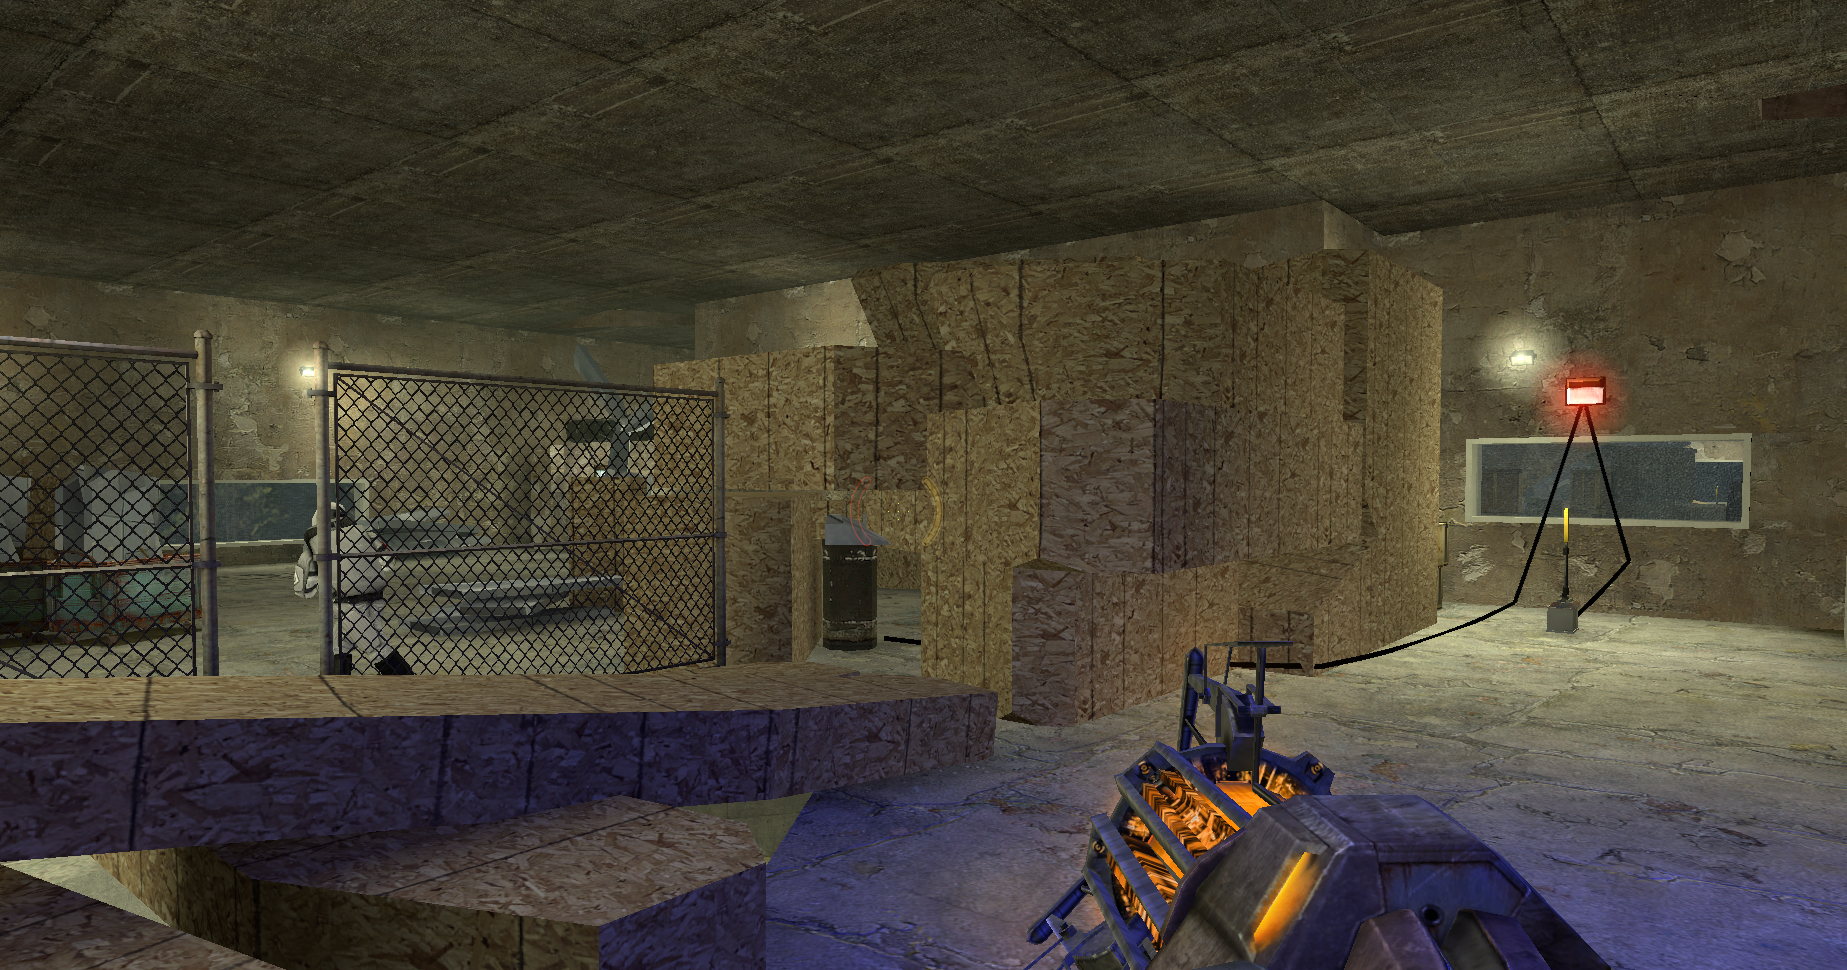
- To demonstrate the danger of the turbine blades, I scripted an event at the start of the level where two Metropolice rush into the turbine door upon seeing the player enter, instantly getting killed.
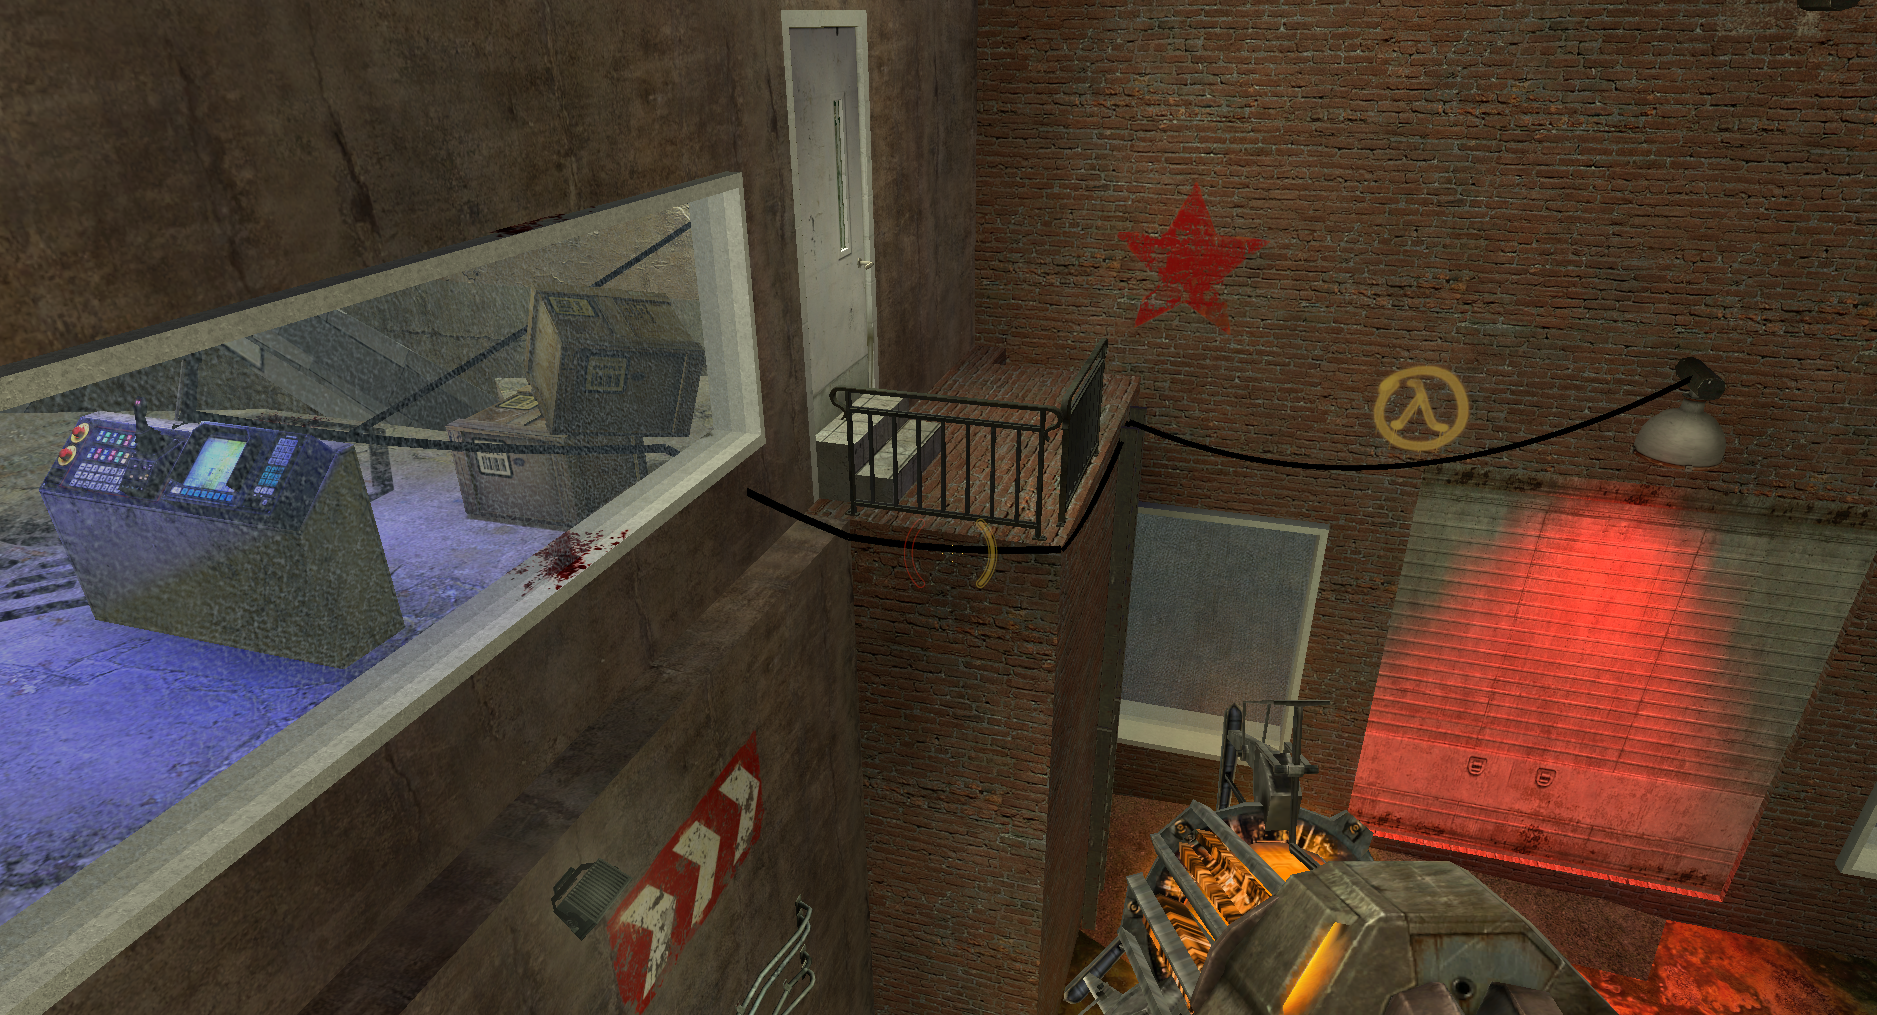
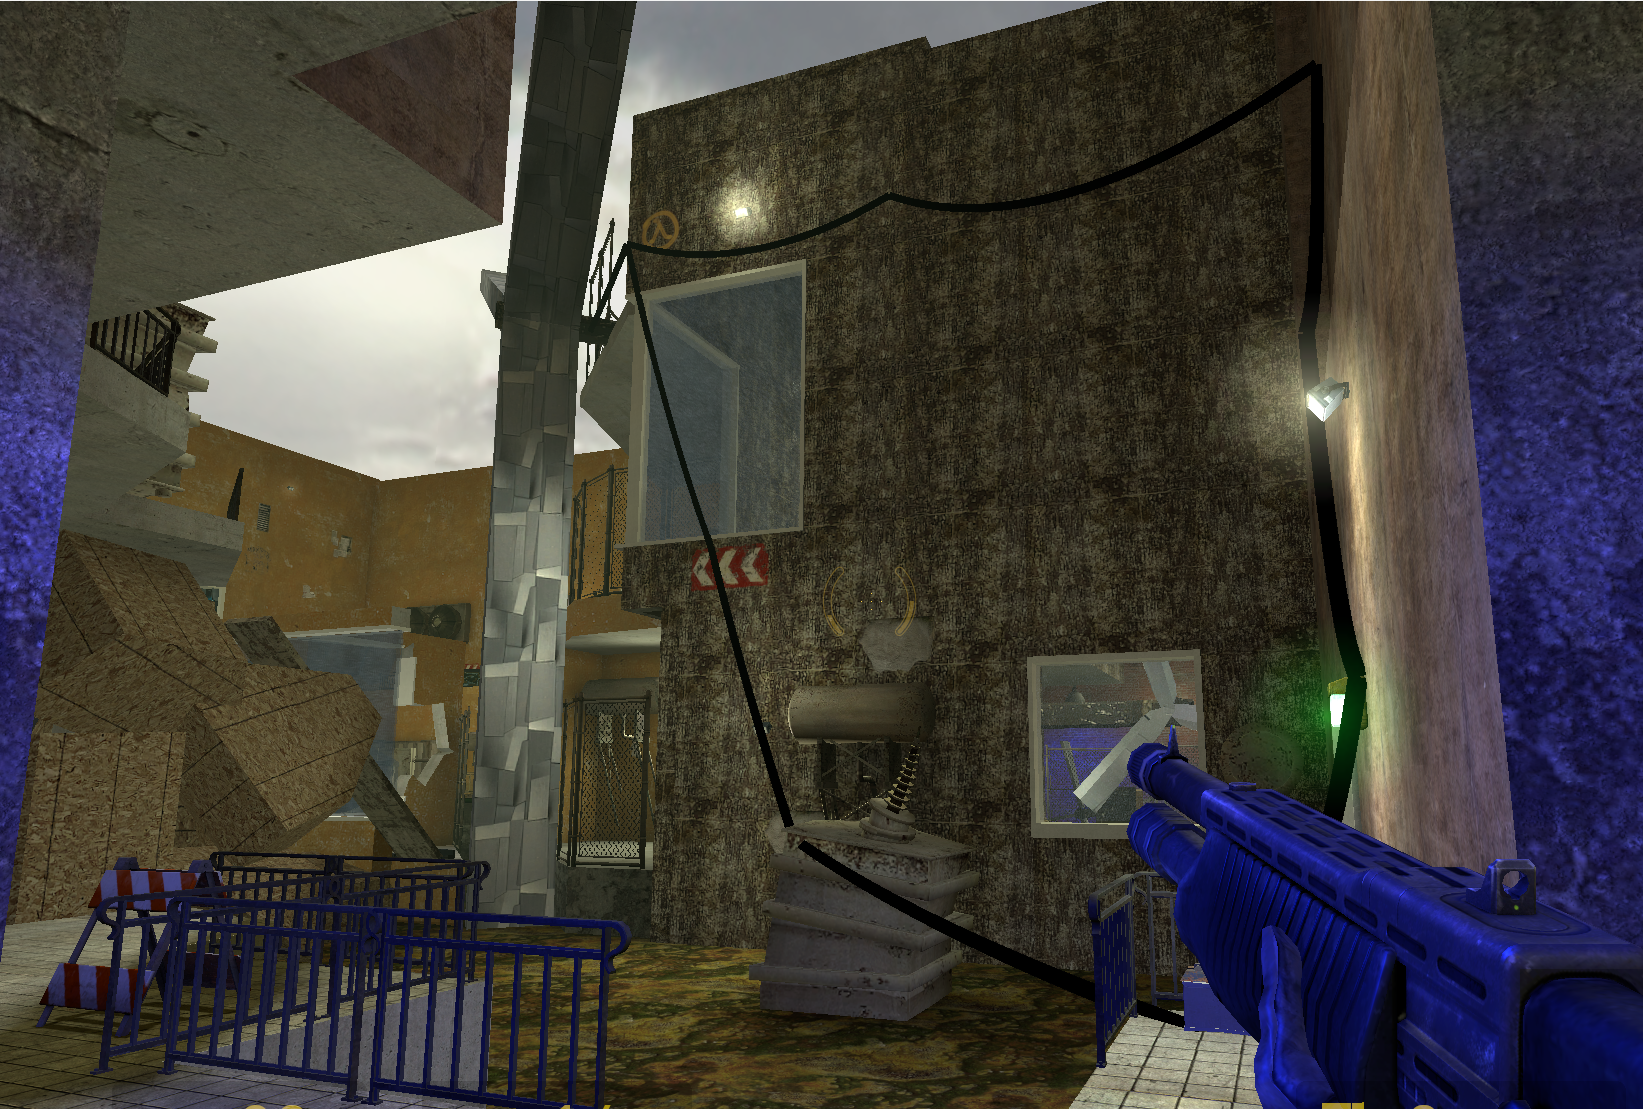
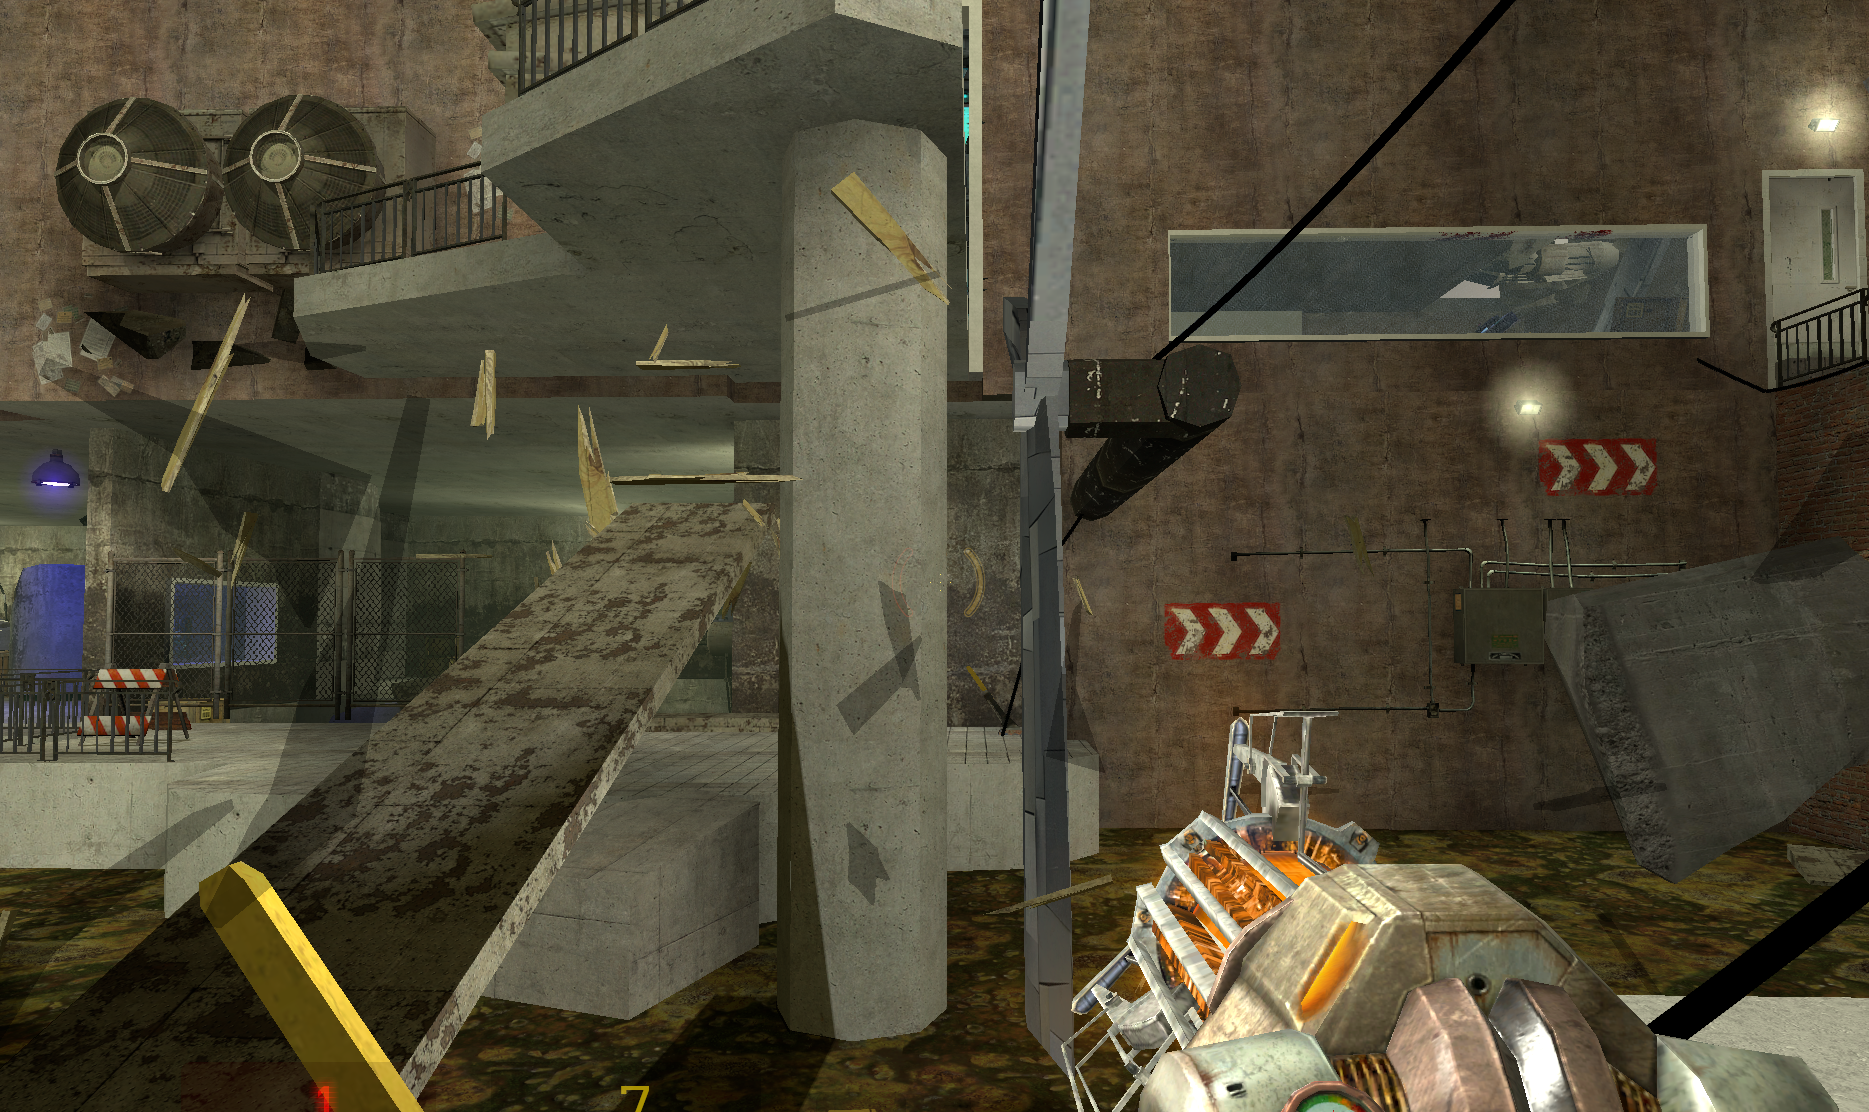
- After that, the player will notice that the turbine is connected to a lever and an indicator light through wires, visually conveying that the lever controls the turbine’s state, with the green/red light indicating whether it is active. To ensure clarity, the lever is elevated on a power box for better visibility, and additional lighting is used to highlight it.
- To jam the turbines, the player needs a metal sheet. To facilitate this, I positioned the metal sheet right beside the turbine door. This way, when the player picks it up for the first time, it naturally falls into the turbine gaps, effectively stopping the turbine.
Using the horizontal turbines to eliminate enemies during combat can be highly effective, but overuse may lead to repetitive gameplay. To maintain a balanced pacing, I included only three horizontal turbines in the level.
- The first turbine is located in area 3/8 as a tutorial section, allowing players to learn how to use it.
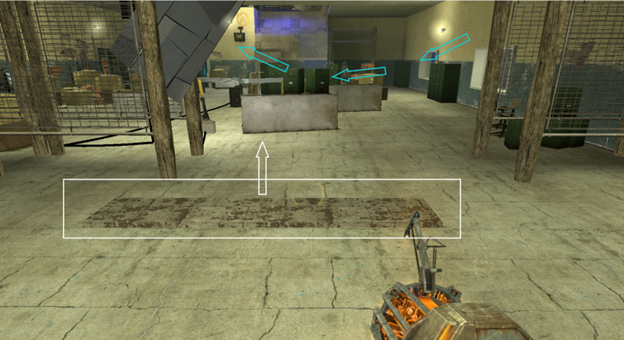
- The second turbine is in area 4 to reinforce this mechanic, while the player skips the first major combat in area 5 to return to the original Half-Life 2 combat experience.
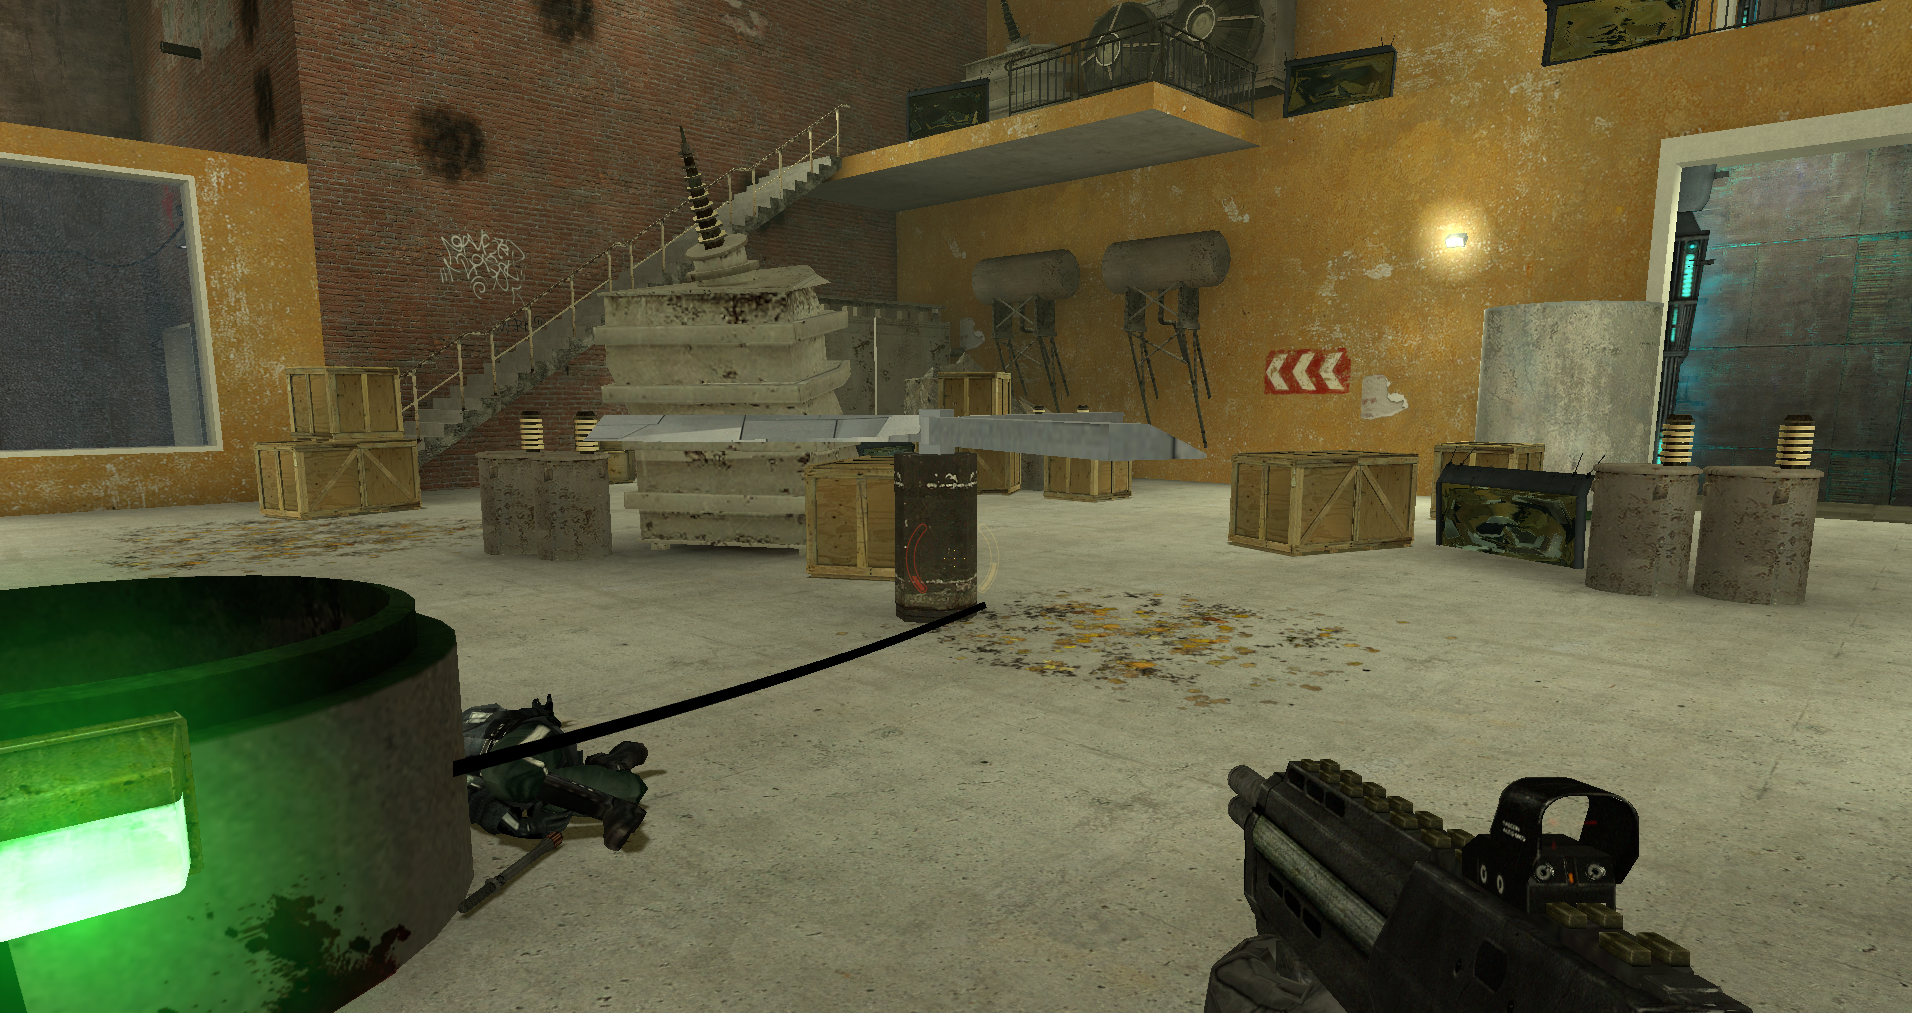
- The final turbine appears in area 8 during the last combat, providing an opportunity for players to experience the satisfaction of using it again. Additionally, with more enemies approaching from various directions in this final combat, strategically using the turbines adds an extra layer of challenge.
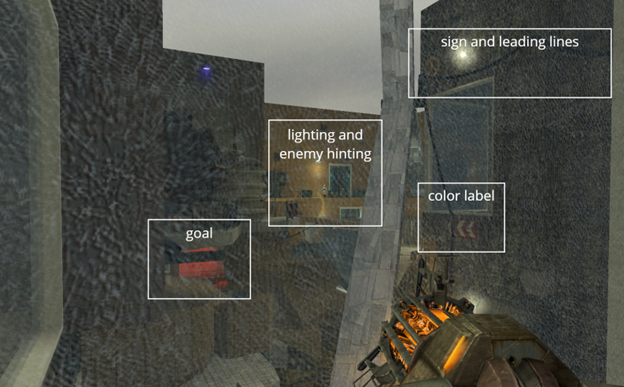
Landmark sightline towards the goal
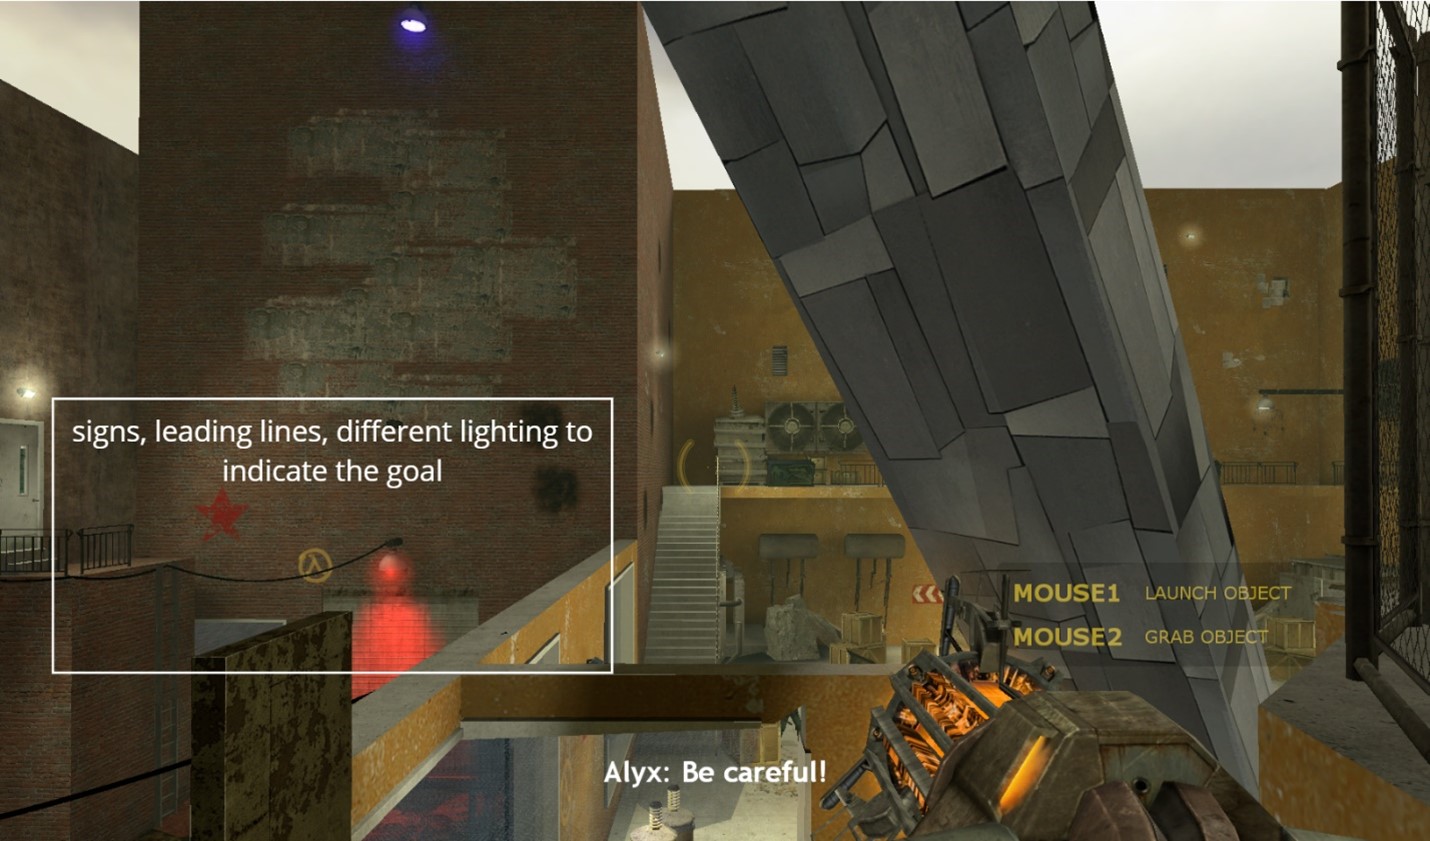
- The giant turbine begins to rotate into view as soon as the player drops into the level, creating a memorable impression that encourages them to return to it later.
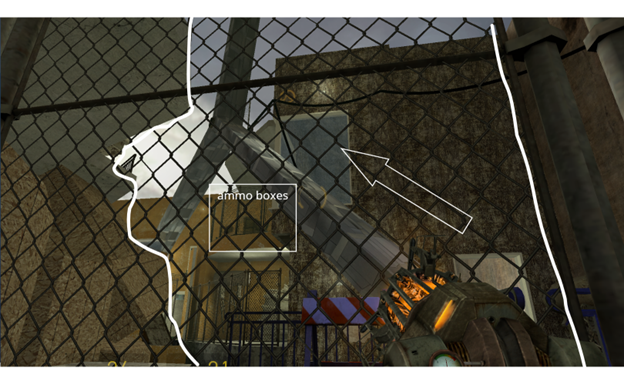
With strategically placed window framing, players can consistently see the giant turbine, helping them orient themselves and understand where they are meant to go. Along with lighting, interest points, leading lines, labels, and geometric structures, this design guides the player’s flow throughout the level.

Technical Challenge
I faced a challenge while implementing the giant turbine as a walkable bridge.
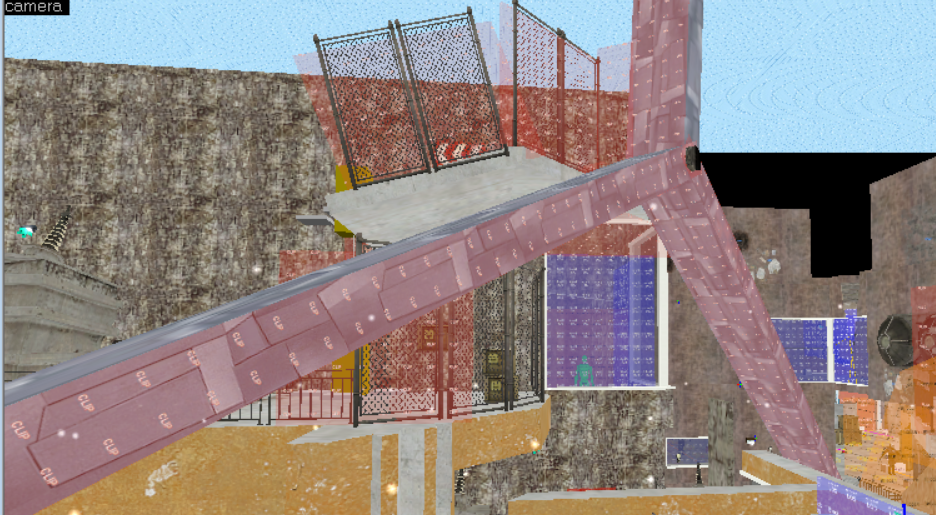
- The func_physbox entity in Hammer was unstable, causing players to fall through without collision when standing still.
- Given the turbine’s significance and visibility in my level, I creatively used a clip texture to replicate the turbine’s physical shape and placed it at the turbine’s stop position, as it always halts at the same angle.
- This way, if players attempt to jump onto the turbine while it’s still turning, they will be bumped off by the func_physbox’s collision. However, when the turbine is turned off, players can safely walk on the clip texture.
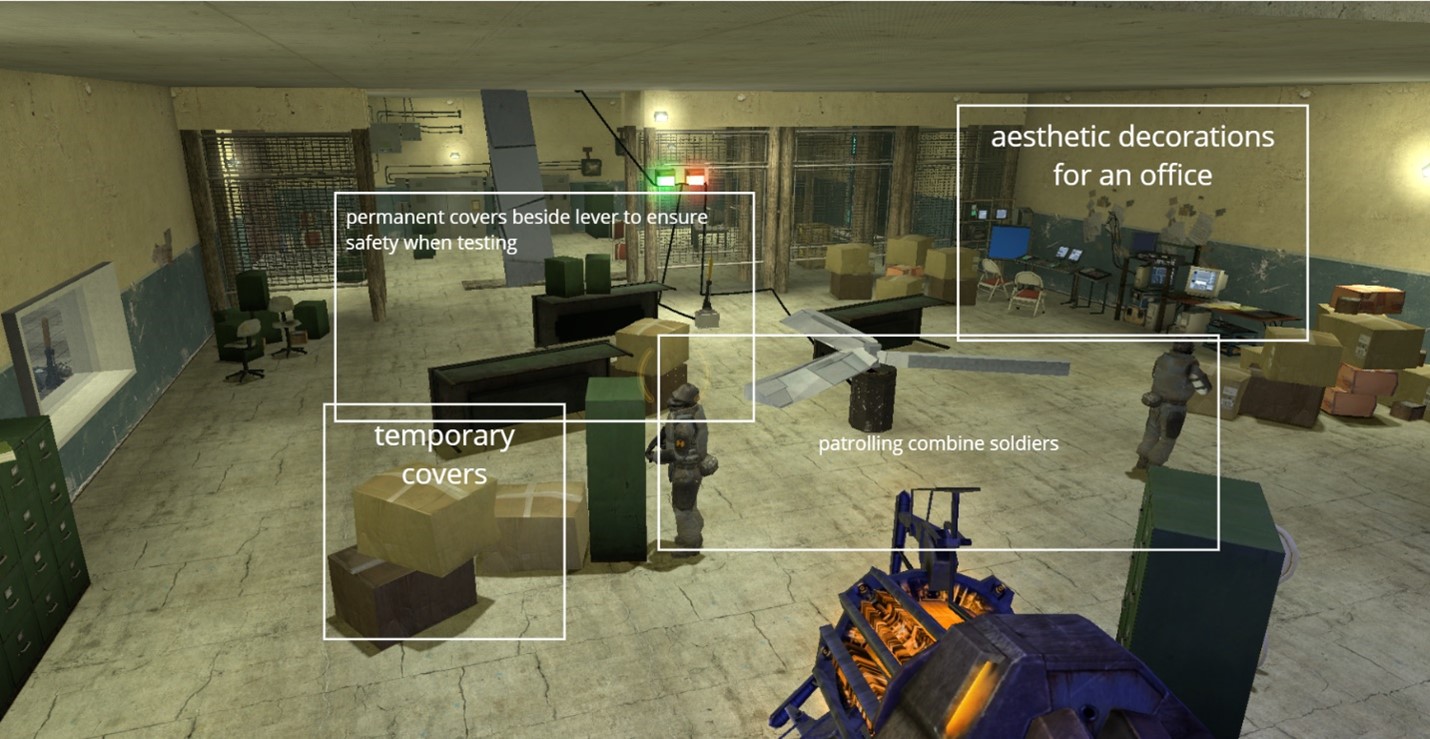
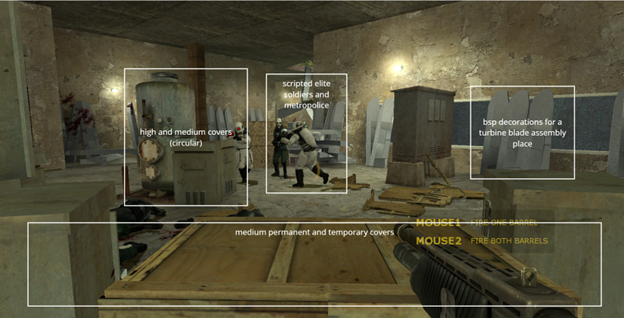
Enemy Combination and Cover Selection
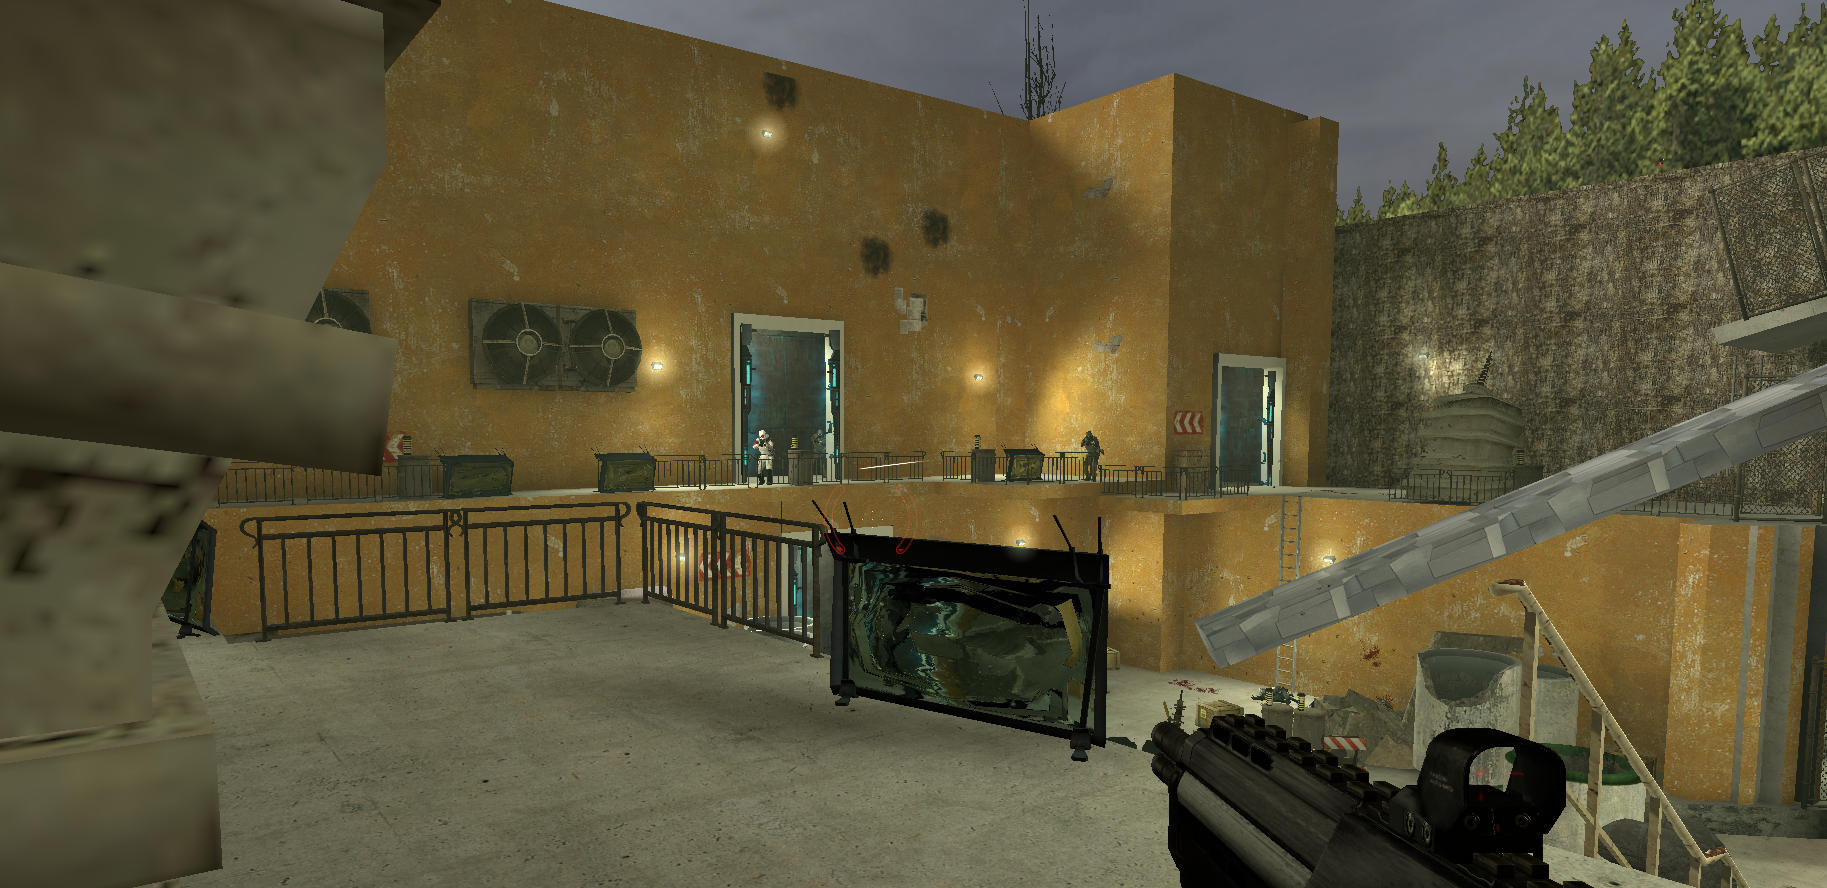
Since Half-Life 2 is an FPS game, combat plays a crucial role in the experience. To simulate a similar feel, I carefully selected a combination of enemies and strategically placed covers.
Each combat room features a mix of permanent and temporary covers, providing players with various flow options and opportunities for repositioning. This design encourages dynamic gameplay and enhances the potential for fun during replay sessions.
Design Process
Level Design Document – initial map design and potential flow 
White Box – basic geometry and representative gameplay 
White Box – basic geometry and representative gameplay 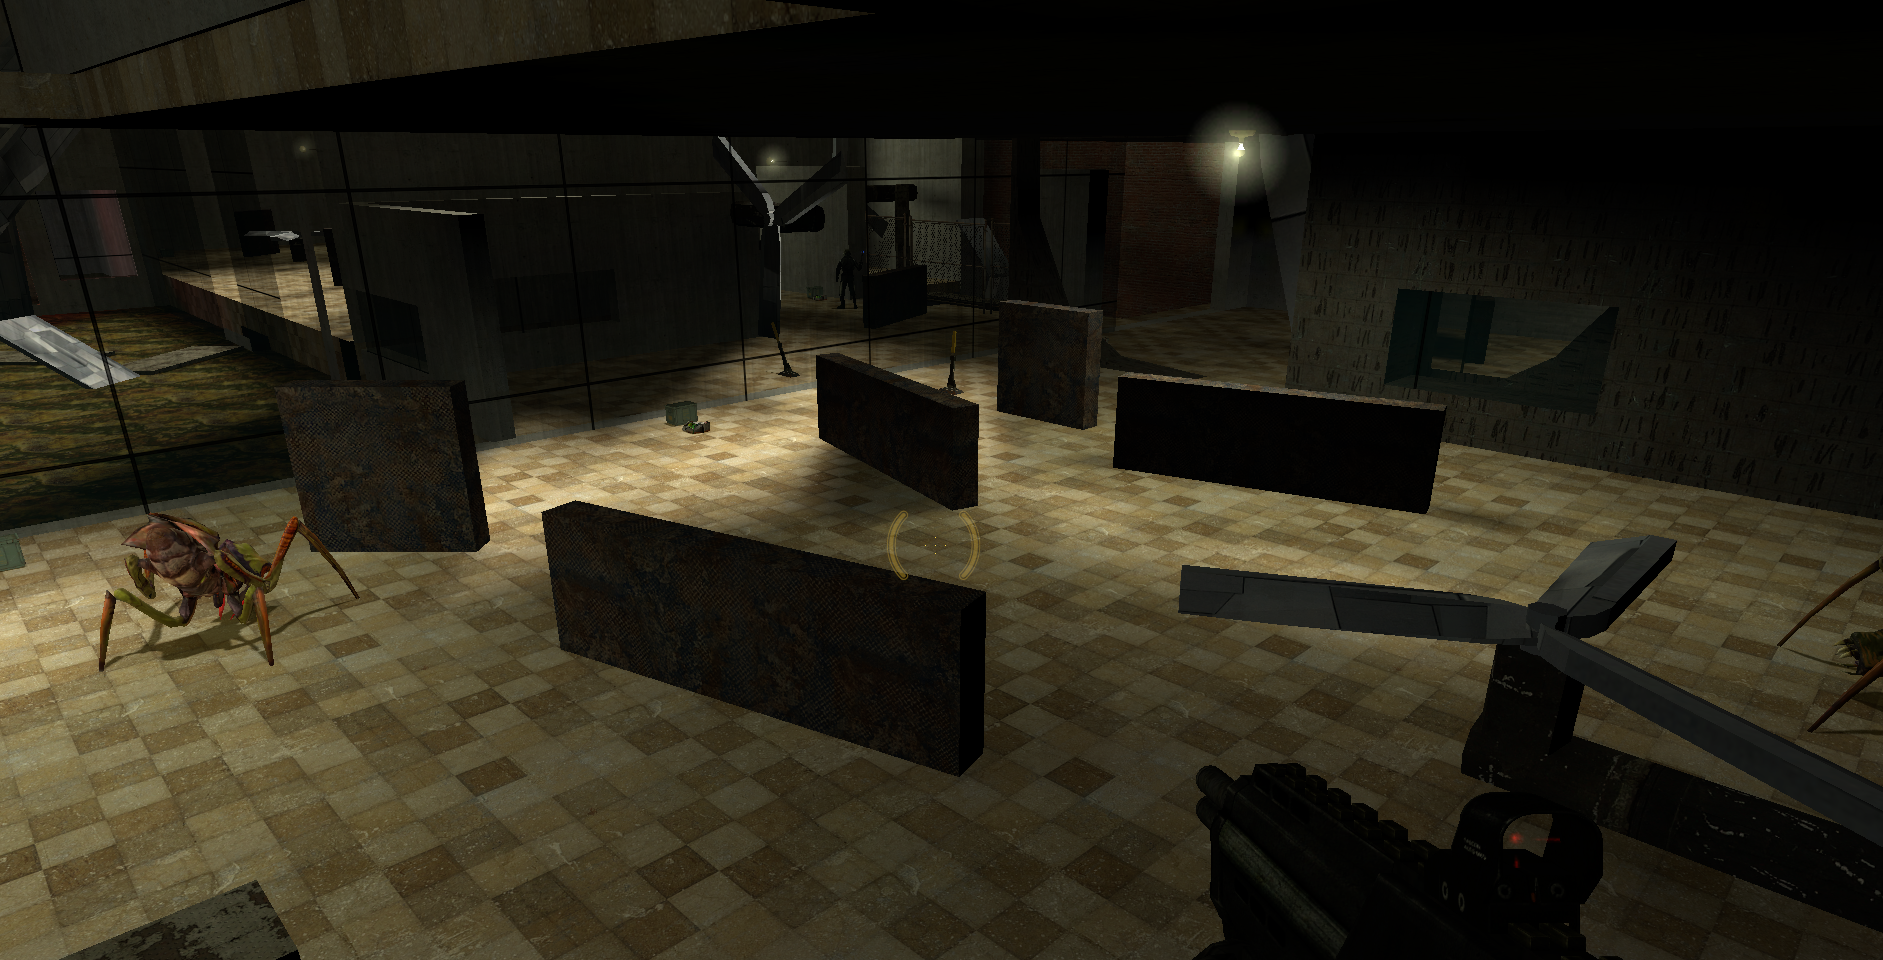
White Box – basic geometry and representative gameplay 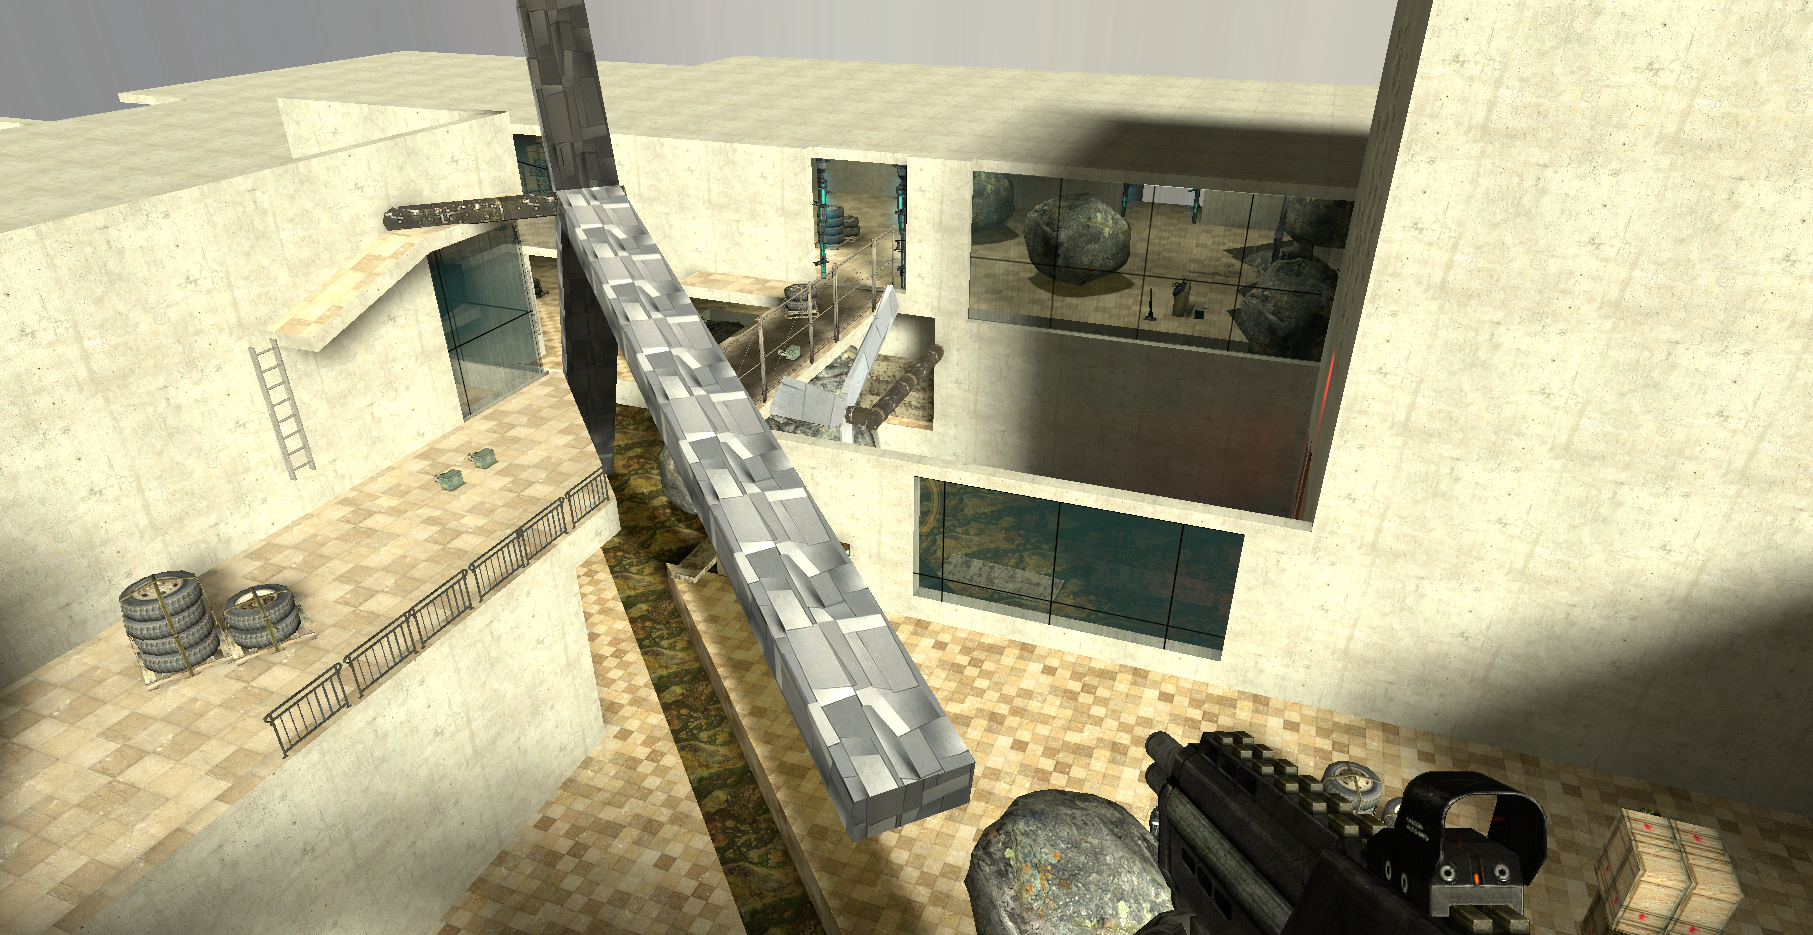
Initial Gameplay – basic conveyance, placeholder combat and covers 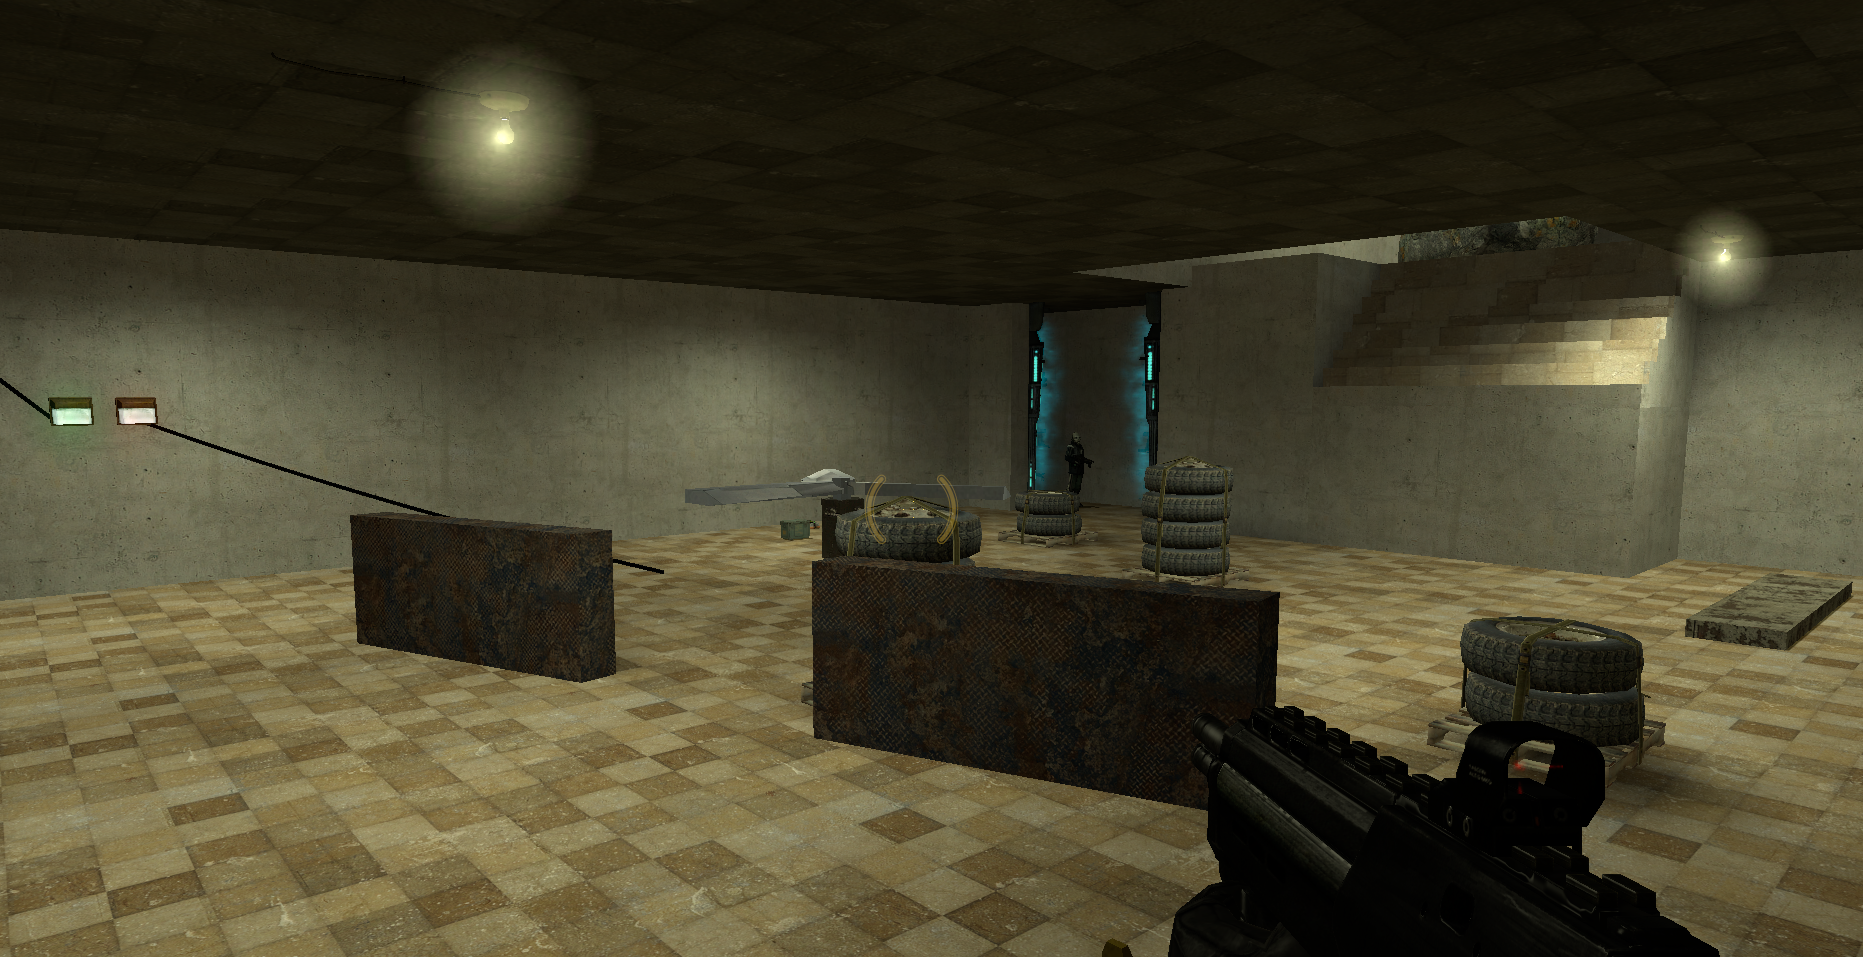
Initial Gameplay – basic conveyance, placeholder combat and covers 
Initial Gameplay – basic conveyance, placeholder combat and covers 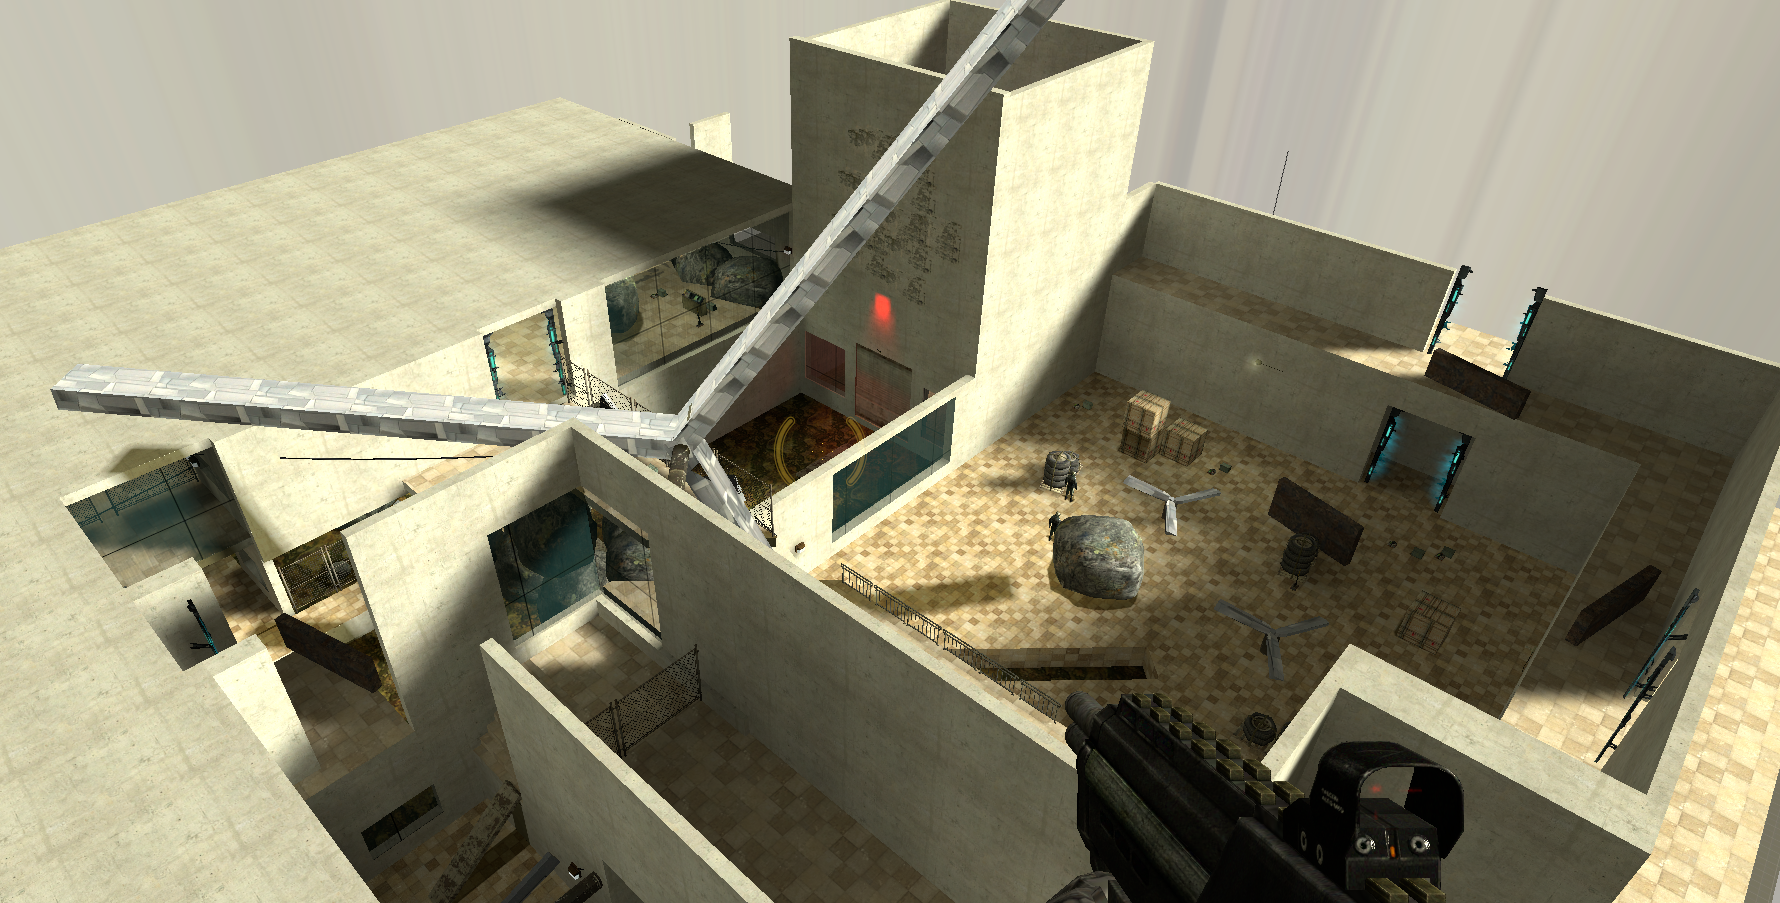
Initial Gameplay – basic conveyance, placeholder combat and covers 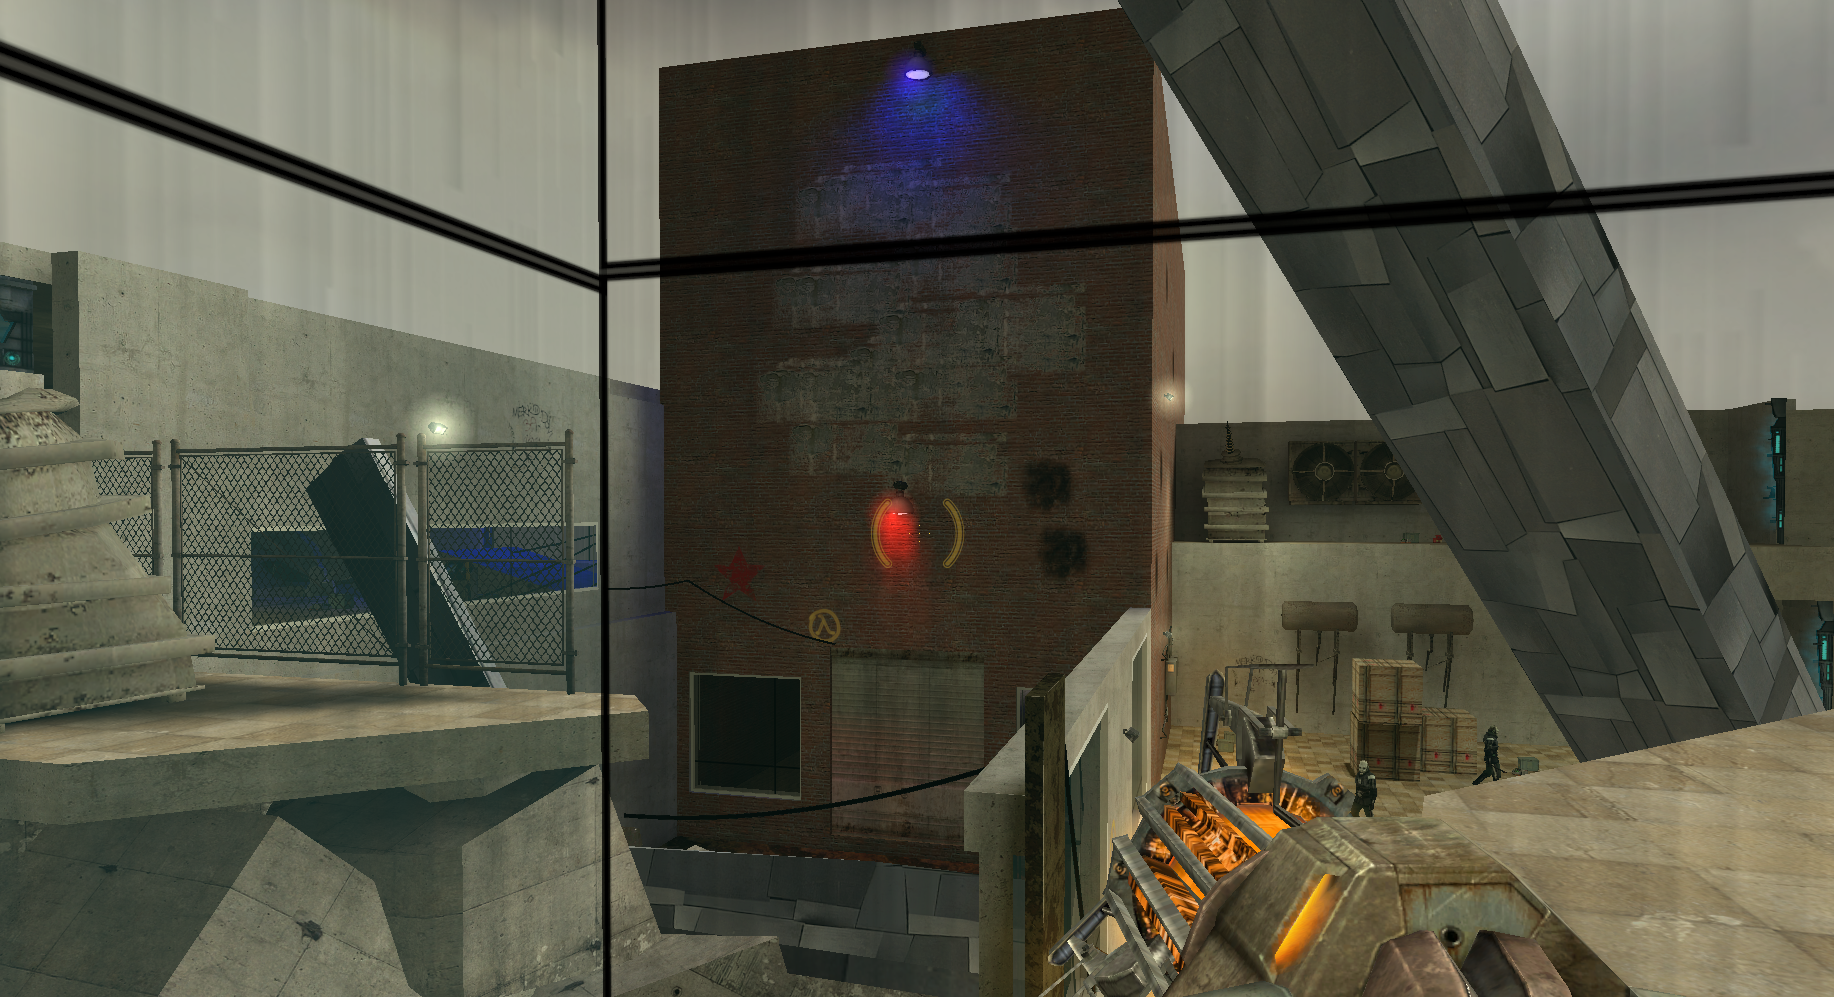
Gameplay Complete – all mechanics and combats in, full conveyance 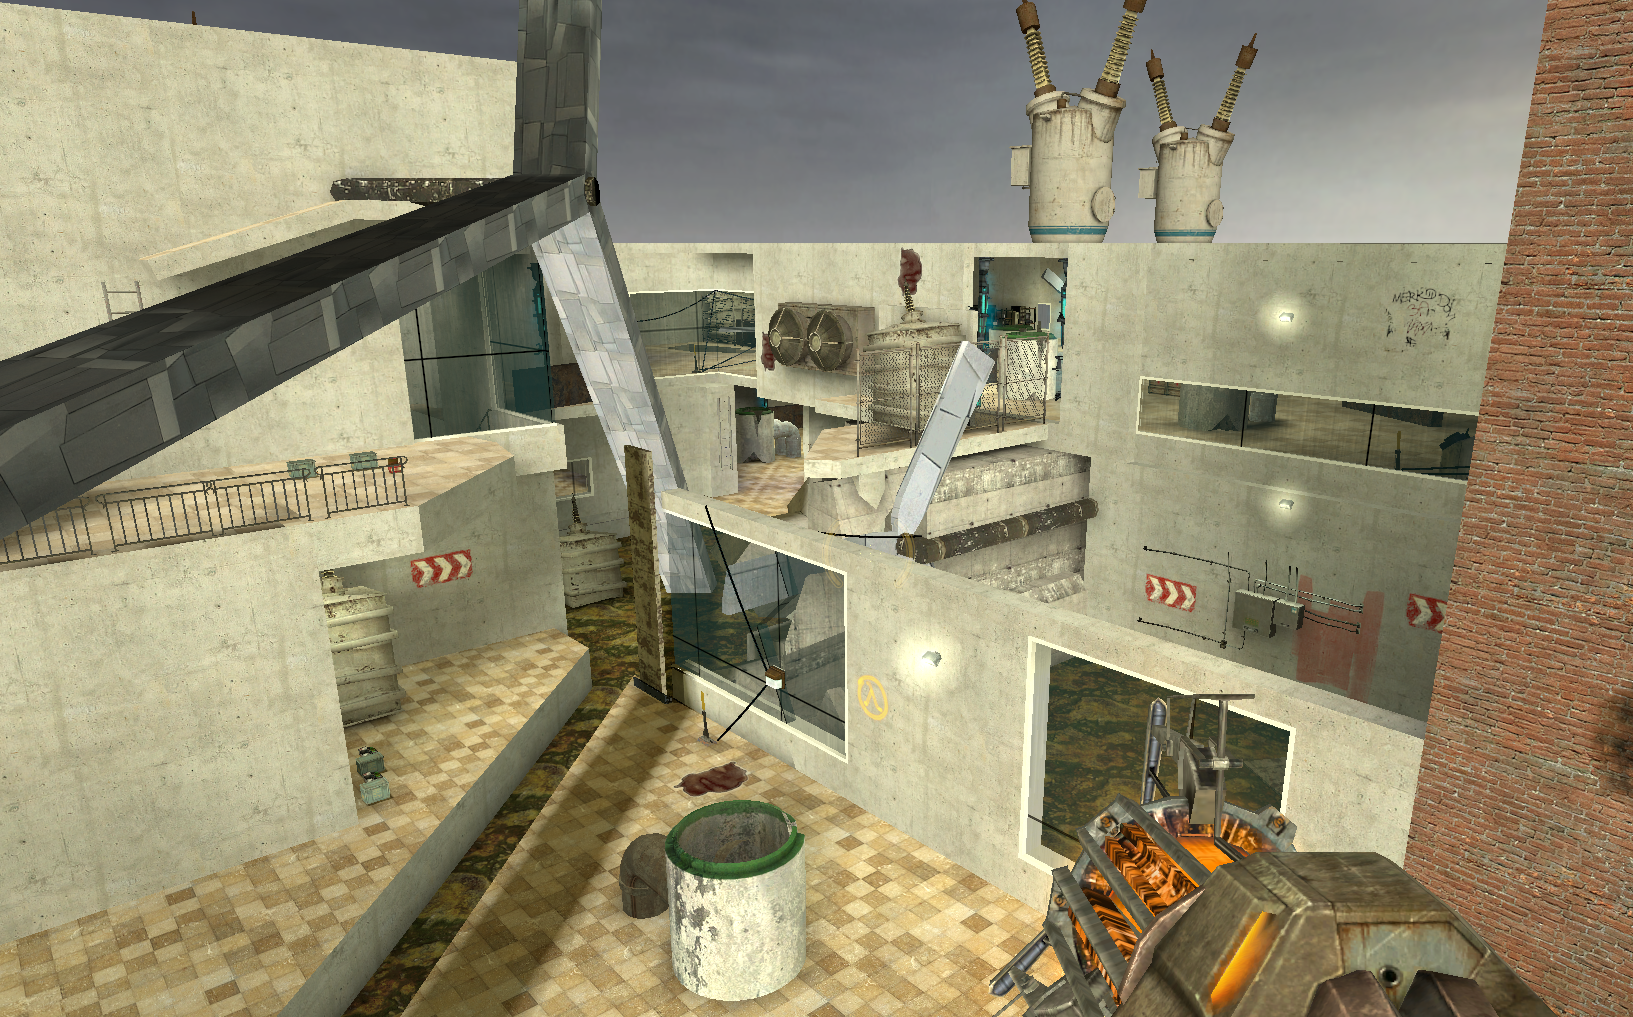
Gameplay Complete – all mechanics and combats in, full conveyance 
Gameplay Complete – all mechanics and combats in, full conveyance 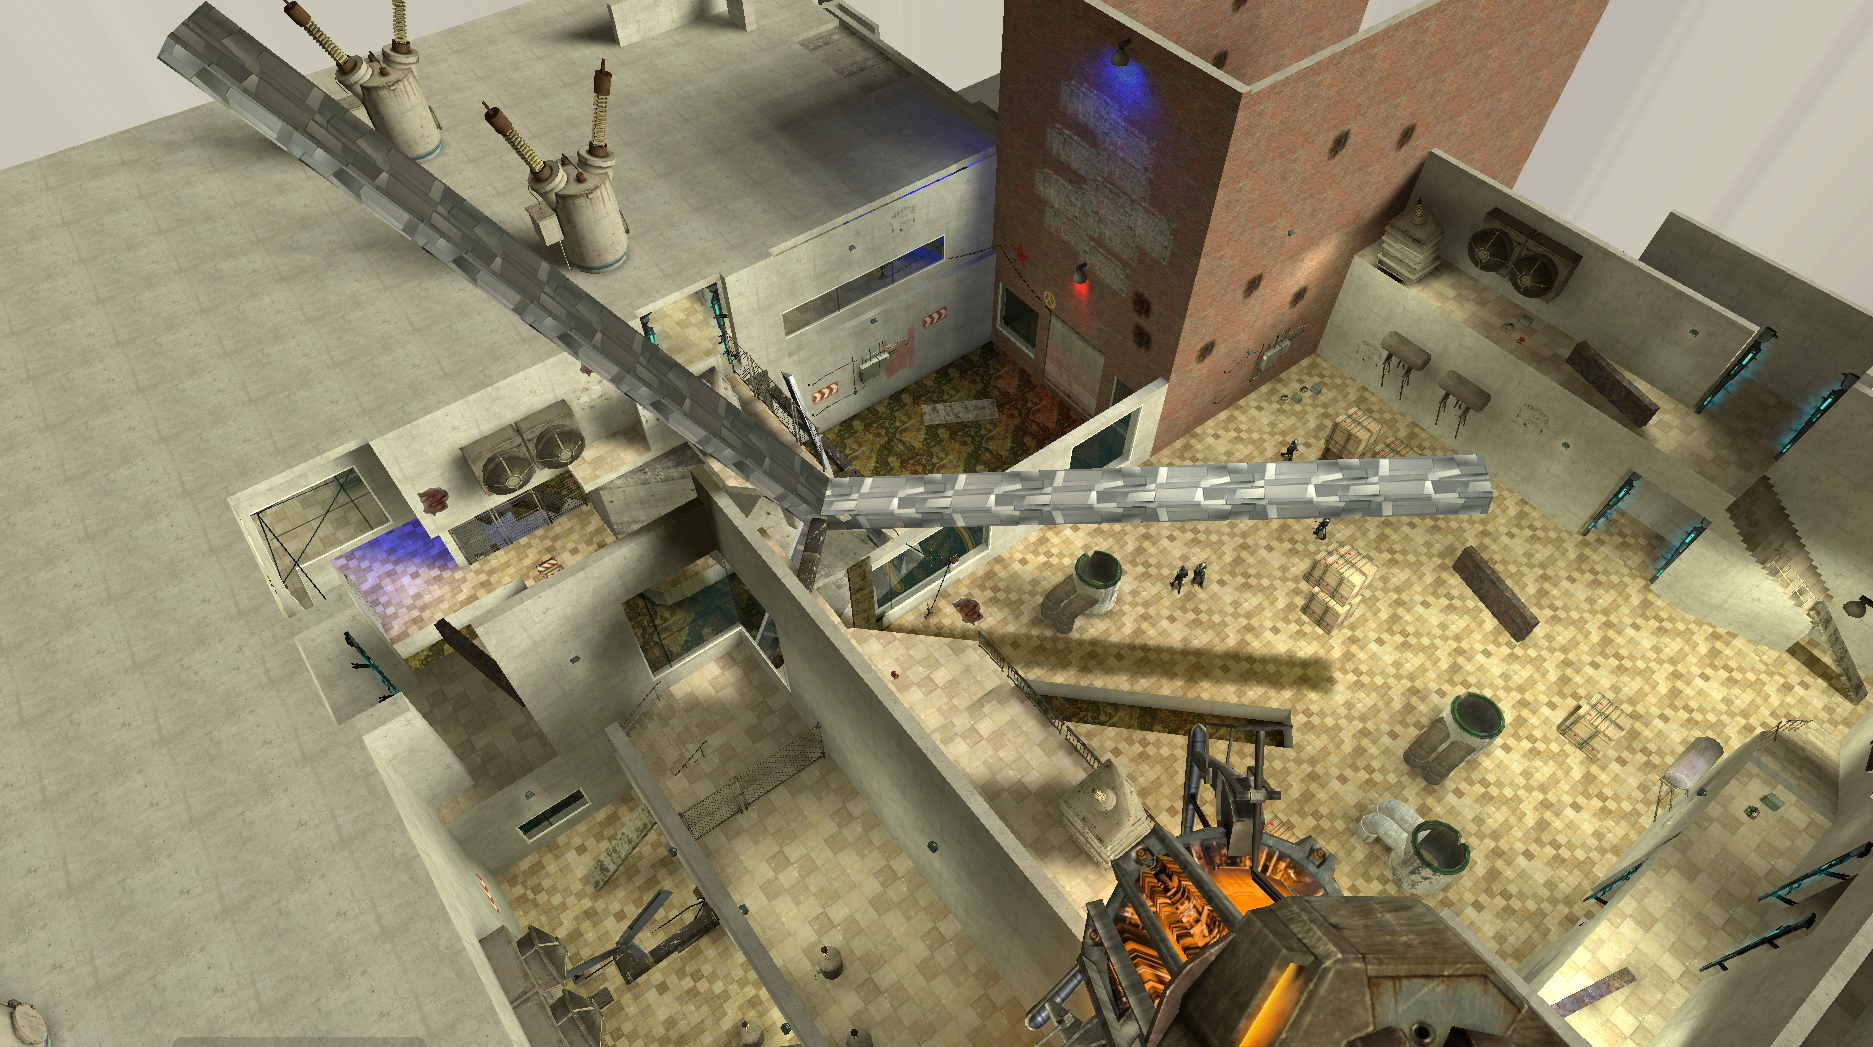
Gameplay Complete – all mechanics and combats in, full conveyance 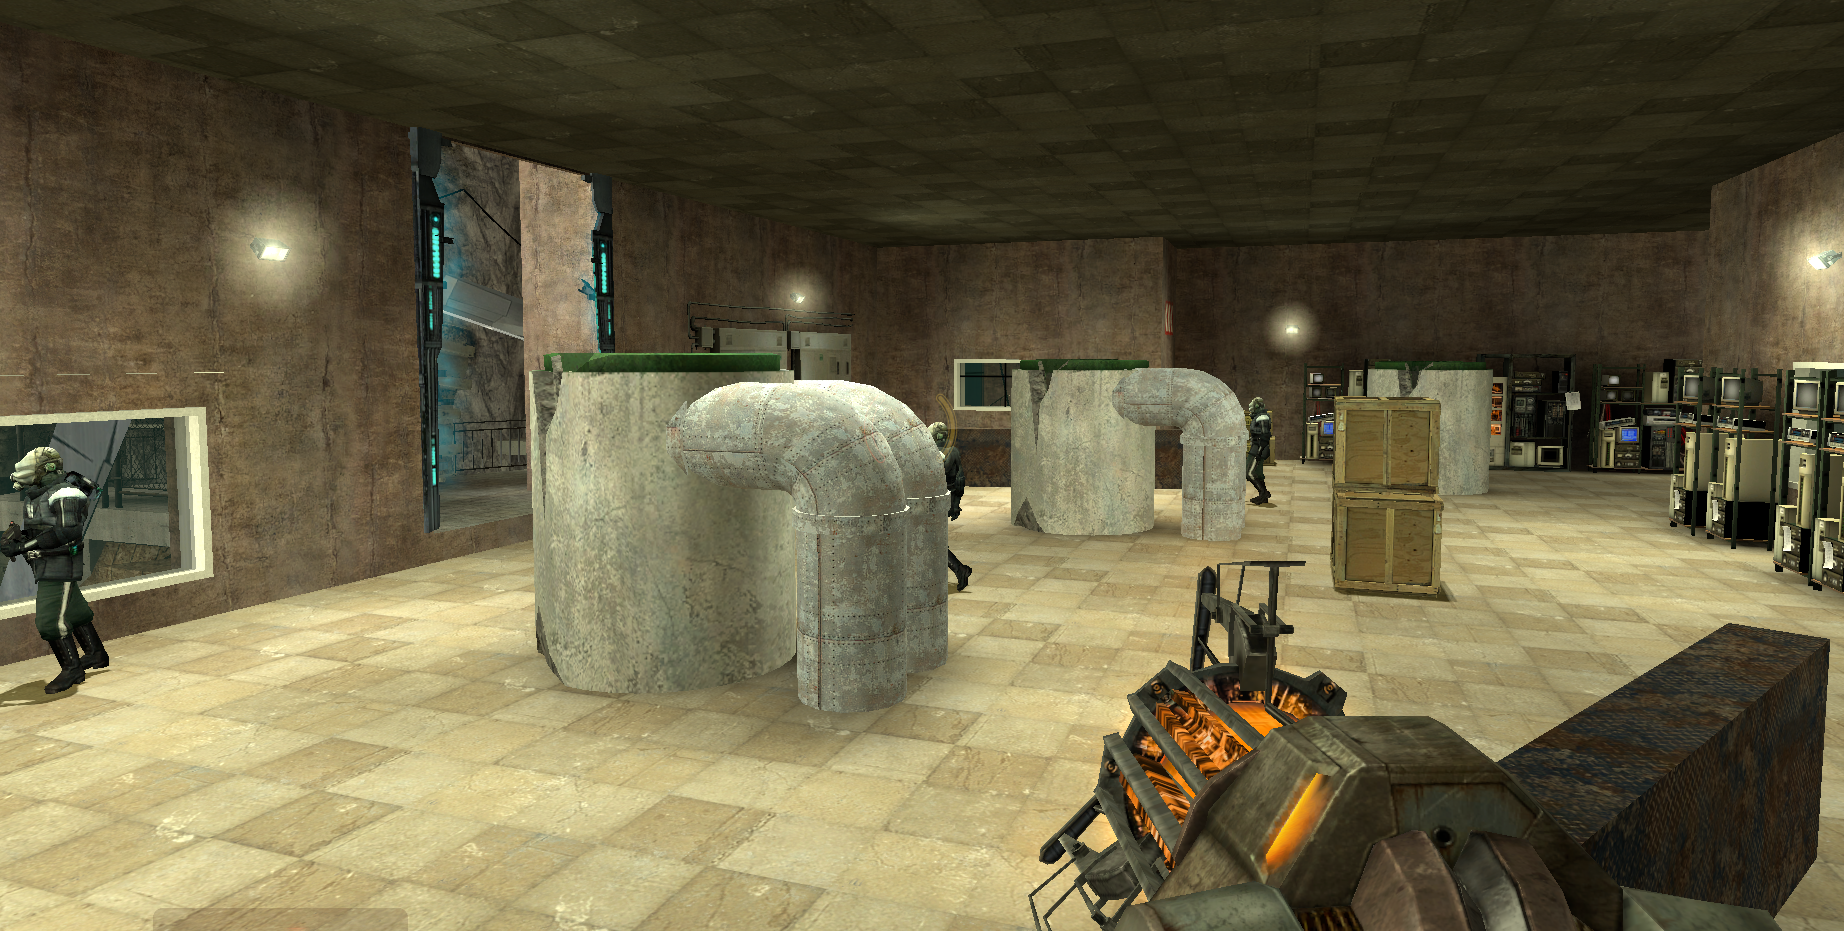
Gameplay Complete – all mechanics and combats in, full conveyance 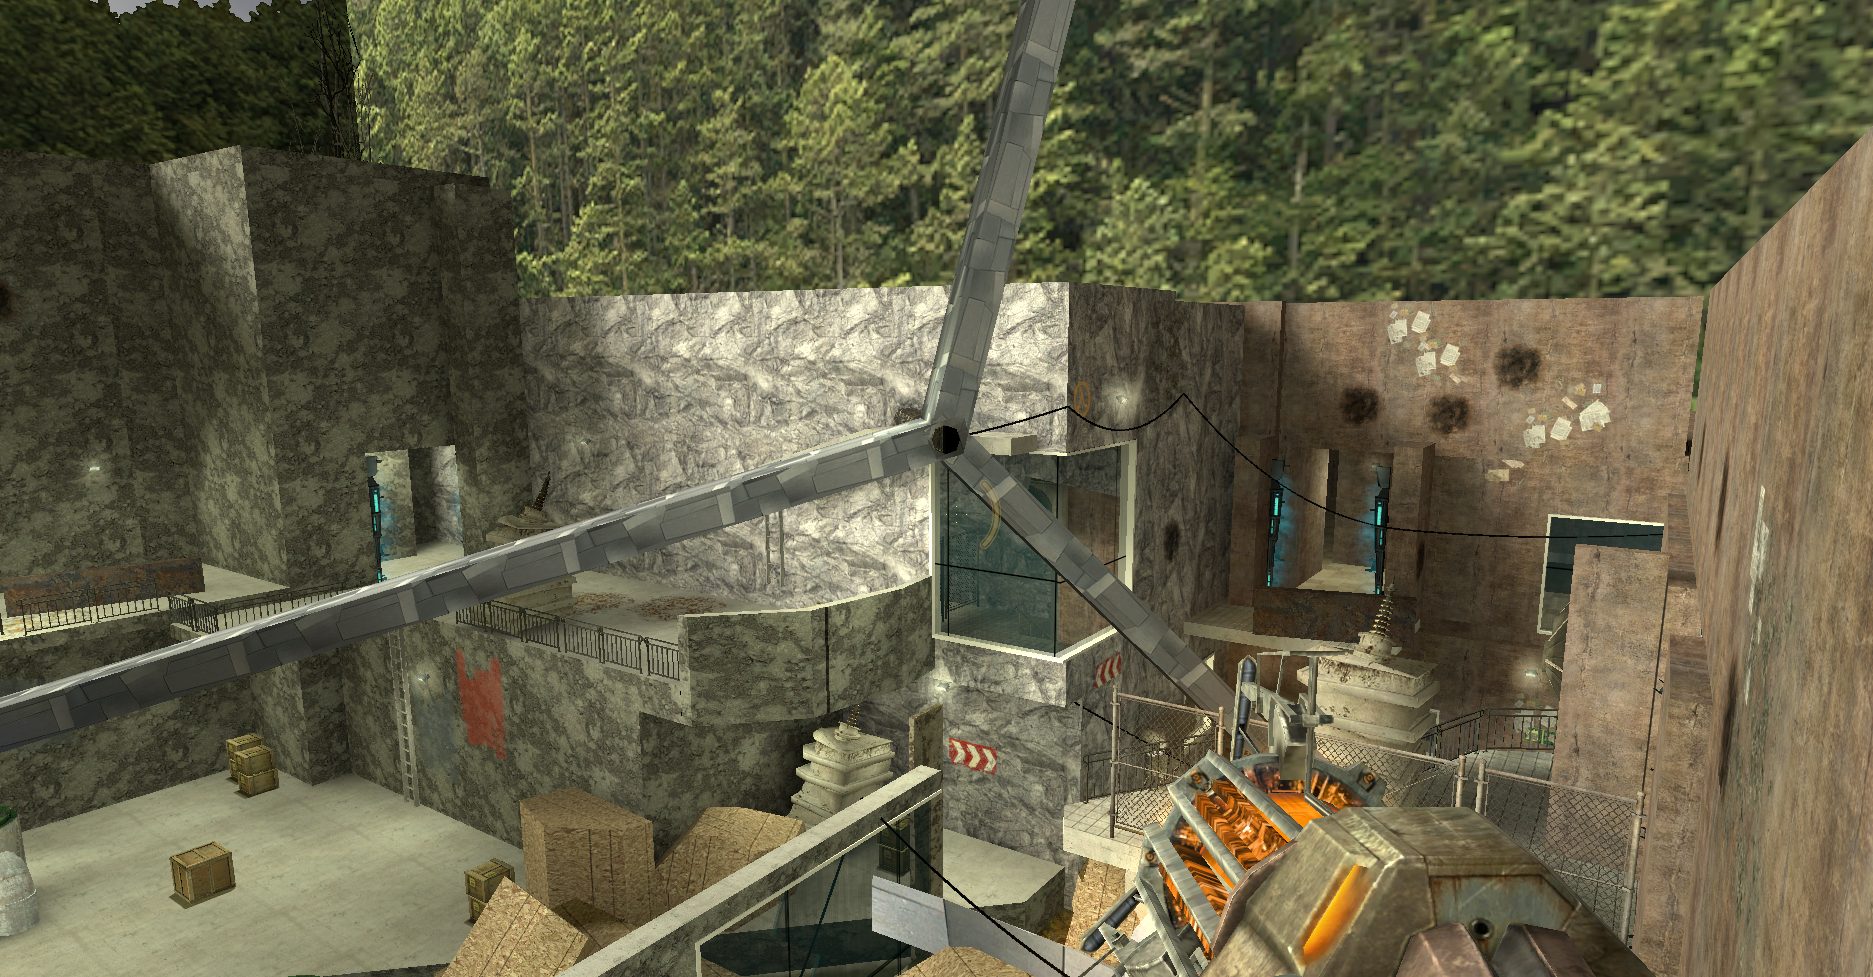
Aesthetics – final textures, skybox, displacement, compiling optimization 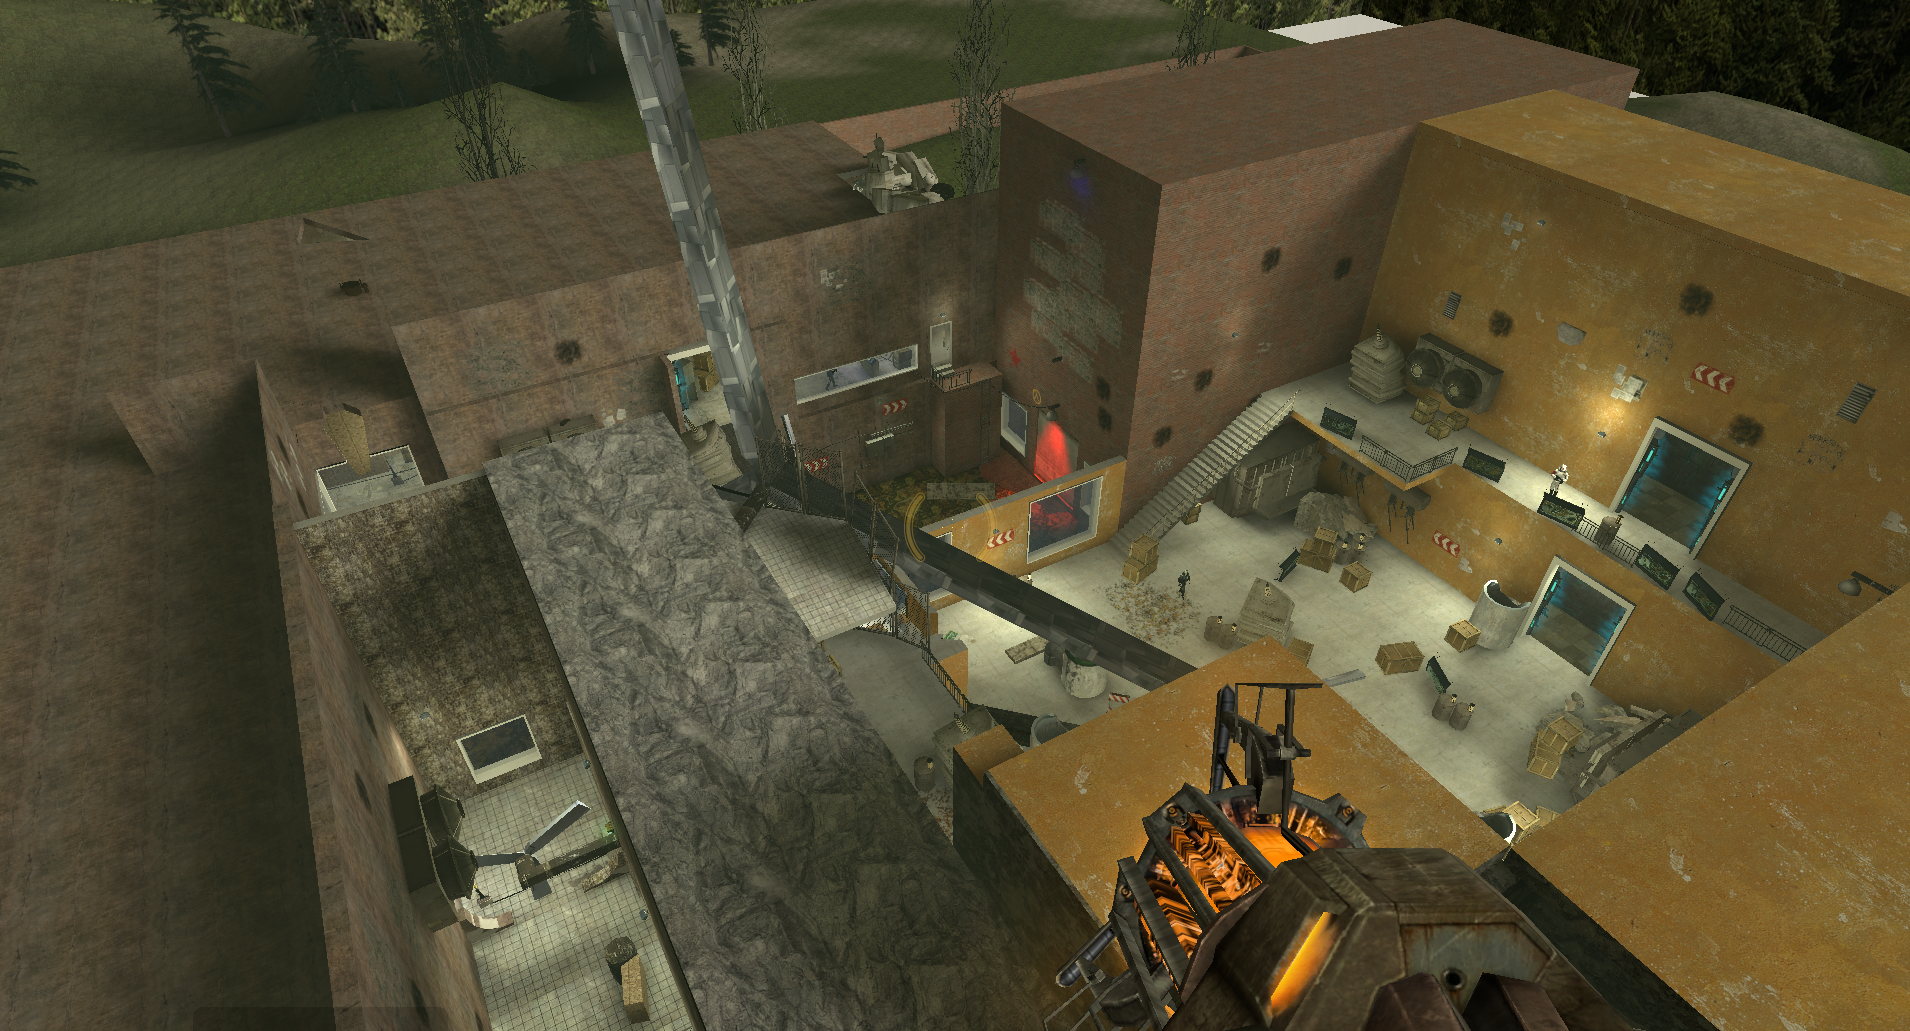
Launch – no showstoppers, everything in
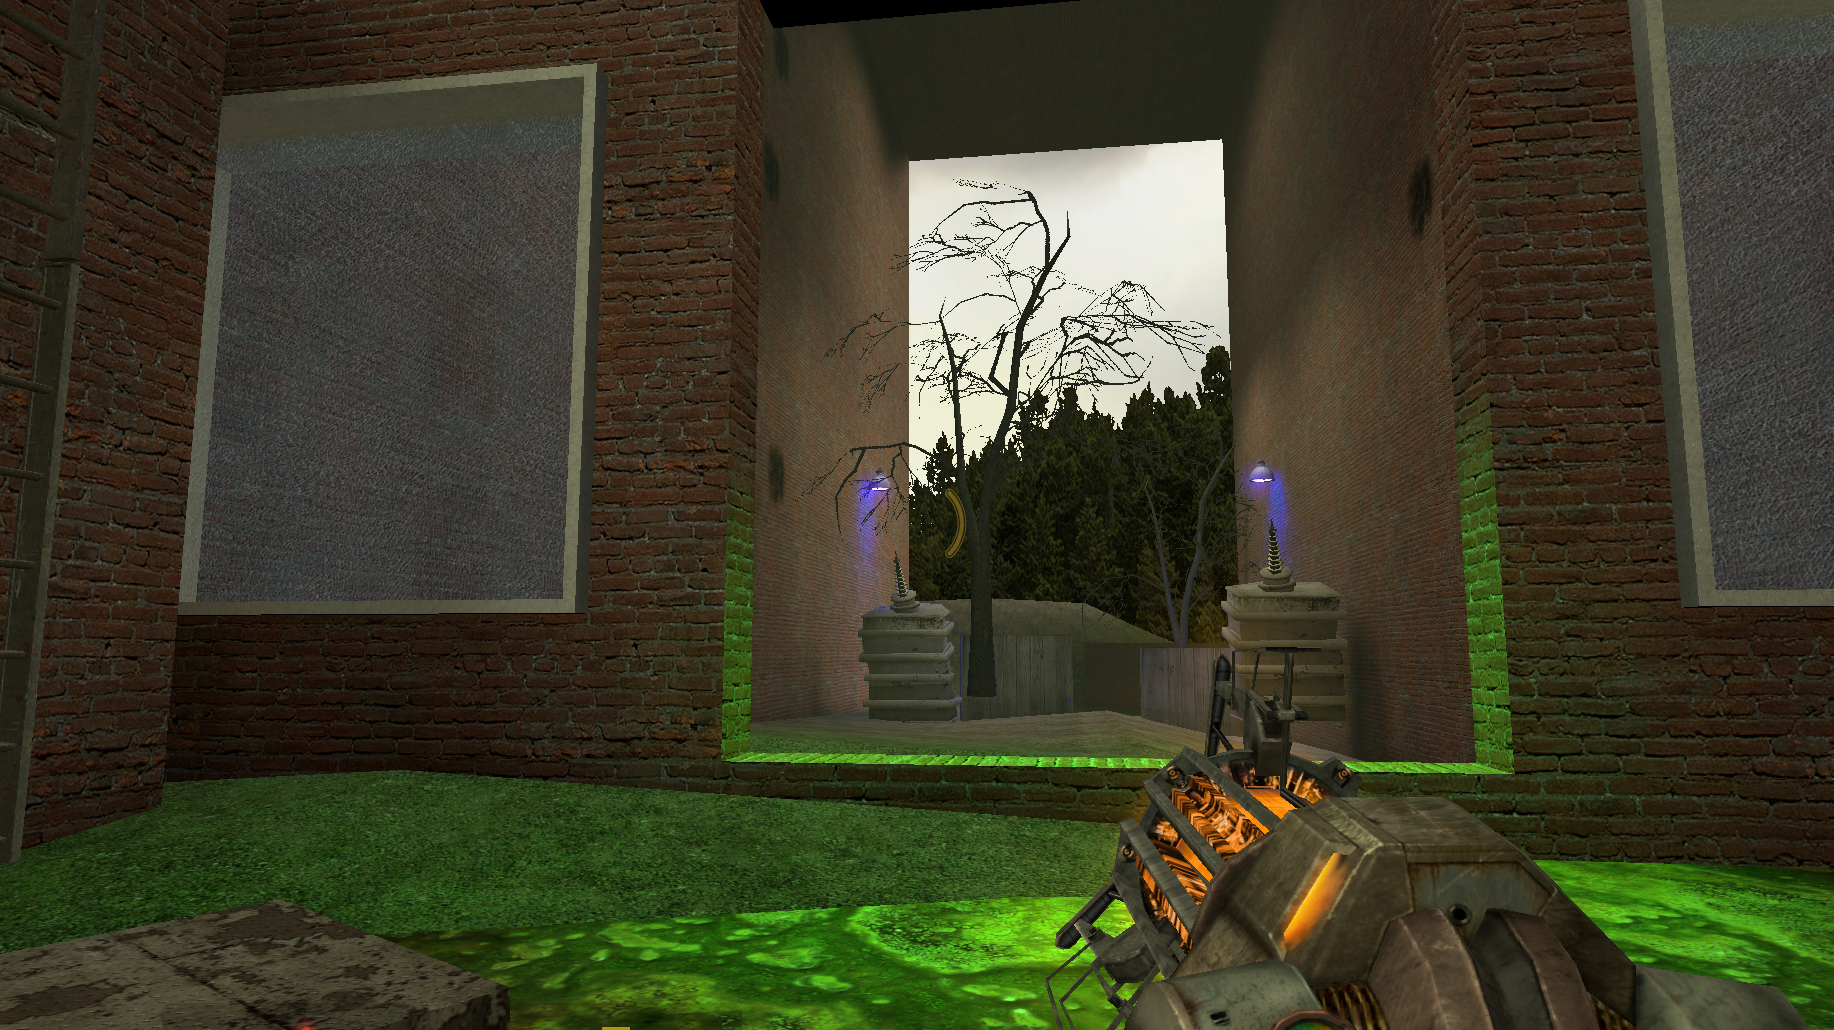
Gallery

Postmortem
What Went Well?
- The weekly meetings with my stakeholder, Professor Ouellette, helped me clarify most of the urgent problems and solutions I should attempt, which saved me a lot of time.
- Pick the core, throw away the others. In my level design document, I had a lot of piecemeal design that didn’t get to implement at all. When I got to implementation stages, I realized I was thinking too ideally about what a consistent level should be and ignored that I didn’t have enough time to test and fail for such many different things. So, I throw them all away, and keep with the core gameplay objects to make them really work together. This makes my development process much more efficient, and the turbines really stood out well at last.
- Prepare for playtest. Playtests always offer a lot of useful feedback. And the more things implemented in the level, the more useful feedback you tend to have. It was during the gameplay complete milestone we had an interim playtest by the previous cohort. I prepared and implemented my complete level flow (though roughly) and got feedback towards the potential flow problems that I wasn’t aware of, which helped me a lot to get my later flow smoother with save points logic, enemy timing, etc.
What Went Wrong?
- It was until the initial gameplay milestone that I realized that I over scoped. Not only was the jamming physics hard to implement, but also, I planned for a much bigger space to fill in, and I didn’t even realize that when I started designing my map. And side problems exist as I don’t have much combat with verticality and puzzles seem repetitive, which are both hard to resolve under the circumstances that the basic geometry is set, and the physics have much higher priority for me to solve beforehand, which all of these should be considered during pre-production stage.
- And the jamming physics. I really should try to test it early during the action blocks, but I didn’t realize I wanted to do this mechanics at that point. I think I started changing strategies too late after I found my way of implementation wasn’t stable enough and didn’t get enough time after that to try new ways. And as my stakeholder suggested, switching to automatically teleporting the metal sheet to the correct position to ensure the visual performance could be stable, but it was late during the launch week, and I just decided to keep with what I have. This is really a pity since the jamming was my core mechanics and I really wanted to implement it well.
- Level optimization. It was during the aesthetics milestone that my compiling time went up to three hours and it turned out to be my decorating brushes weren’t converted to func_detail. It was a small thing, but I didn’t do it well enough to identify the problem early. I really should take optimization in mind in the future.
What I Learned?
- Designing a space isn’t easy, decorating it either. I don’t have much experience to deal with aesthetics props or decorations before, so when my stakeholder told me I should plan for my space and make them meaningful by different textures and props during an early meeting, I was confused about how to do and what to start with, so I just always pushed it back. It was until I checked levels made by previous cohorts that I thought I do find some useful references that I could start with. So, this is an important lesson for me to plan for aesthetics and place functions even at document stage and check for reference in game maps or other people’s levels can always help to get the idea.
- I knew from the start that I am weak at designing combat encounters. So, I always asked classmates that are strong at combats to playtest and offer feedback on how to place covers and how to create a better encounter flow, and I really learned a lot from them.
- Solve small problems along the way. There could be many low-priority problems reflected during playtests and feedback sessions. Though low priority, it’s better to solve them early, so that they don’t affect the overall level performance later as they accumulate. And solving them always provides some accomplishment to let me have faith to finish the rest.
Play the Level
Download from HERE> https://drive.google.com/file/d/1hJ8ZqbhAaAyXXFaviilp6Gjq1JrqOwyn/view?usp=sharing
Download Level Design Document:

Leave a comment