
Technical Design
- Play on Steam
- Tool: Unreal Engine 5.4
- Platform: PC
- Gameplay time: ~1 hour
- Team Size: 21
- Development time: 13 weeks, ~200 hours in total.
Trailer
Summary
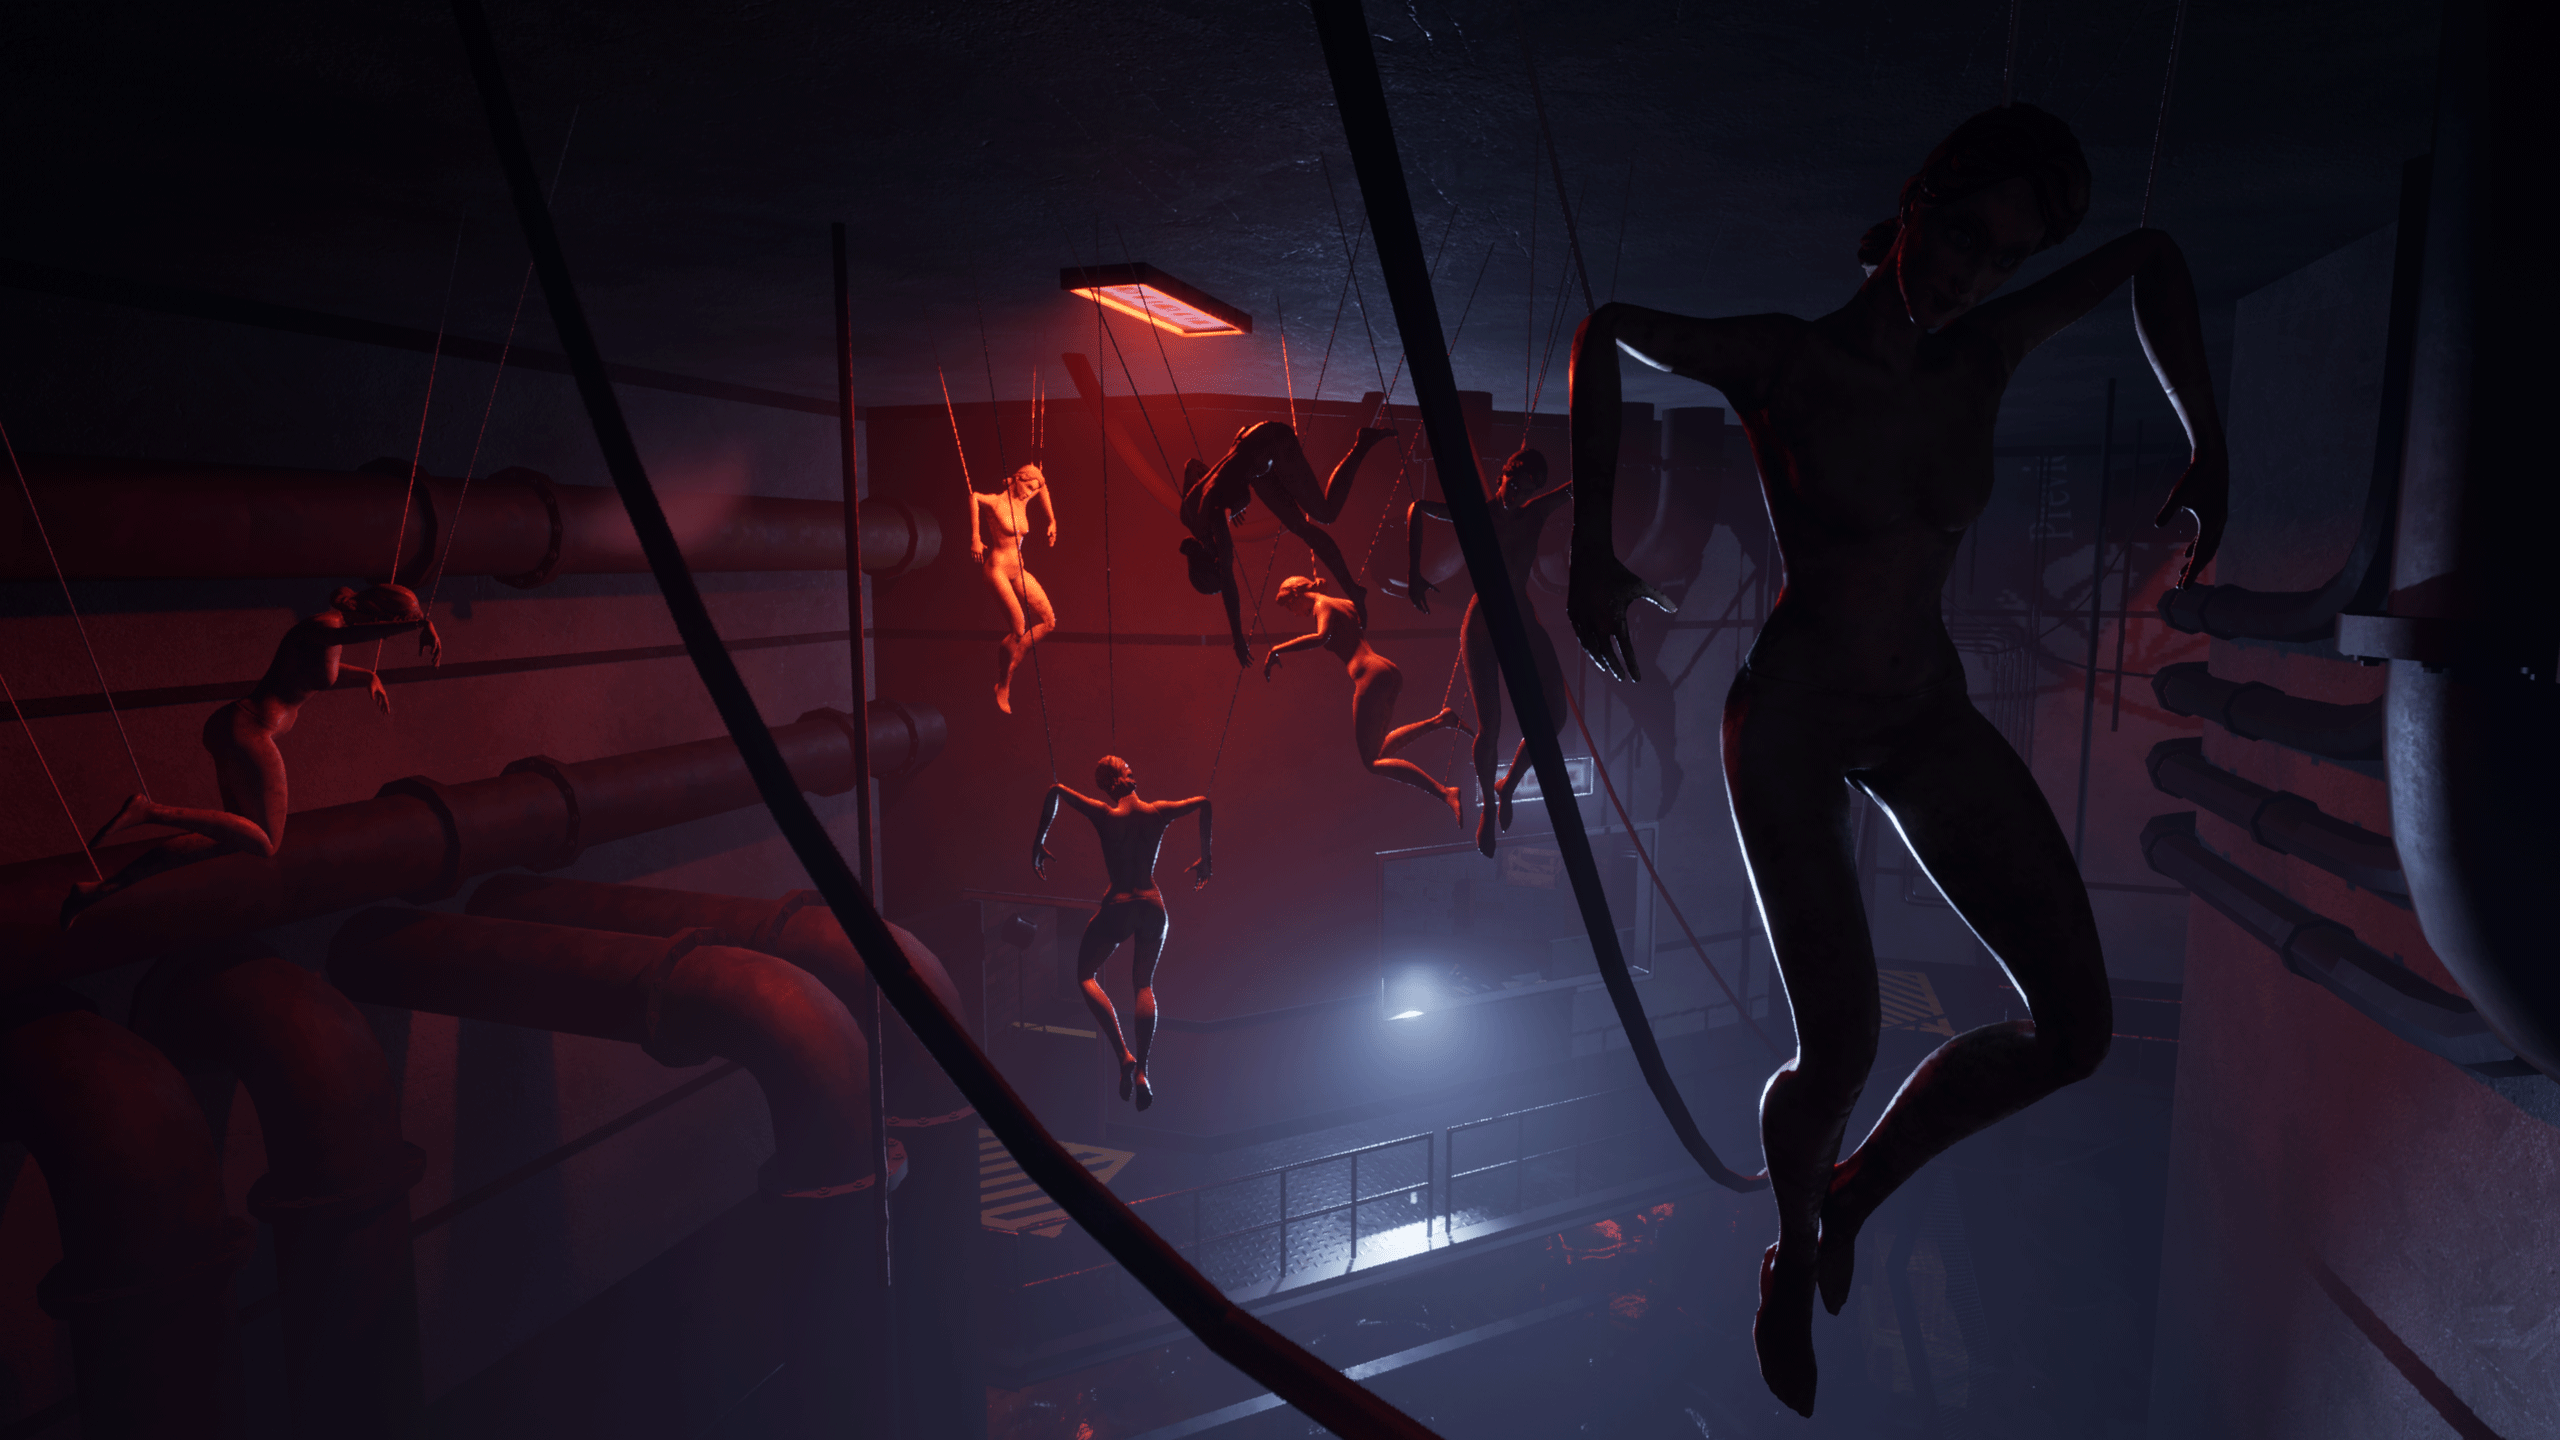
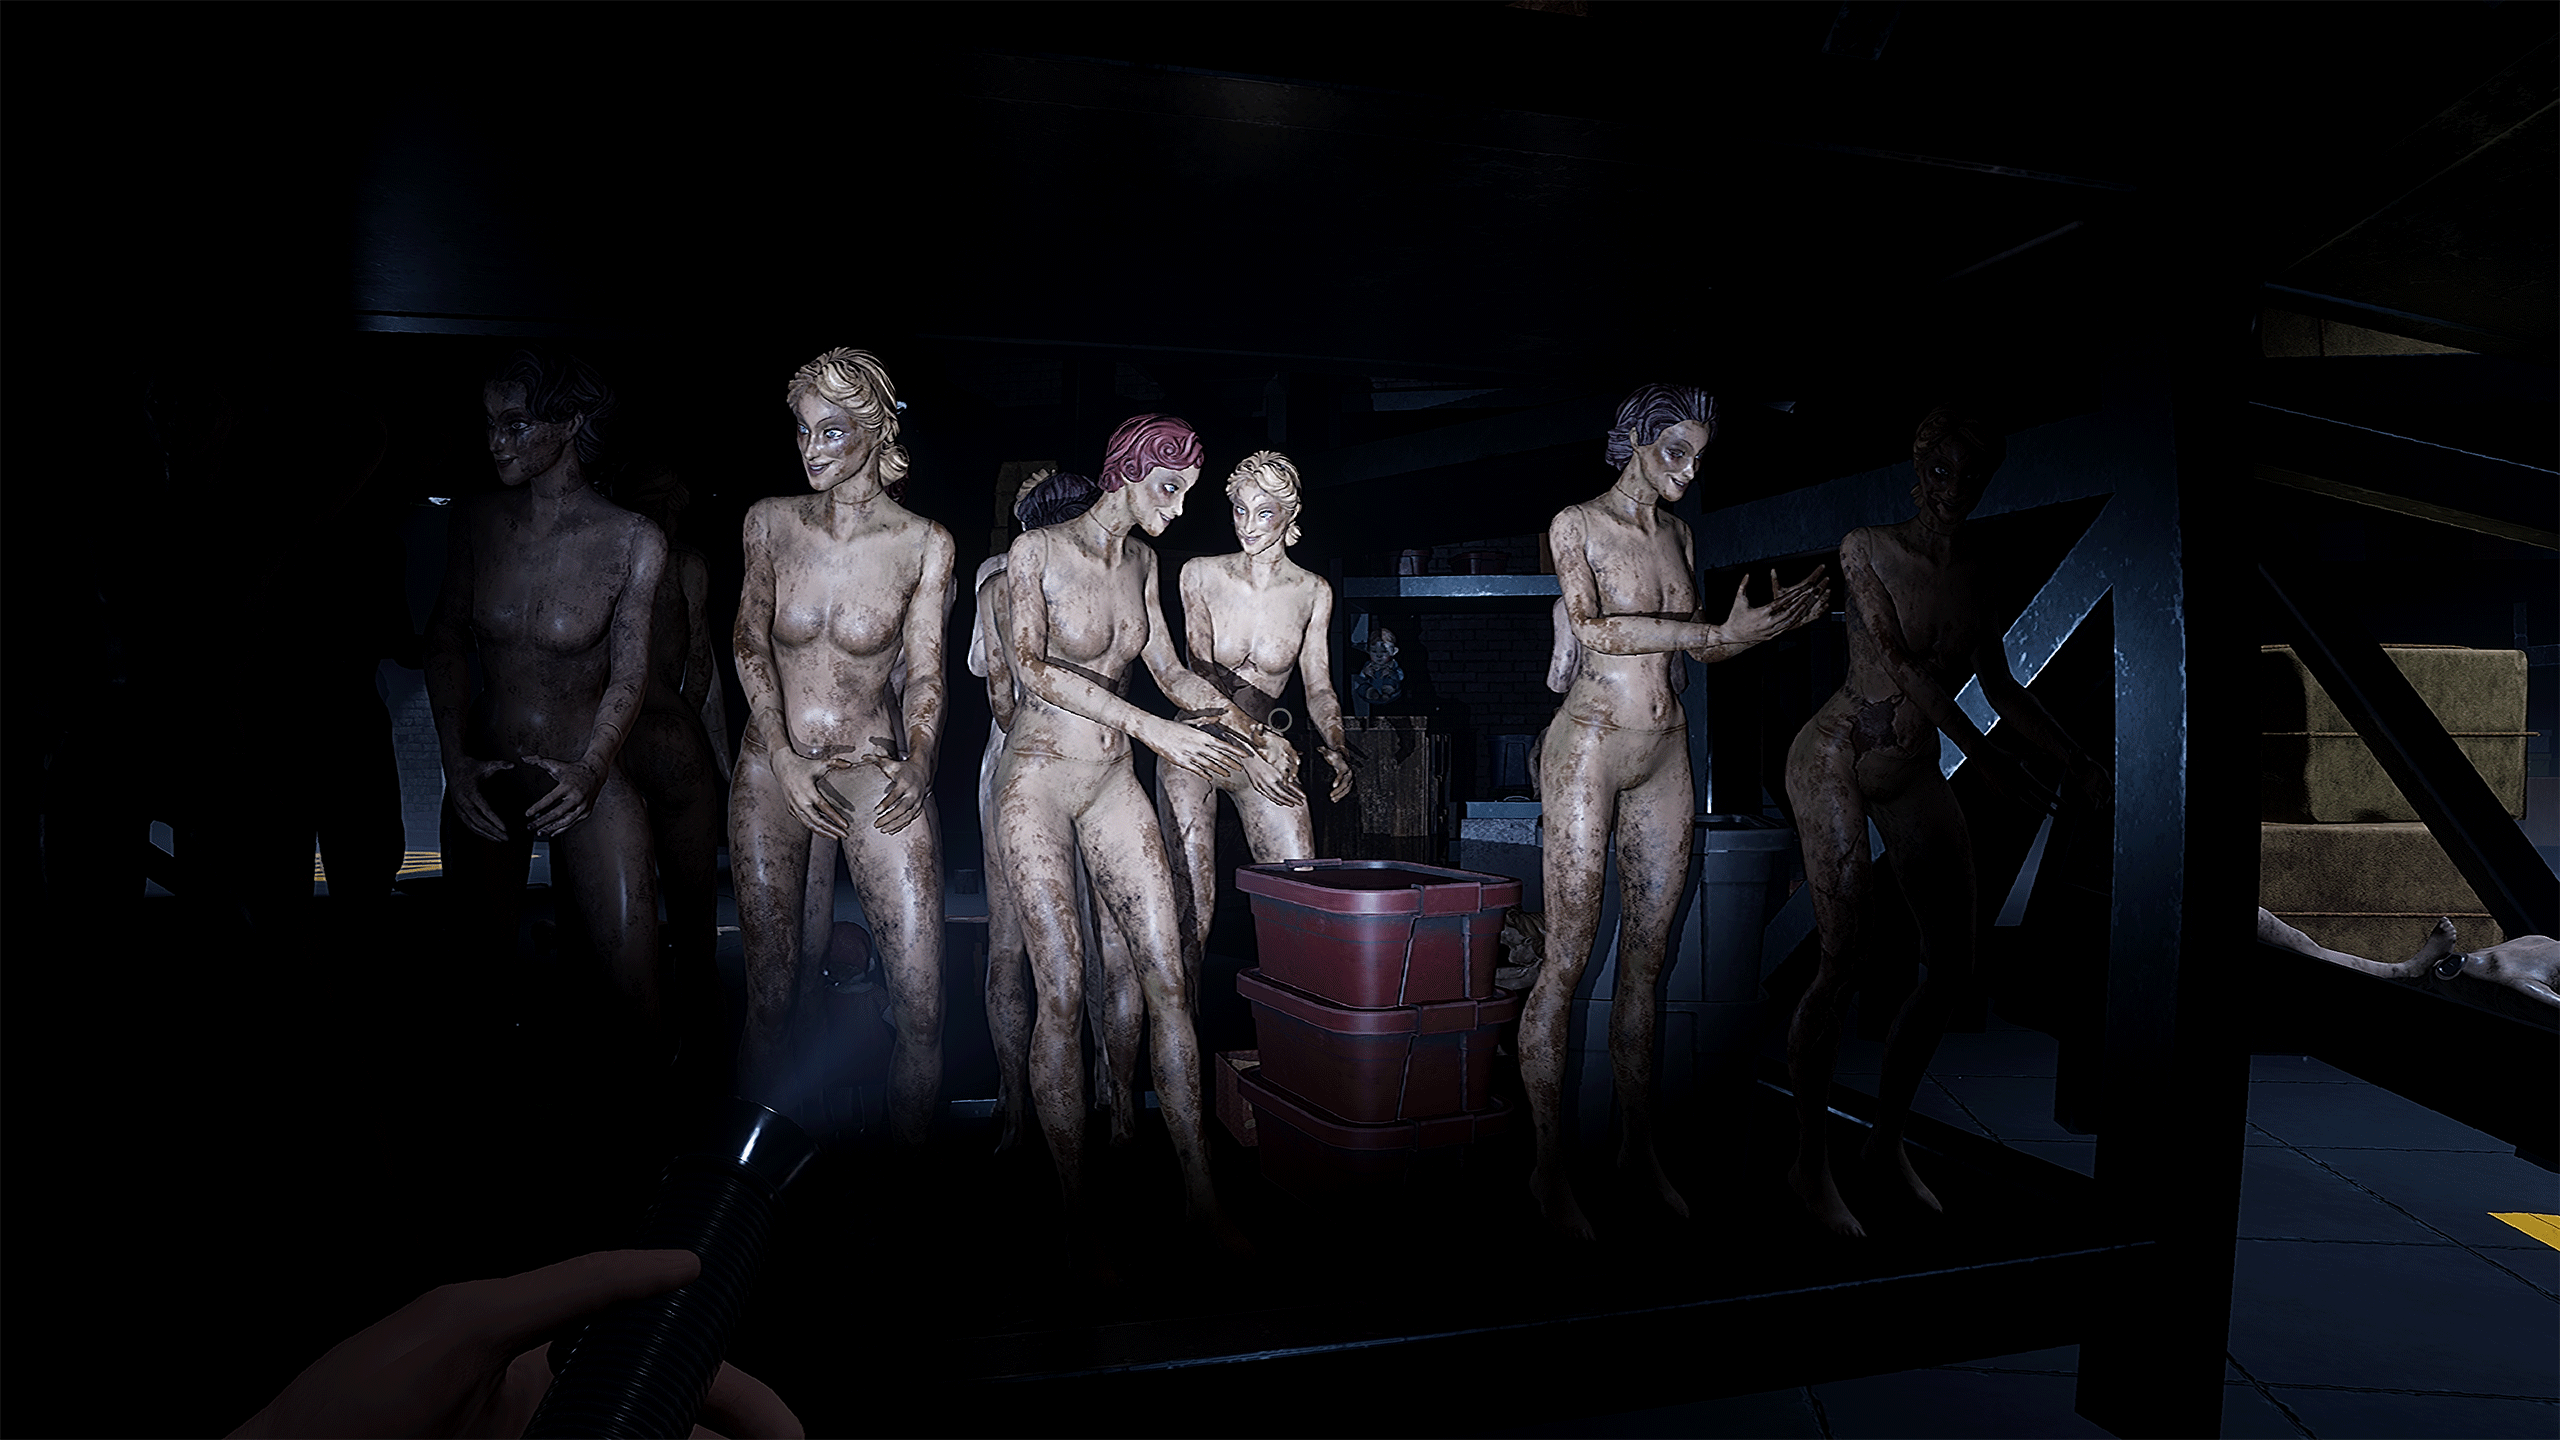
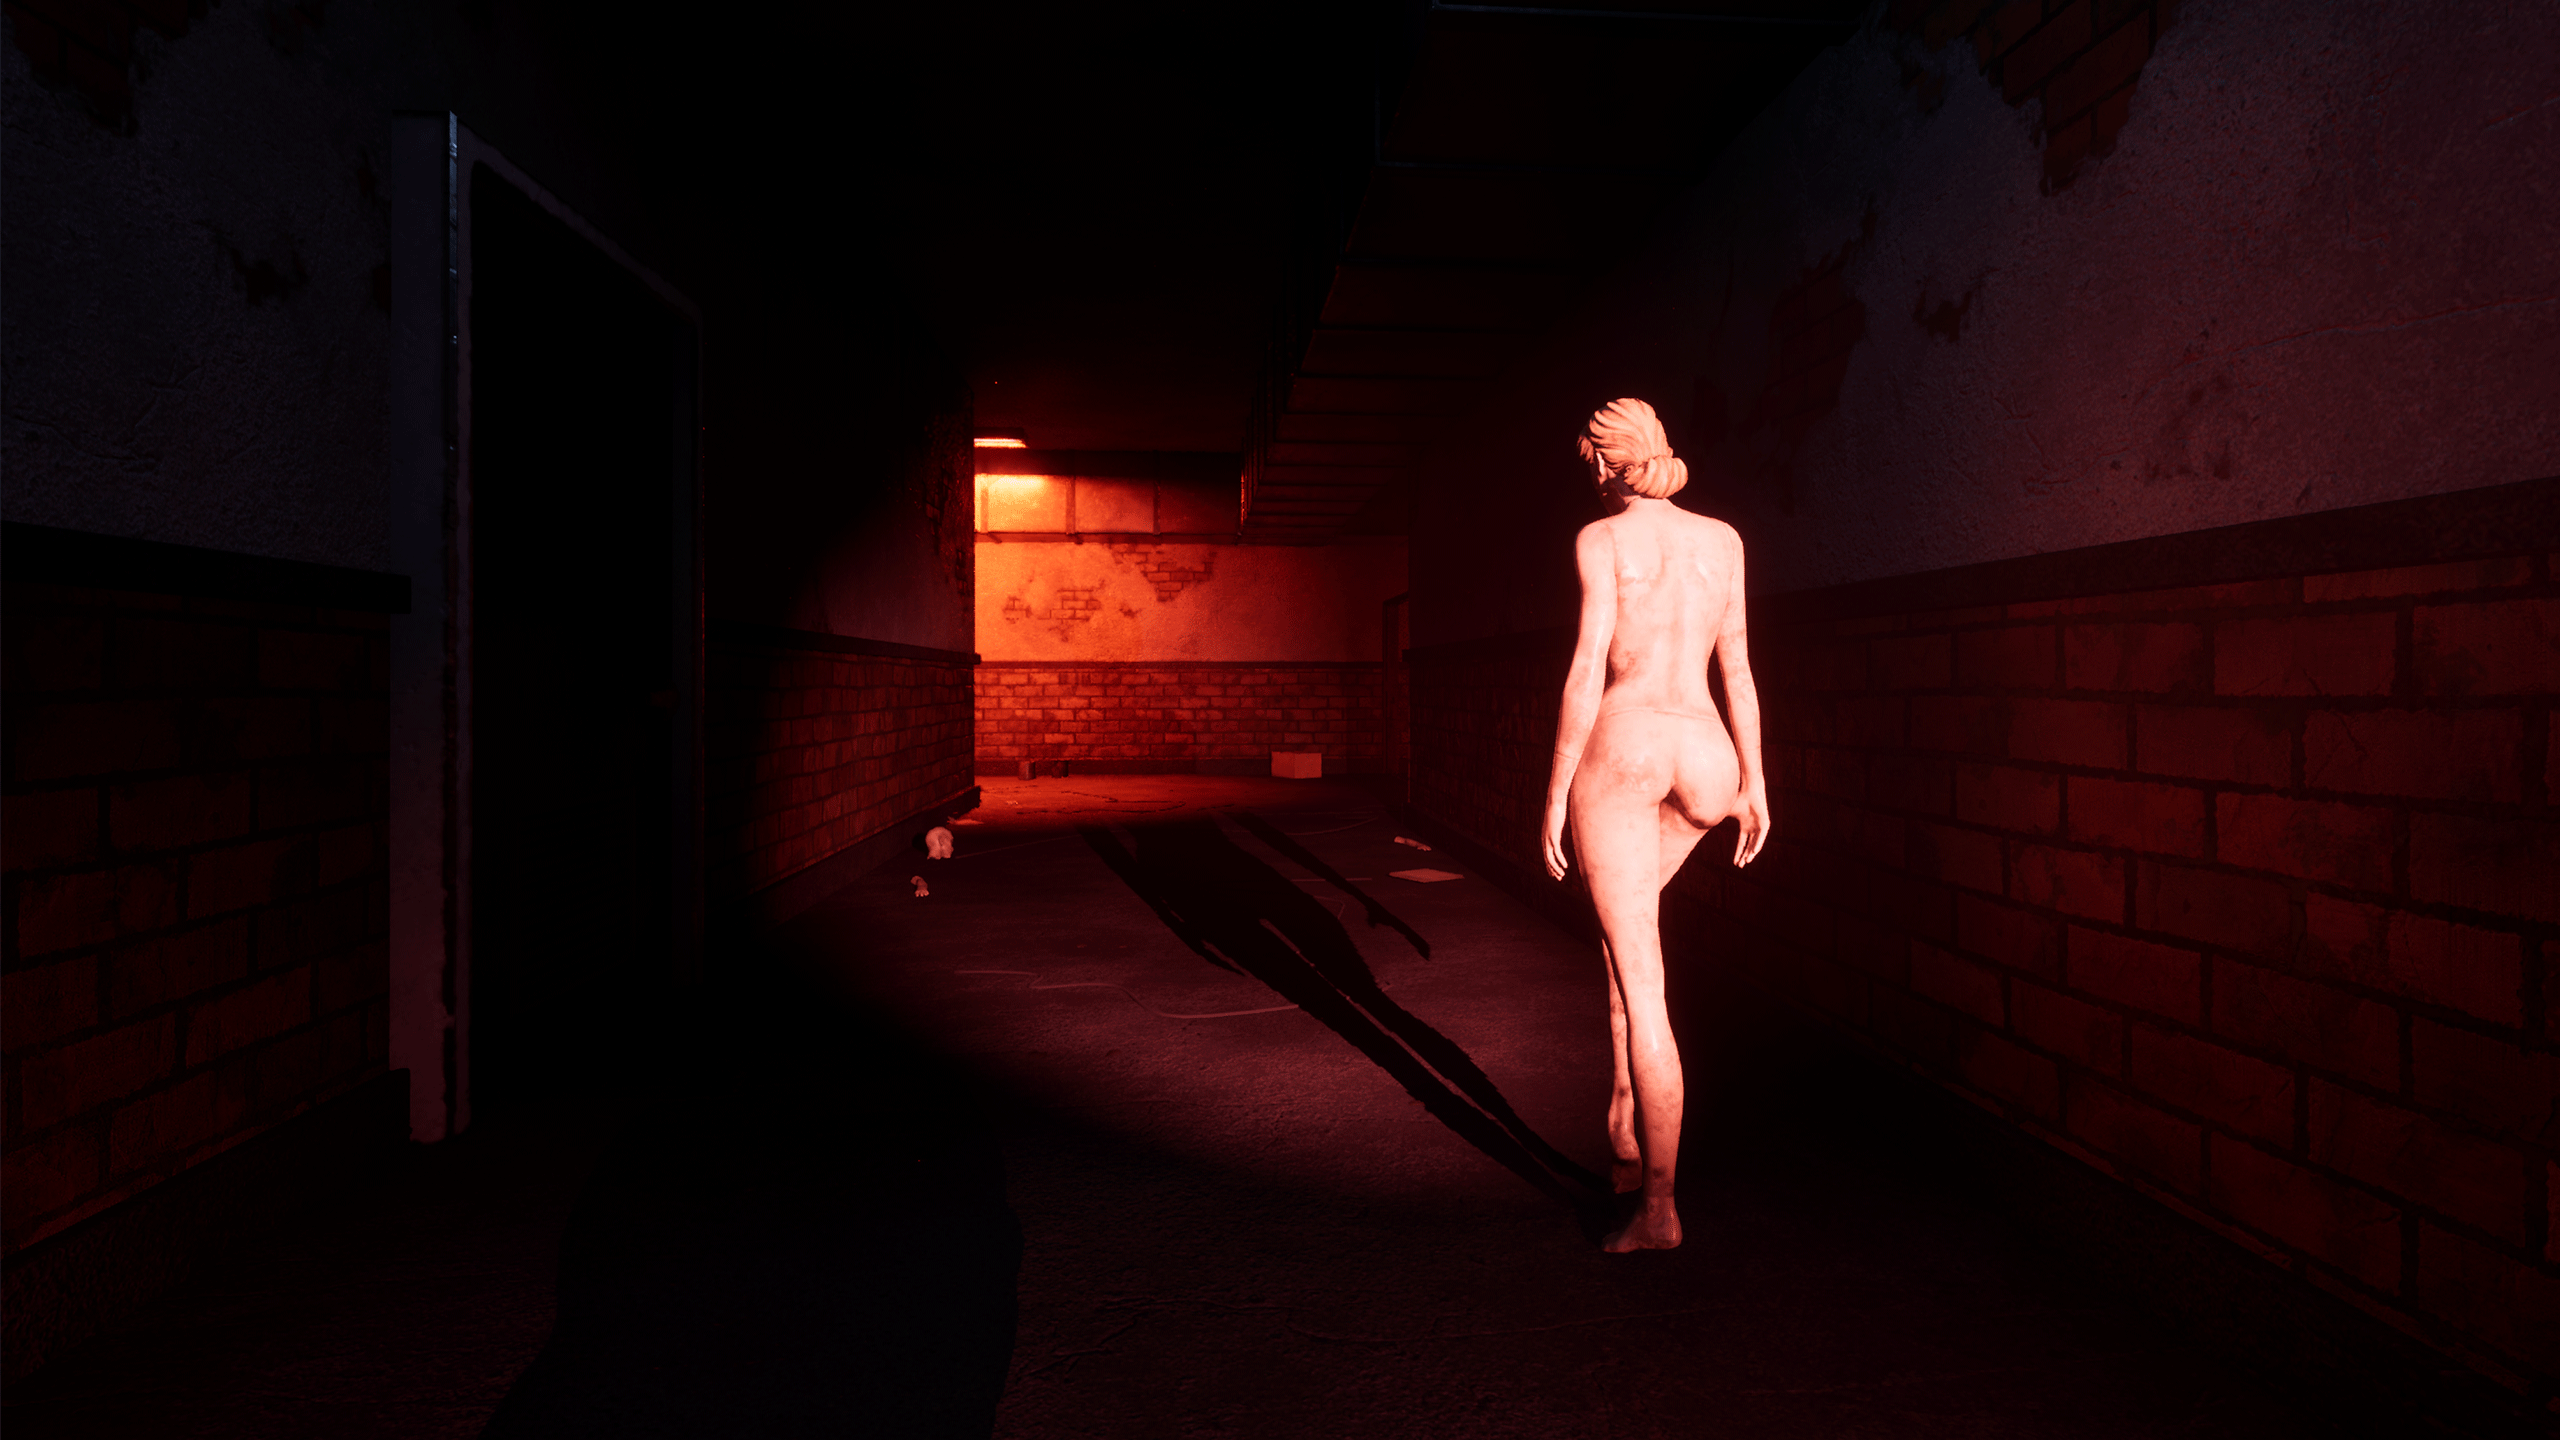
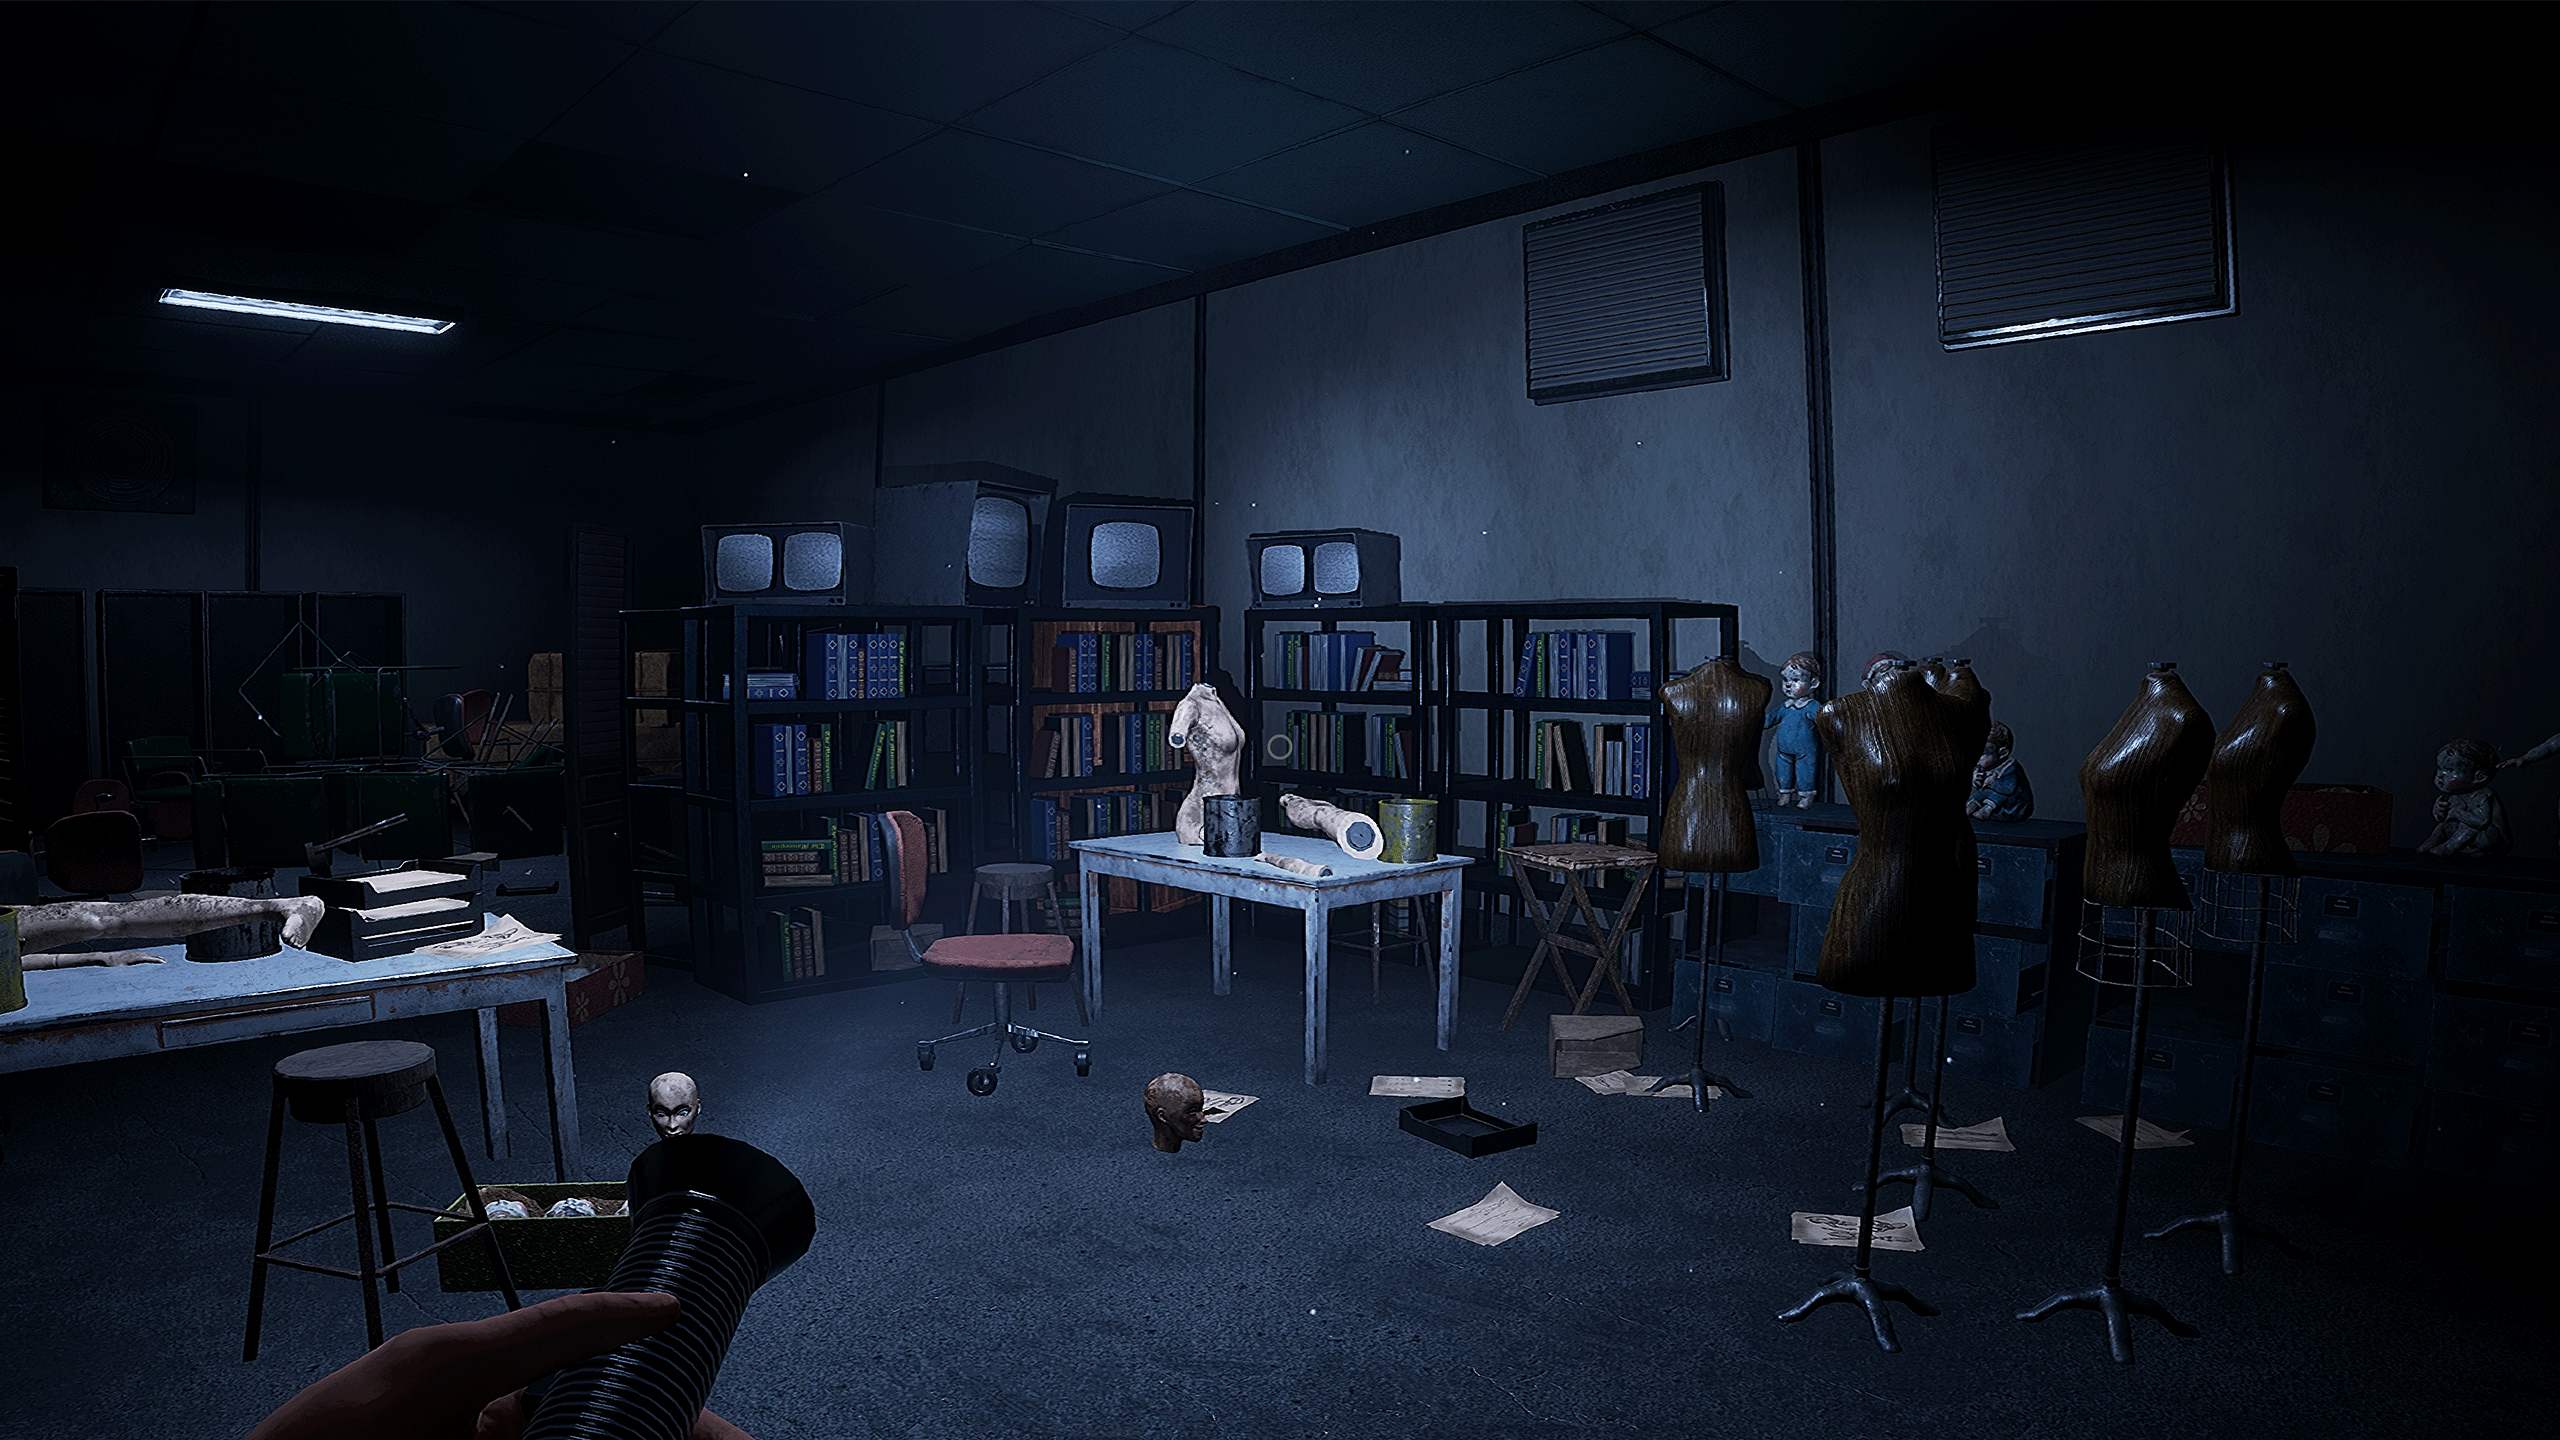
Mirrored Phantoms is a first-person horror game developed in Unreal 5.4. The player starts trapped in a nightmarish mannequin factory where reality itself is shattered. To unravel the secrets of Mirrored Phantoms, the game asks the player to explore a deeply atmospheric world, solve the mystery of the mirror shards, and survive the terrors that await in this slow-burning experience.
Responsibility
As the Technical Designer, I was responsible for prototyping early gameplay mechanics, implementing horror triggers to support level designers, optimizing sound integration, and providing Blueprint asset support. I also assisted with QA to ensure a polished experience.
To enhance collaboration and streamline implementation, I created a wiki page documenting setup instructions, helping programmers, level designers, and other team members efficiently integrate and utilize the mechanics and Blueprints I developed. You can check it out at HERE.

Mechanics Prototype
Explore the fun
During the early POCT stage, I used Blueprints to prototype mechanics proposed by the game designer and created sandbox levels—testing feasibility, exploring playability, and evaluating their integration with other gameplay elements.

Our enemy prototype at the POCT stage was similar to the Weeping Angels—when you look at it, it stops moving.
In this sandbox level, I experimented with tricking the enemy into standing on one pressure plate while grabbing a block to activate another pressure plate.
I was testing how the enemy mechanics can work in tandem with the puzzle mechanics. This sandbox encourages clever manipulation of the enemy while strategically planning the solution to the pressure plates.
We were exploring the fun of searching for valve handles to open doors as a consistent gameplay theme.
In this sandbox level, I experimented with picking up the valve handle and snapping it onto the pipe to unlock the door.
Initially, the door opened with a single click activating the valve handle. However, since our enemy mechanics primarily rely on sightlines, I redesigned it to direct the player’s attention to the valve, requiring the player to hold the interaction with the handle to open the door.
This change is designed to introduce opportunities for Weeping Angel enemies, requiring the player to open the door while avoiding their attacks.

In this sandbox level, I experimented with rotating the pipe to reroute the steam, removing the steam that blocked the player’s progress.
Similar to the door activation, the valve handle rotation also requires the player to hold the interaction.
Early Prototype
Later in development, we finalized gameplay featuring conveyor belts and steam pipes. I prototyped switch mechanics to activate conveyor belts (switch interaction, belt moving, speed change trigger, moving texture change, physics simulation) as well as interactions for rotating pipe handles.

Conveyor Belt Demo:
- Player interacts with switch to activate the conveyor belts.
- Player overlaps the speed trigger to change the speed of the conveyor belts.
The speed trigger is a great way to scare the player while they’re on the conveyor belt. As the belt moves them forward, they have little control, and the trigger provides a sudden jump scare, making it feel like something unexpected is happening.
(In game)

(in game)
(In game)
These mechanics were handed off to programmers for further refinement, while I remained available for support. As a Level Designer, I structured the mechanics to be designer-friendly—intuitive to understand and easy to implement. I exposed key properties that designers would find useful for fine-tuning gameplay, ensuring flexibility in creating an optimal player experience.
My role involved bridging the gap between programmers and designers by communicating design intent, emphasizing key aspects important to designers, and collaborating to ensure the feature was both seamlessly integrated and easy to implement.
Horror Triggers
When level designers began designing the levels, they brought a lot of innovative ideas, and my role was to help refine and bring these ‘crazy’ concepts to life. We sit down together to go over the details—the interaction steps, desired outcomes, and effects.
Based on our discussions, I would begin prototyping while incorporating details I believed would better align with the broader design vision. I would then implement the mechanics, pass them back for feedback, and refine them based on performance and iteration. After a few iterations, we would fine-tune the design until we were both satisfied with the result.
Triggers In the Game

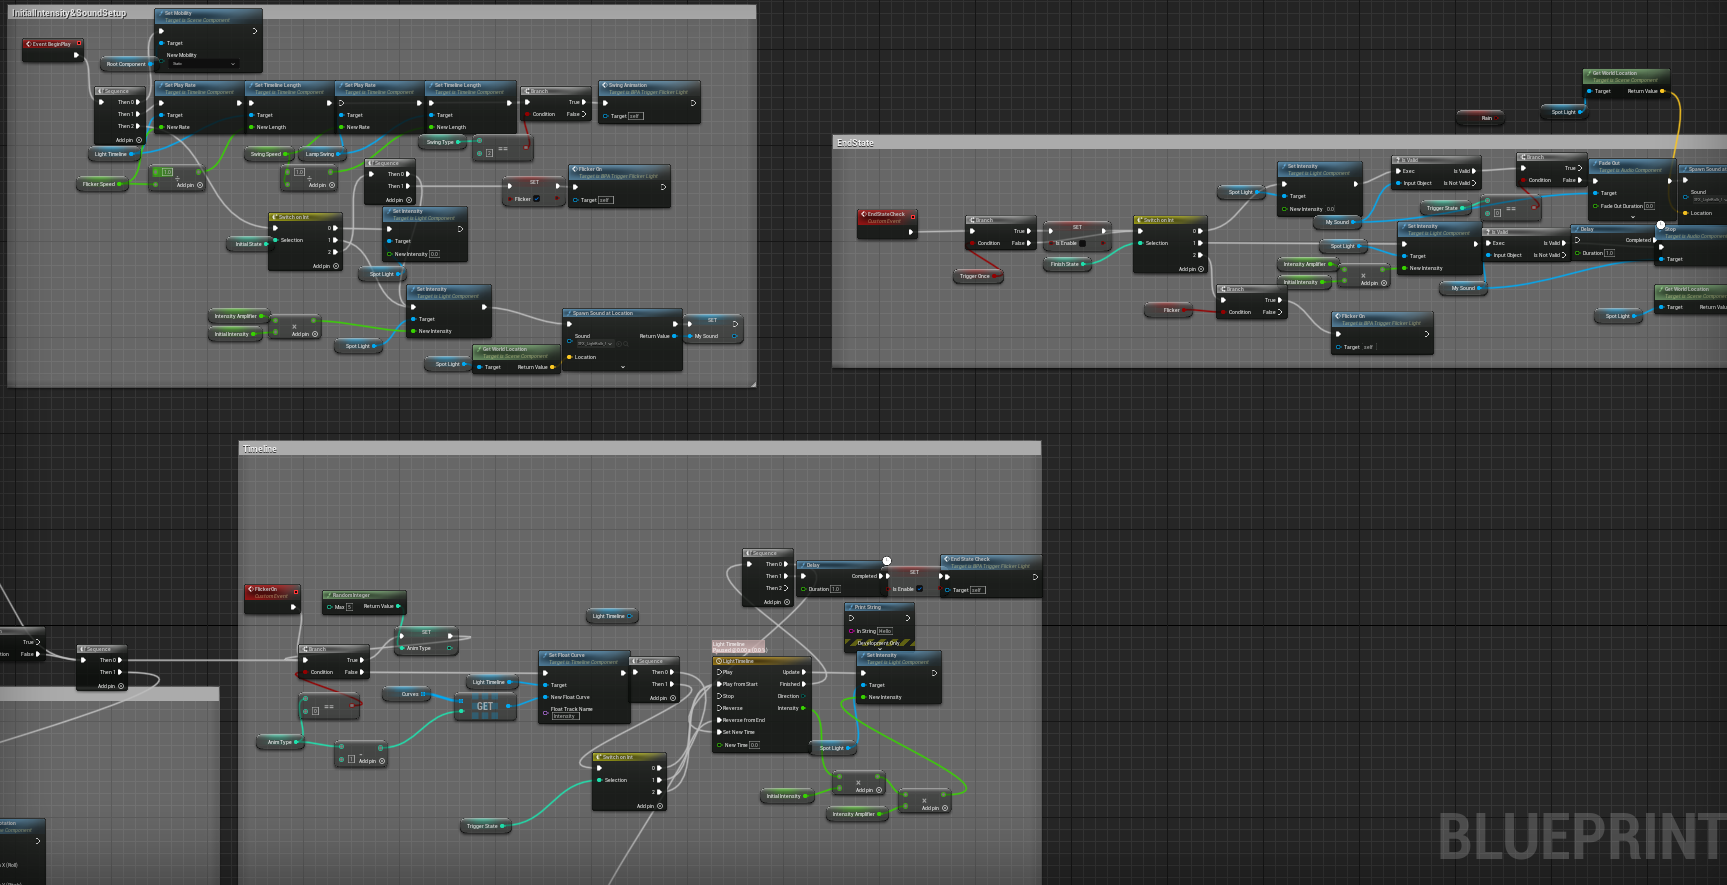
The thunder and lightning trigger was one of my favorites. While I had a vision for how the lighting should look and created a timeline curve accordingly, I anticipated that the designer might want to adjust it. To allow flexibility, I created a separate curve and provided access for the designer to tweak it.
Since thunder naturally follows lightning with a delay, I researched the speed of light and sound, factoring in a typical distance from the lightning source to enhance realism. I initially set the delay to around three seconds, but after the designer noted that it felt too long given the room’s relatively small size compared to an open exterior, I agreed and exposed the delay as an adjustable property. We ultimately settled on a delay of 1.5 to 2 seconds for better pacing and a more immersive experience.

There’s an interesting story behind this mannequin. While testing the game, I accidentally walked into its spawn location and got stuck. I discussed this with the designer and we made sure to adjust the trigger volume, moving it far enough away from the mannequin’s location to prevent any similar issues in the future.
One challenge I encountered while writing the blueprint logic for this trigger was initially misunderstanding the designer’s intent. I had set the mannequin’s visibility to be determined only at the start of the game, assuming it was a one-time trigger. However, due to multiple triggers linked to the mannequin, the logic was messed up, and some mannequins never showed up. After clarifying the designer’s intent, I fixed this by updating the mannequin’s visibility each time a controlling trigger was activated.
These are some triggers I designed and implemented to enhance the creepy atmosphere of the game. Some of them were used, while others were not. The ones that were implemented have turned out really well, with our designers showing great creativity in finding interesting ways to utilize them.


Since the waste point was a large, empty space, it initially felt dull and unengaging to traverse. After implementing the falling parts based on my suggestions, the area became more dynamic and interactive, adding tension and a sense of unpredictability to the player’s experience.
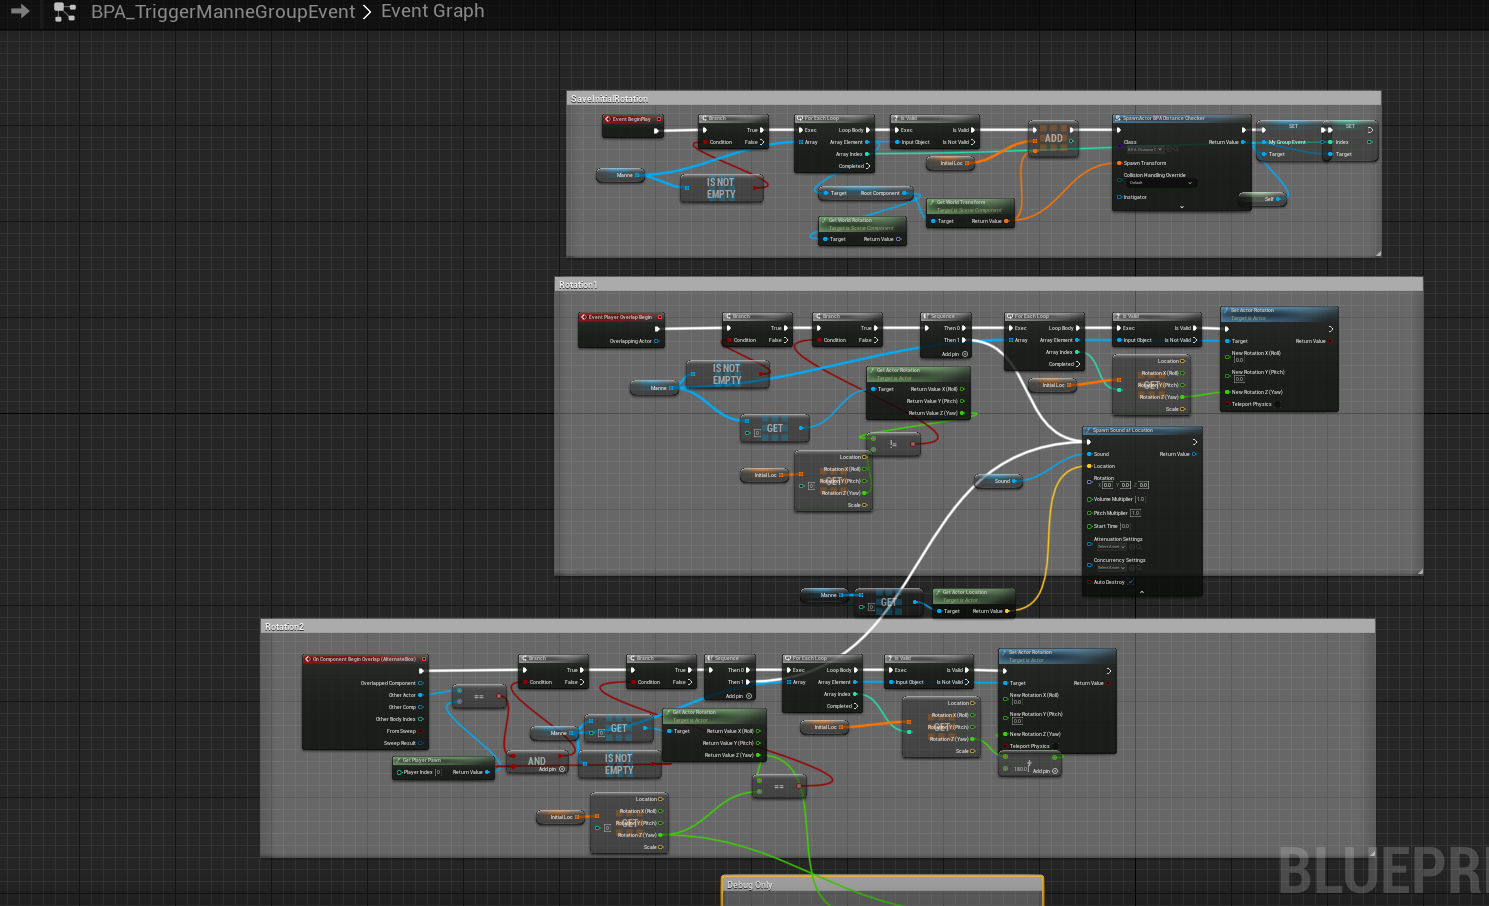
Save initial rotation and trigger 180 rotation everytime the player enters the trigger
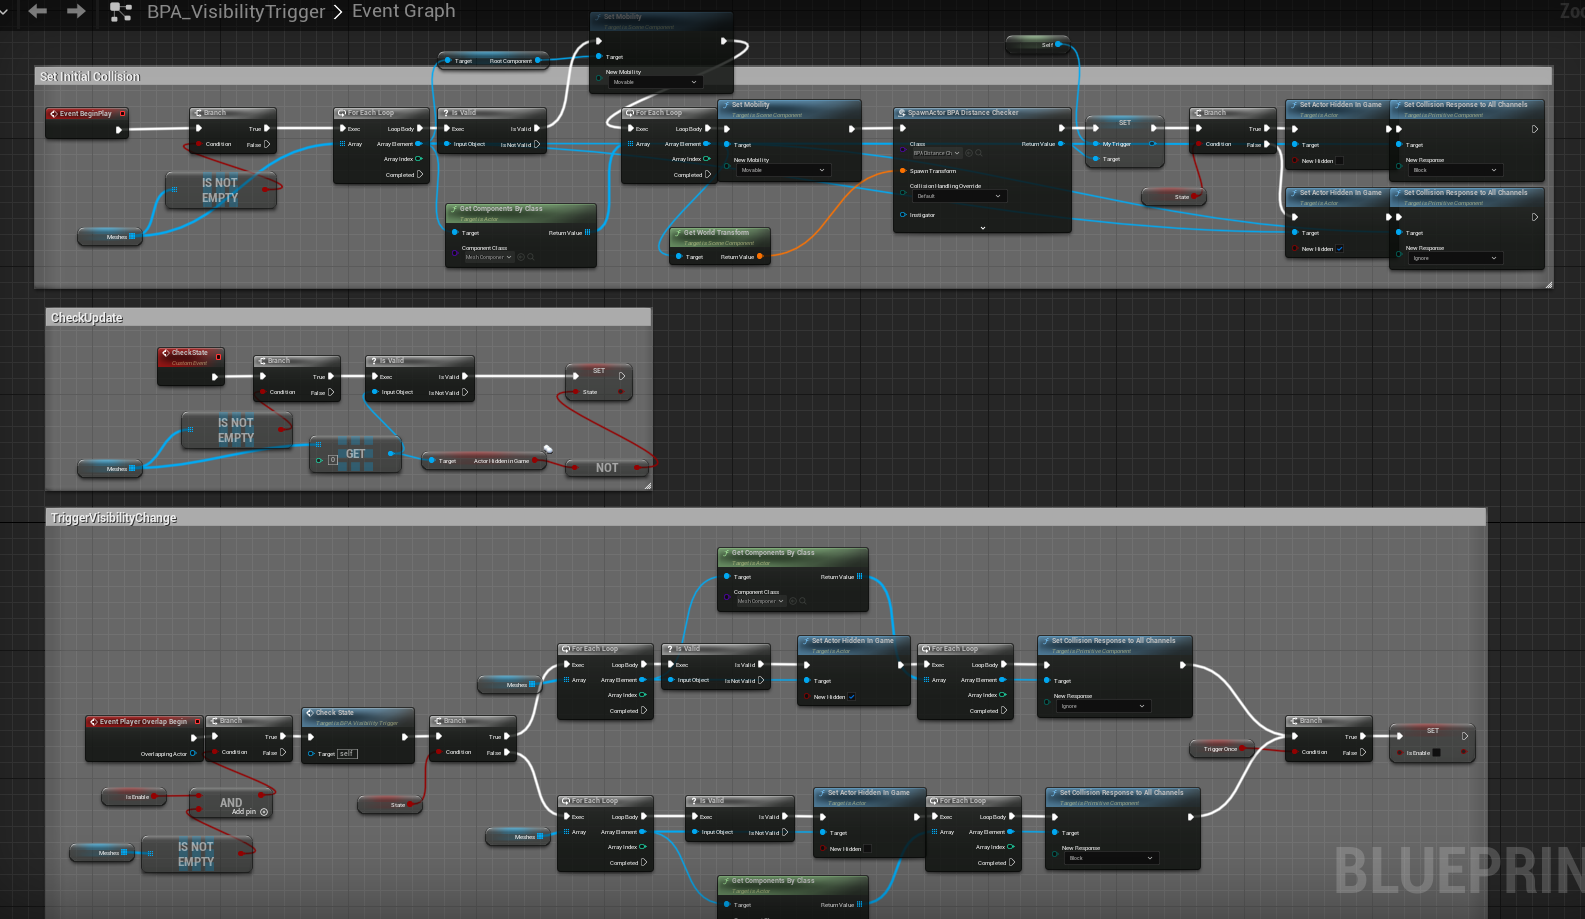
Determines the visibility of the mannequin on each time the trigger is activated, and flip visibility & collision
Infinite Hallway
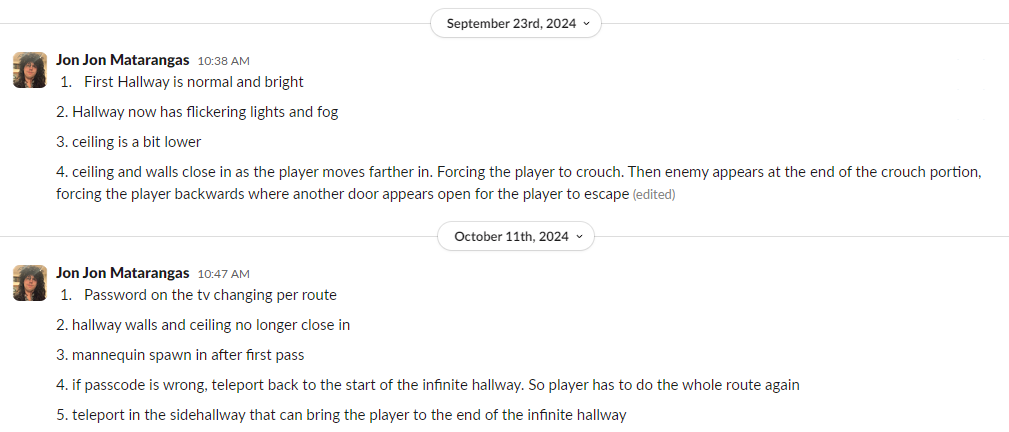
One level featured a looping hallway reminiscent of Silent Hill P.T. During the prototyping process, we had several discussions about how the hallway would change with each loop.
At one point, the designer wanted the hallway to shrink in size. After implementing it, I found the effect wasn’t noticeable enough and didn’t meaningfully enhance the atmosphere. I suggested exploring alternative ideas.
Another version involved using a combination lock, consistent with other parts of the game. The password digits would be revealed during each hallway run, but this risked becoming repetitive. I suggested adding other gameplay elements to keep players engaged beyond just entering the password, but the designer was concerned this might distract players from noticing the digits. Ultimately, we decided that the combination lock wouldn’t work well in this context, so we removed it in favor of a more effective solution.

We went through quite a lot iterations to identify the best gameplay elements and refine them. It was a valuable process of understanding and translating someone else’s design vision. During the process, I’d often realize that some details I assumed were clear weren’t what they intended—often because they hadn’t thought to clarify them, while I had assumed them to be the default. Over time, I learned to double-check details from the start, even when they seemed definite.
The most rewarding part of this experience was improving my ability to see from others’ perspectives and communicate more effectively across disciplines. I also gained a great sense of accomplishment in bringing those visions to life.
Asset Actors
I collaborated with our artists to create Blueprint actor assets, such as swinging flickering lights, creepy handbox, and props with specific timeline animations, including floating props.
To accommodate the artists’ request for more randomized and varied floating animations, I introduced several adjustable properties on the Floating Prop:
(1) Direction – different movement paths calculated by selectively negating one of the x, y, or z coordinates;
(2) Rate – the timeline’s playback speed;
(3) Amplifier – a multiplier for travel distance;
(4) Randomness – small randomized adjustments to the timeline routes to create variety.
These parameters allowed for more dynamic and natural-looking floating animations while giving artists flexibility in fine-tuning the effect.


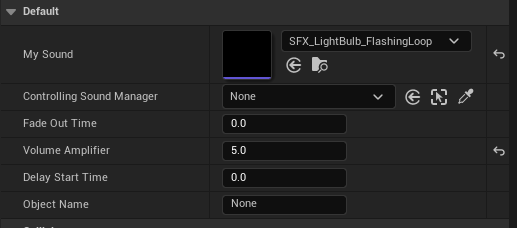
The flickering light is a common horror game element. To make it highly reusable, I exposed properties such as color, trigger times, and state transitions across different stages, allowing designers to customize it to their needs.
With this single blueprint, they can create a one-time flickering light, a constantly broken green conveyance light, a light that breaks upon the player entering a specific area, etc.

Sound
We only had one sound designer on the team, and he was overwhelmed with the workload. As we reached the later stages of development, with most mechanics and triggers completed and no new additions, I shifted my focus to assist our sound designer with implementing the sounds.
Sound Trigger
This is a custom trigger designed to play one-time sound effects, allowing designers to customize factors based on the specific flow of their levels. Designers can use this trigger to play looping sounds, which automatically stop when the player steps into another trigger.
Gameplay related Sound Request
During my discussions with level designers about the music our composers created for each level, some proposed alternative ideas that better suited their designs.
One example is the infinite stairway, where players are teleported into the staircase as they climb. Walking upwards teleports them back to the start, while walking downwards leads to the exit.
The level designer wanted to adjust the sound pitch to indicate that walking downwards is the correct path. After discussions about pitch range, rate of pitch change, and how our sound designer should expose parameters from FMOD Studio to Unreal, I created this unique sound trigger for the staircase that enhances the gameplay experience.


Others
In addition to the above, I implemented regional background music triggers and ambient sounds for different rooms.
QA
Bug Reporting
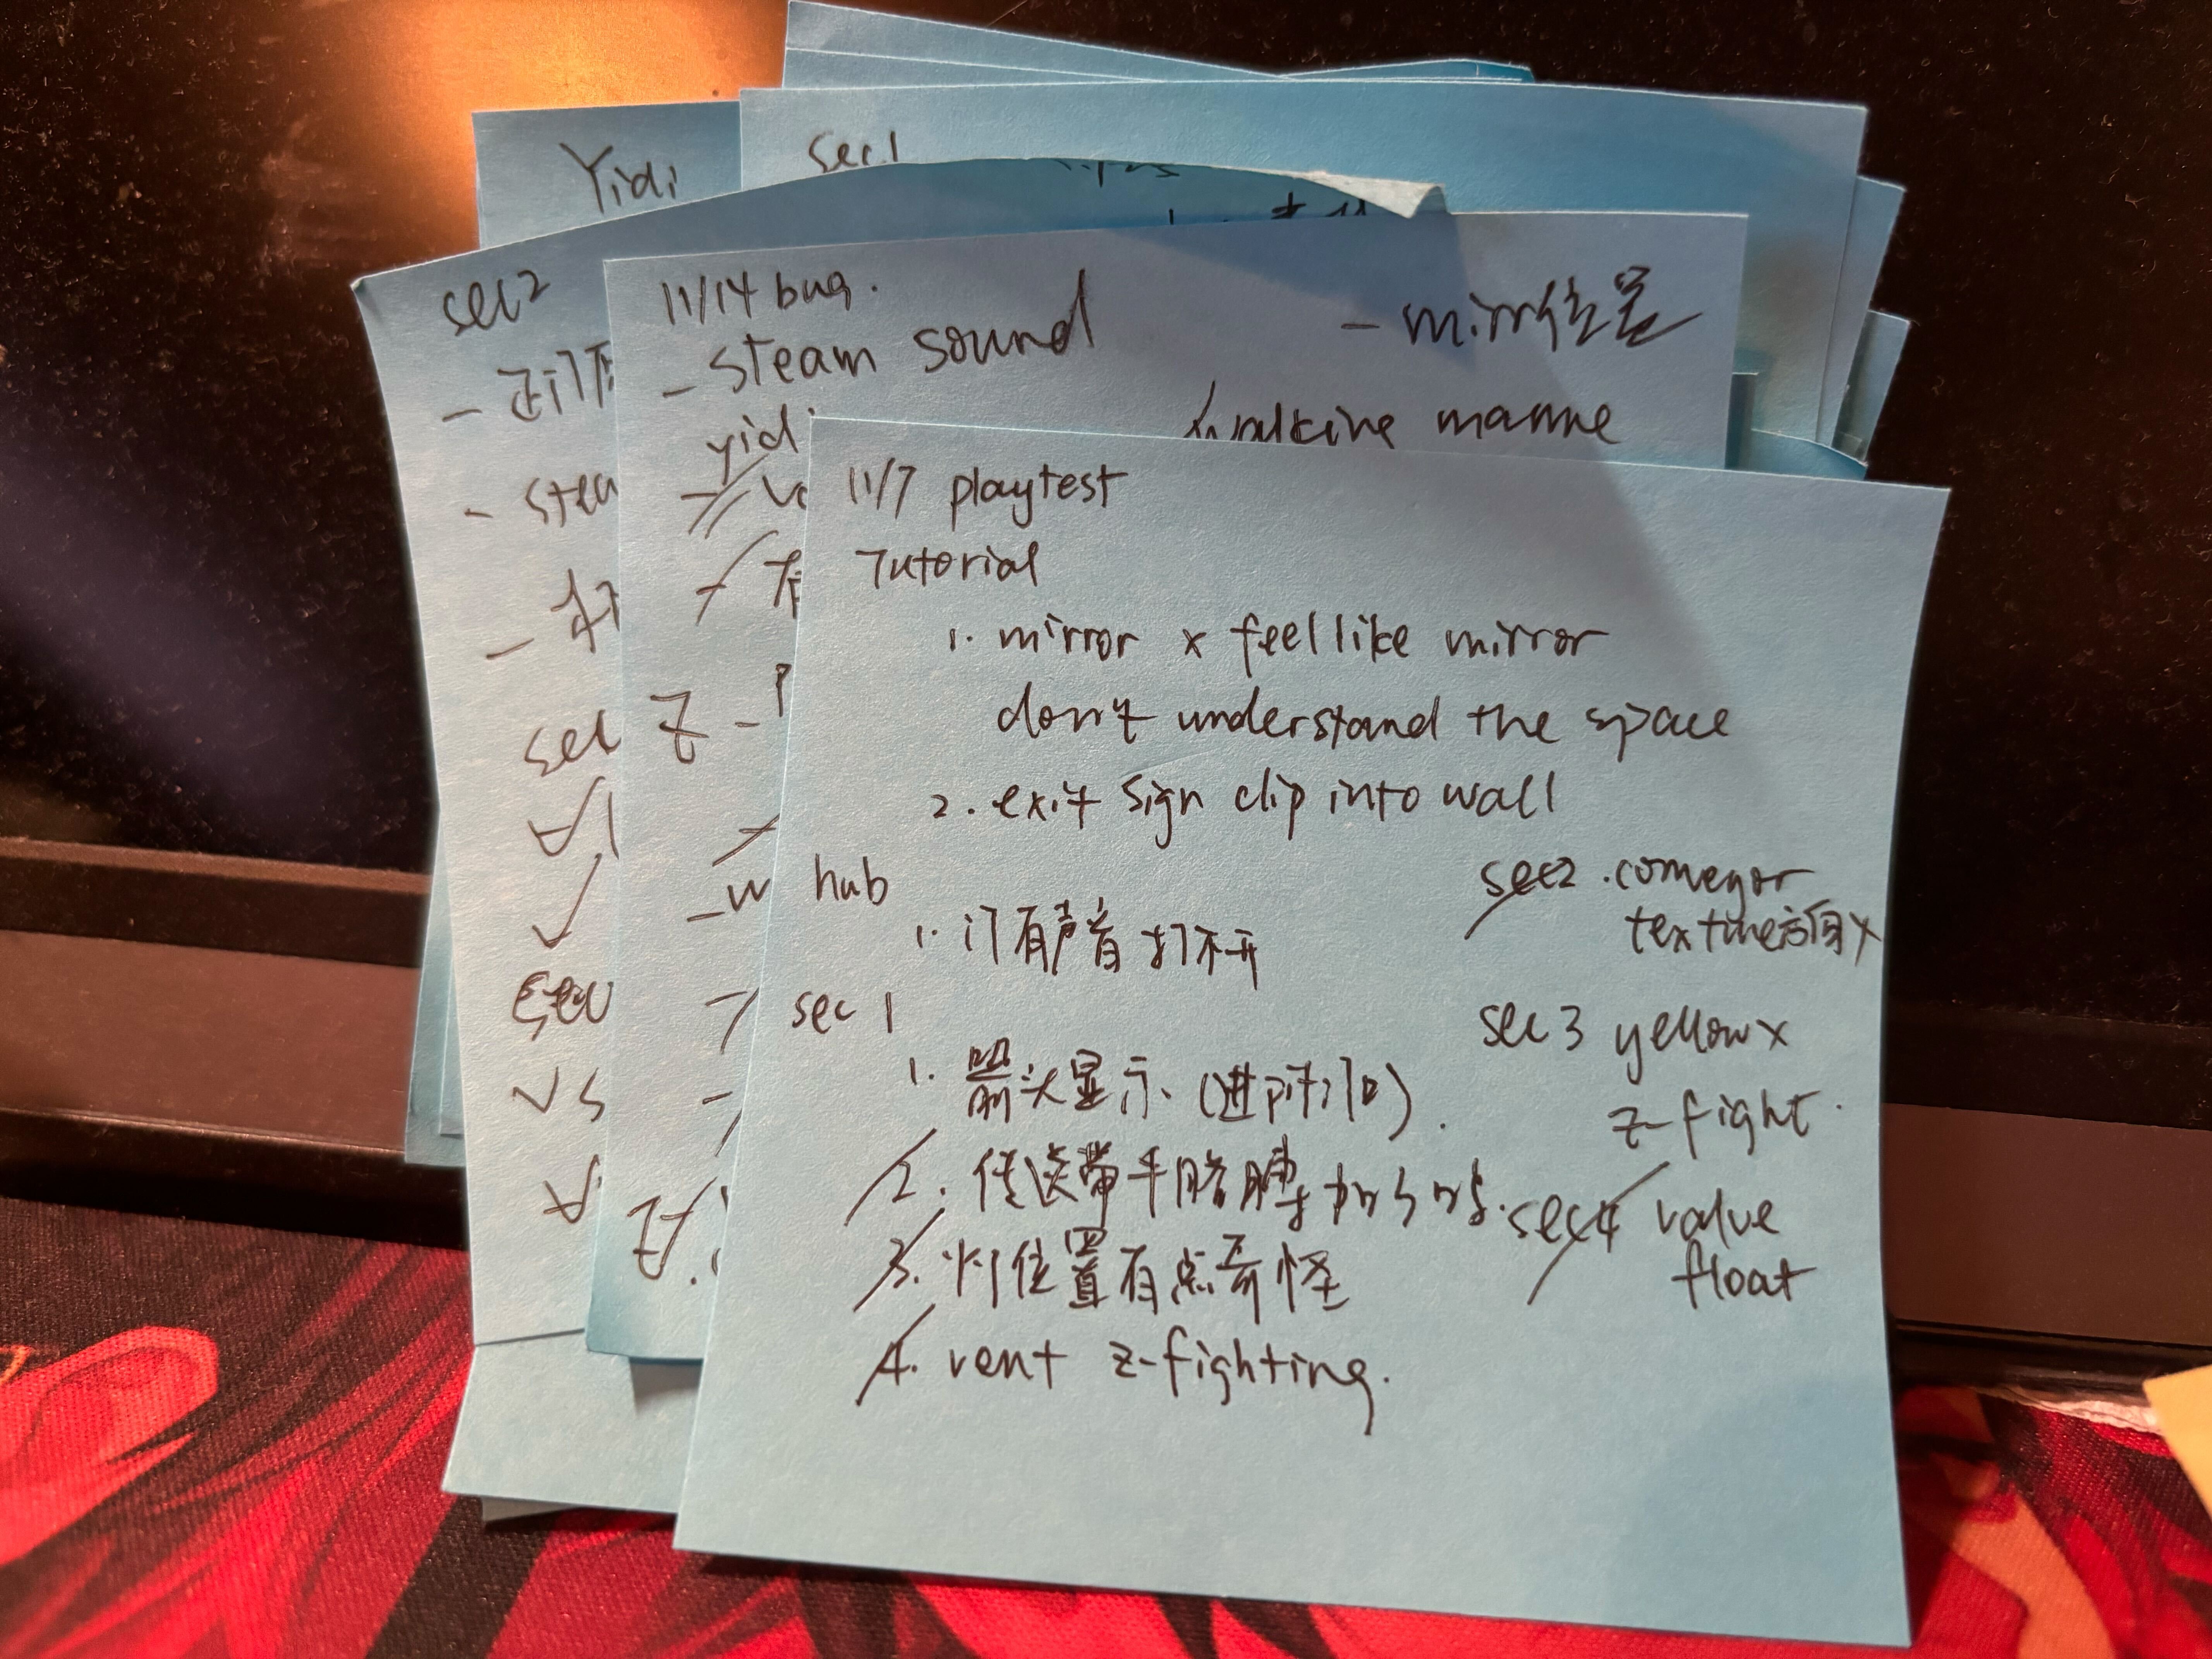
During the remainder of my time on the project, I played the game daily to conduct playtests.
I took notes on every bug I encountered using sticky notes, and after playing, I would approach the person in charge of those functions to inform them of any issues and keep track of the changes.
Gallery


Postmortem
What Went Well?
- The correct role for me! I had a great time creating the blueprints. Before starting this project, I made the decision to pursue technical design as my career path. This project provided a valuable opportunity to step into that role and further refine my skills. After completing it, I found myself truly enjoying the work I had done and became even more confident that technical design is the direction I want to continue pursuing.
- Being the best teammate meant working and debugging efficiently. Watching how my implemented features were used effectively and creatively by designers in the game, I realized I had made the right decision in exposing sufficient properties and negotiating with the designers about their needs before development. This reinforced my confidence in my skills and ability to learn quickly, positioning me to be a trustworthy and reliable team member going forward.
What Went Wrong?
- Realizing communication gaps always existed, I initially had confidence in my abilities as a communicator. However, along the way, I realized there would always be perspectives I hadn’t considered or aspects I didn’t fully understand. I’ve come to recognize the importance of maintaining awareness of these gaps and actively working to bridge them throughout my process, ensuring effective communication and collaboration within the team.
- I realized I could contribute more to the game than I initially thought. The team wasn’t fully accustomed to working with a technical designer, and the workflow was a bit chaotic. I also wasn’t clear about what tasks should be mine and what should be handled by others, like programmers. Looking back, I see that I should have been more proactive in developing ideas and creating things from the start. Even if tasks later get handed off, it’s better to have something prepared to make the game more interesting and engaging.
What I Learned?
- Keeping the goal clear is essential. I’ve learned that when the designer and I align on the ultimate outcome of what we’re developing, it makes communication more efficient. When everyone understands whether something contributes to the design goal, it simplifies decision-making and ensures a smoother process, speeding up development and improving collaboration.
- As someone constantly communicating with different disciplines, I’ve gained an understanding of how each role approaches tasks differently. It’s often my job to ensure everyone is aligned and to make sure that the values and priorities of each role are acknowledged and considered by others. This helps in fostering better collaboration and ensures that all perspectives are taken into account.
Play The Game
Visit our steam page to play!

Leave a comment