

Quest & Level Design
- Tool: Fallout 4, Creation Kit
- Platform: PC
- Level Size: 1 exterior small world, 1 interior space with 12 rooms.
- Gameplay time: ~30minutes
- Team Size: Individual.
- Development time: 12 weeks, ~300 hours in total.
Level Walkthrough
Summary
“Chromosome” is a single-player level in Fallout 4. It is a side quest that tells a story about a missing friend Eda, which happened in the town Florentia. The player will gradually figure out through dialogues that Doctor Iris in the Clinic is conducting research on the genetic disease with Synths as test subjects. In the end, the player will have to choose between saving the Synths or treating the patients.
The gameplay is designed with exploration and combat, encouraging the player to explore the place and find extra information & supplies by lockpicking & hacking, and utilizing various weapons to fight the enemies and achieve the destination.
Design Goals
Exploration Emphasized: Provide optional spaces and information, allowing the player to gain advantages as they progress.
Strategized Combat: Provide variety through the combination of weapons and path options allowing the player to strategize for encounters.
Reuse of space: Back to the same place from a different perspective through shortcuts or involvement in a different combat, making the place more meaningful and memorable.
Design Discussion
Exploration Emphasized
Critical Path & Conveyance
A broad objective that can be seen in distance, allows the player to find the path to get near as they explore by good conveyance.
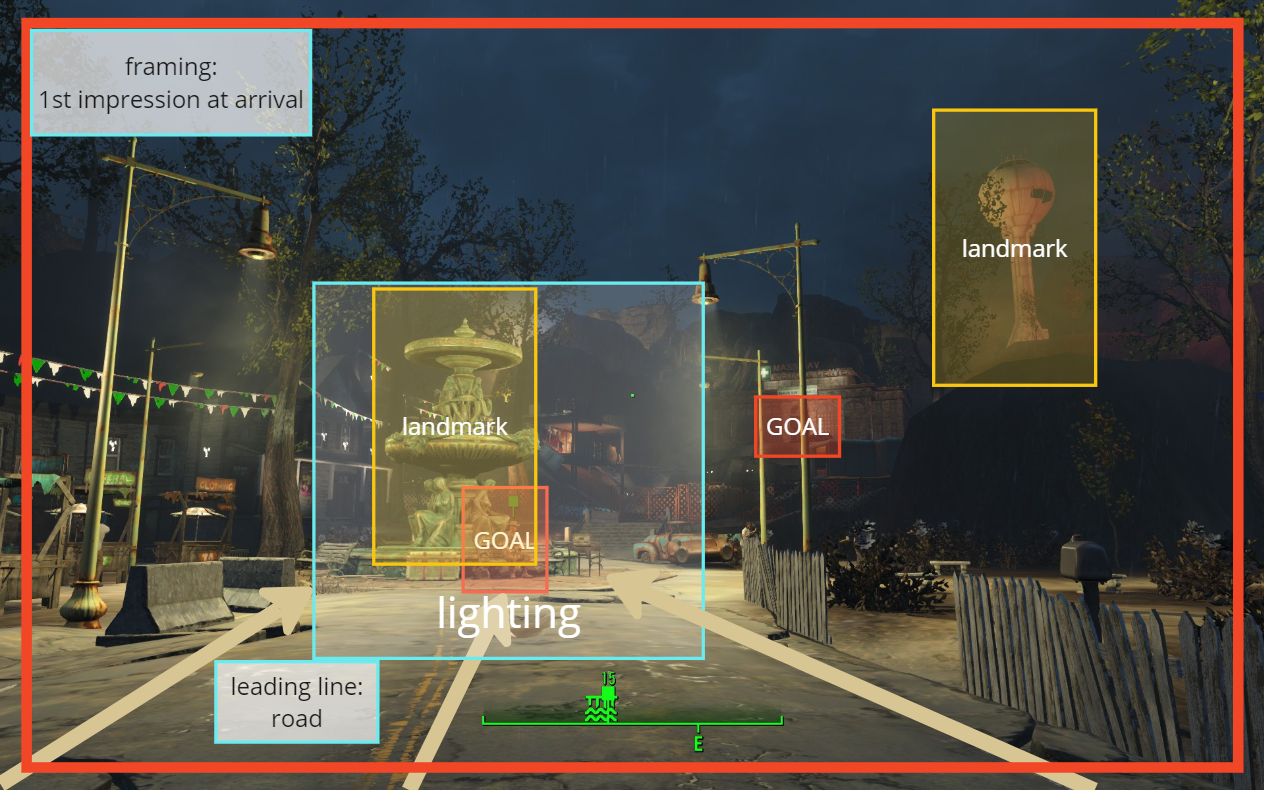
Framing for goals at arrival: Quest NPC at Fountain -> Preview next quest space Clinic on the hill 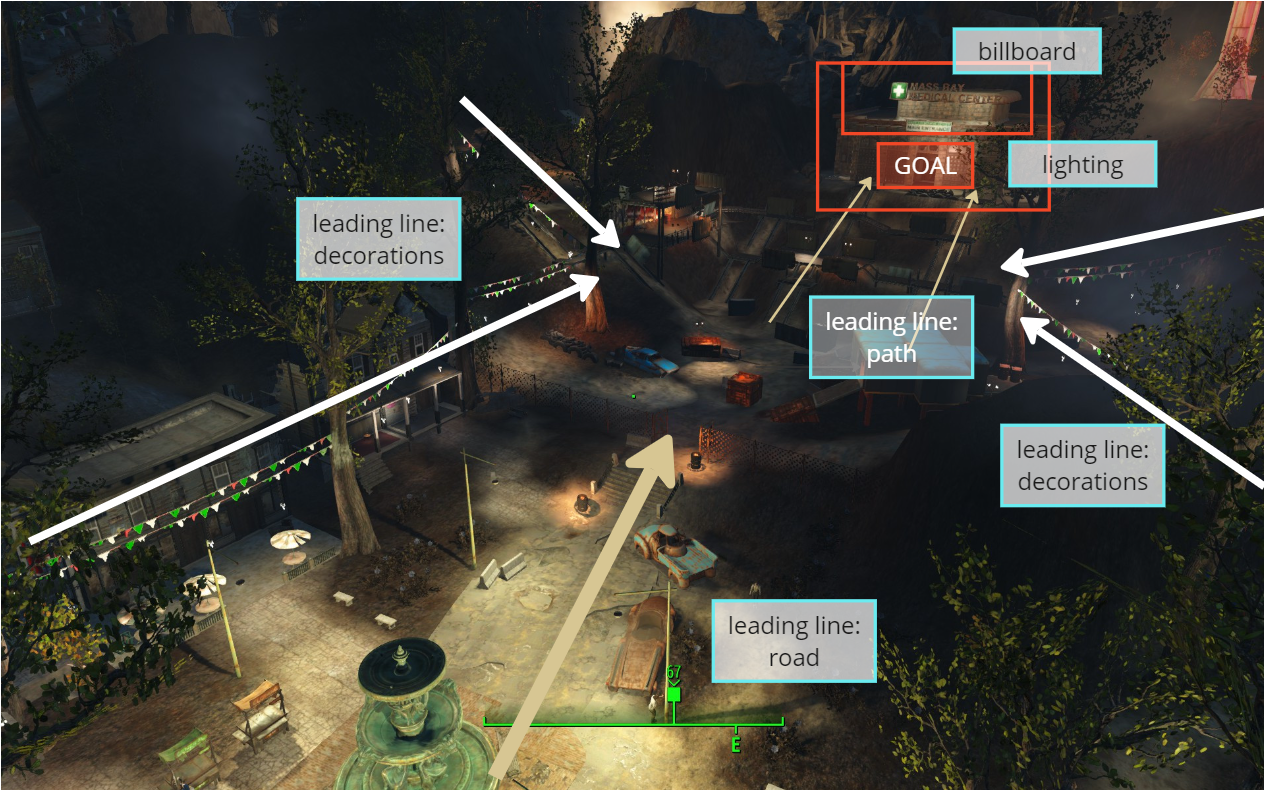
Leading lines towards the Clinic: paths and decorations 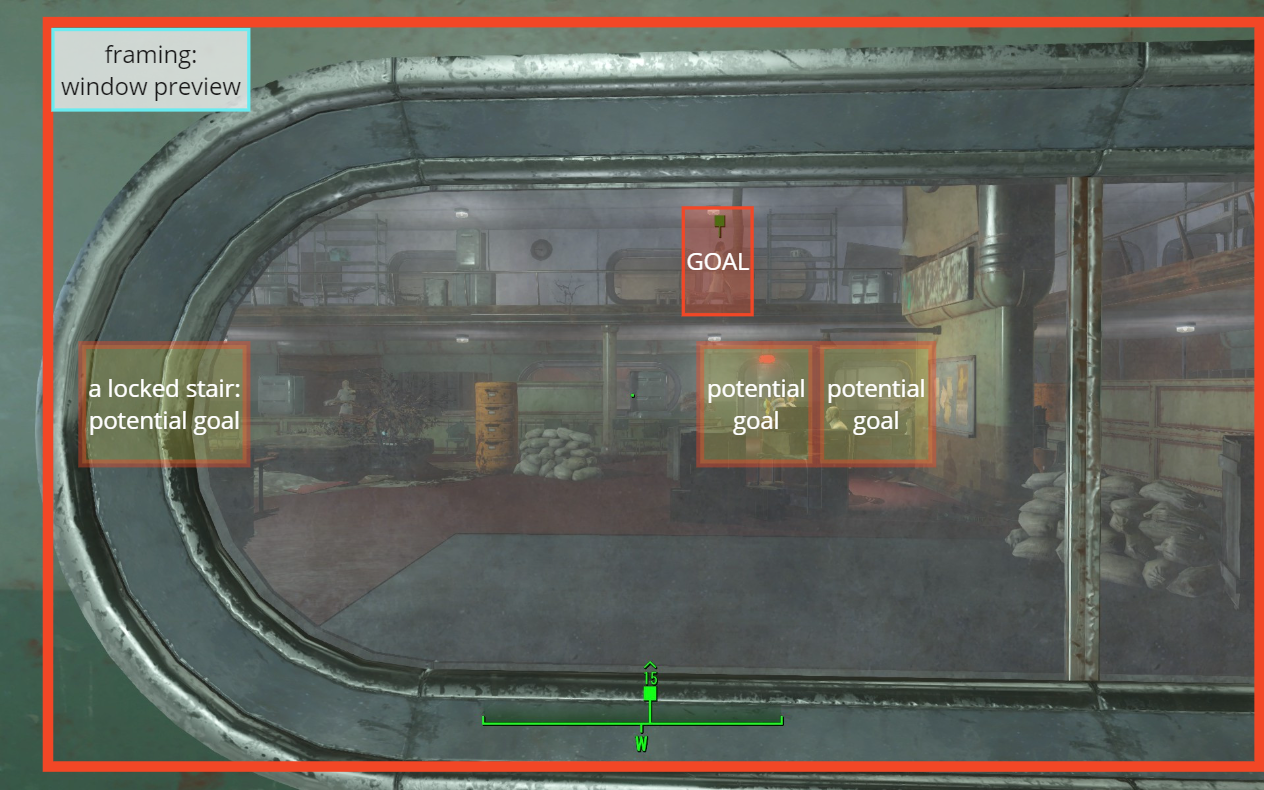
Framing preview at Clinic entrance: potential goals & quest NPC, encourage players to find a way to get to 2nd floor 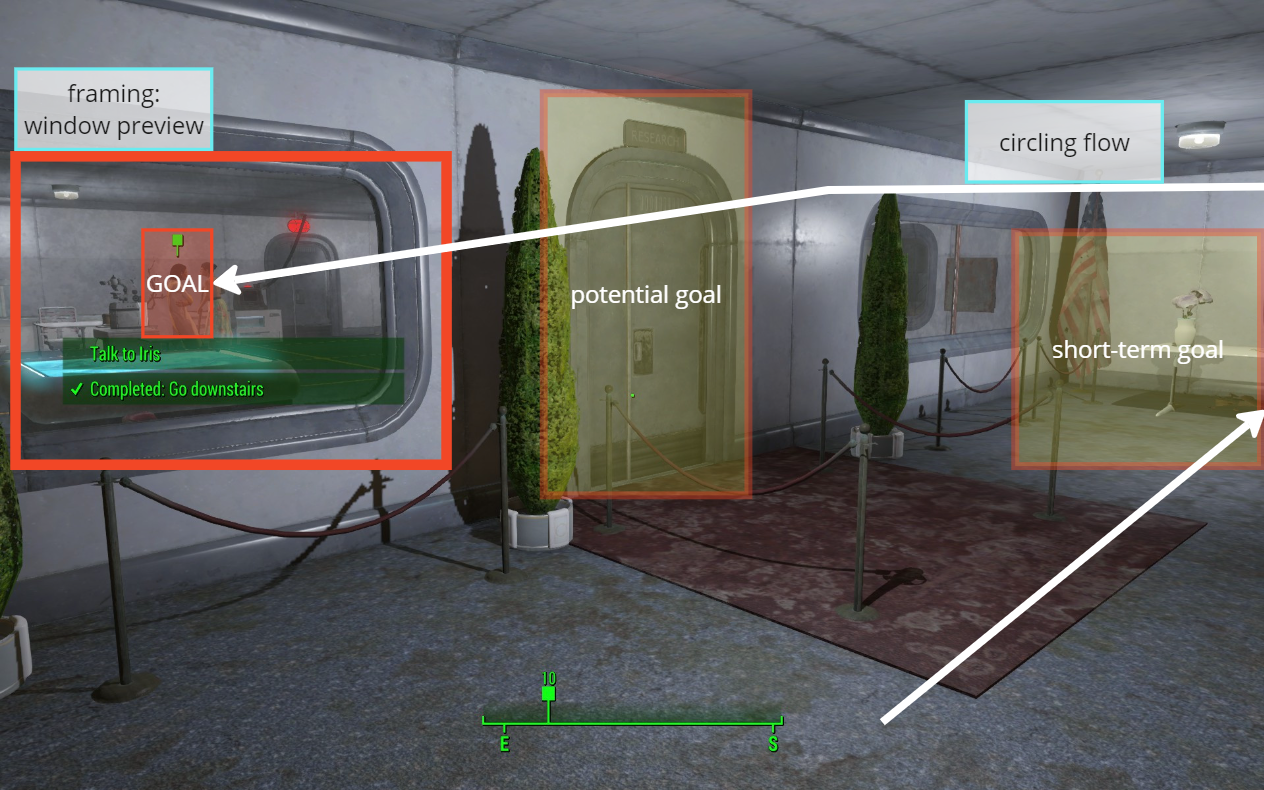
Framing preview for Lab: quest NPC, encourage the player to find a way to get in
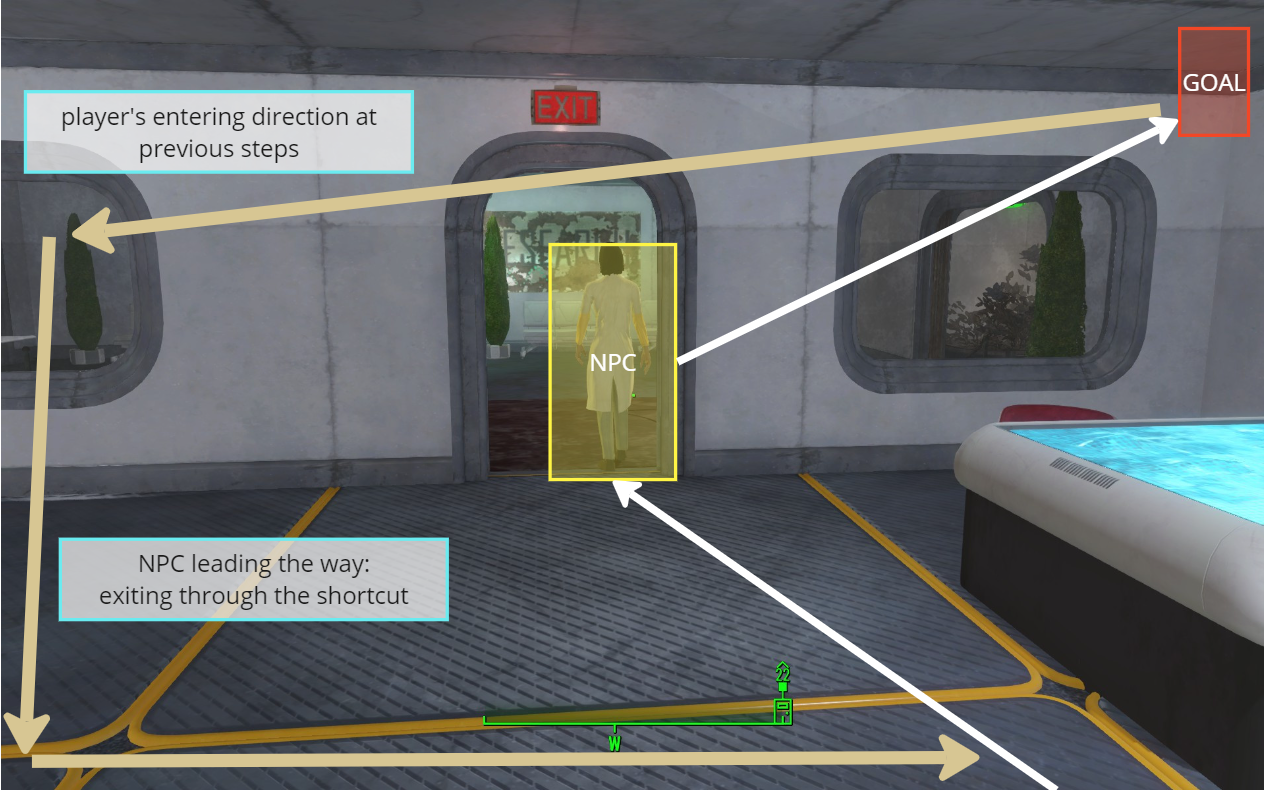
NPC Leading the Way

Optional Exploration Opportunities
- Journal entries in terminals (requires hacking) and notes.
- Talk to NPCs not included in the critical path to gain extra information and understanding of the story.
- Side quest for background story about main character Iris.
- Bonus mini side quest about returning a teddy bear to a girl’s mother.
- Many lockpicks required rooms and containers for extra supplies.
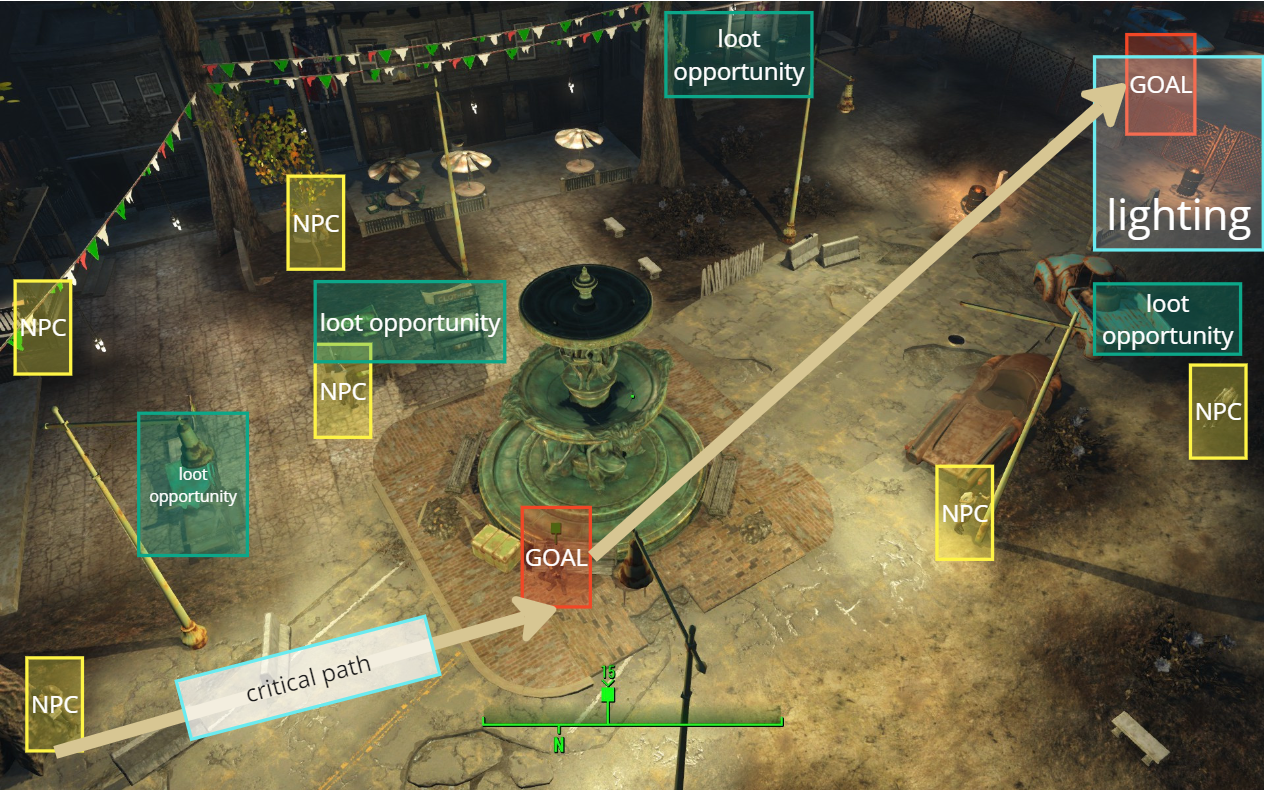
Optional NPCs to talk to and loot opportunities around the critical path (relatively darker lighting to deviate from the main paths) 
Optional NPCs to talk to and loot opportunities in the Clinic Patients’ Room (allow for more contextual information introduced to the player through dialogues) 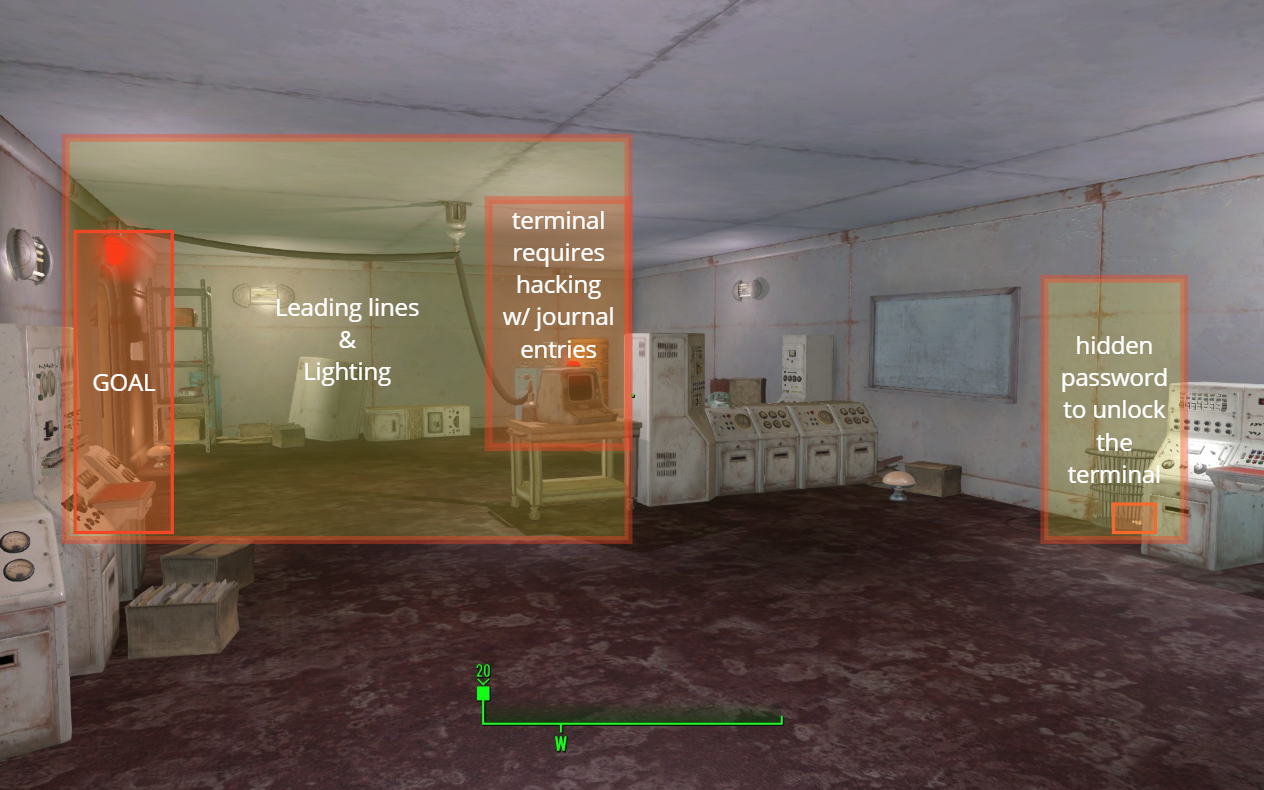
Terminal Puzzle designed with hacking minigame, hidden password for exploratory players, clear affordance and feedback on the door lights to help player understand the gameplay
Strategized Combat
Enemy Combination & Guided Flow
The enemies are organized into waves based on death counters. With carefully designed spawn delays and placement guidance, players are encouraged to fully traverse the combat space and progress toward their goals incrementally.
To customize these waves, I developed a new Papyrus script that allows for adjustments in timing and enemy numbers, ensuring a dynamic and engaging experience tailored to the gameplay flow.
Event OnDeath(Actor akKiller)
 pCount.SetValue(pCount.GetValueInt()+1) //death counter
 if pCount.GetValue()==pLength
  pQuest.SetStage(pStage) //quest stage control
  pQuest.SetObjectiveCompleted(pStage2)
 EndIf
 if pCount.GetValue()==waveCounter1
  Utility.Wait(Timer) //spawn delay to give player a rest
  pEnableMarker1.Enable() //spawn second wave
  if pDoor1 != None
   pDoor1.Lock(false)
   pDoor1.SetOpen(true) //open spawn closet
  endif
 EndIf
 if pCount.GetValue()==waveCounter2
  Utility.Wait(Timer2) //spawn delay to give player a rest
  pEnableMarker2.Enable() //spawn third wave
  if pDoor2 != None
   pDoor2.Lock(false)
   pDoor2.SetOpen(true) //open spawn closet
  endif
 EndIf
EndEvent
Melee and ranged enemies are strategically placed in groups to enhance gameplay dynamics. Most enemies are assigned preferred covers and idle markers, ensuring they occupy positions that promote a general flow toward the player’s objectives.

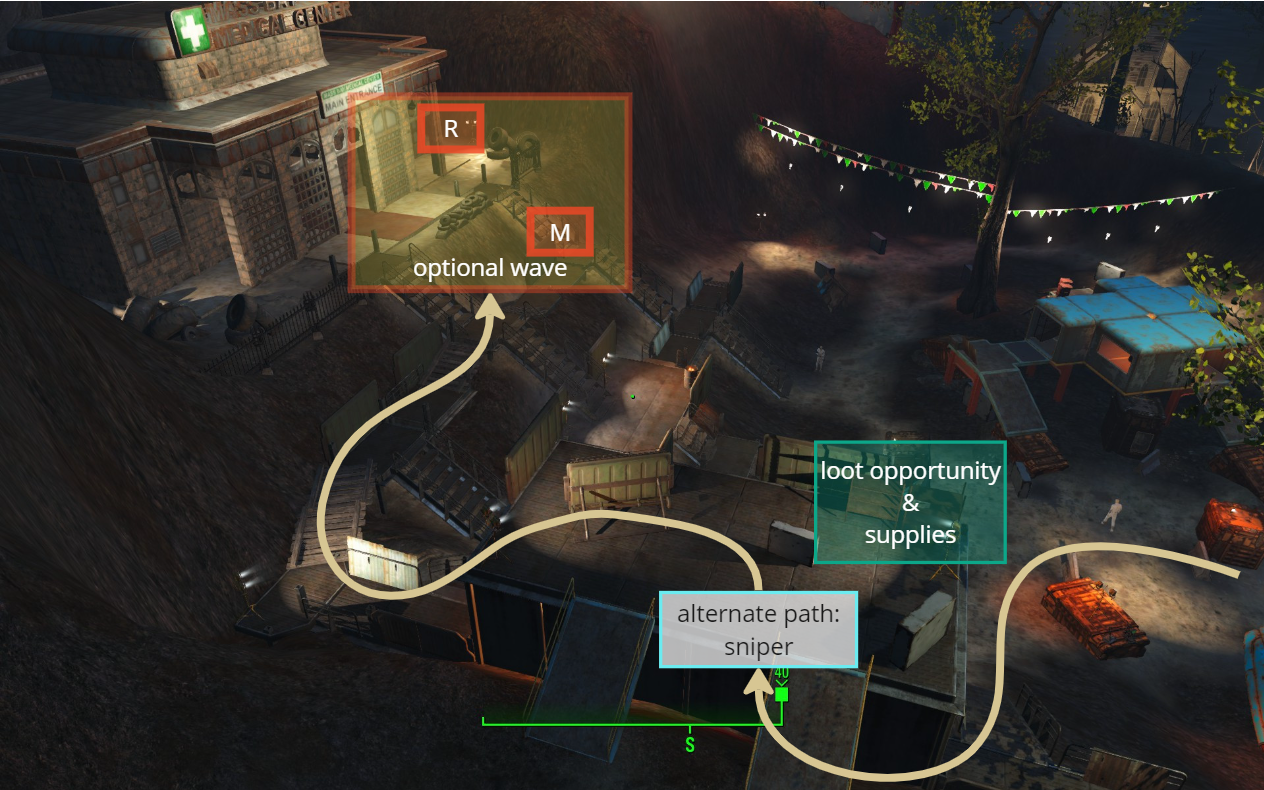
Wave Flow for Exterior Encounter -> normal, sniper, stealth paths designed to support various playstyles 
Wave Flow at Clinic Hall -> multiple spawn closets to motivate the player to move around the space 
Enemy Leading way towards the goal NPC -> enemy linked with preferred cover spot to motivate player moving forward
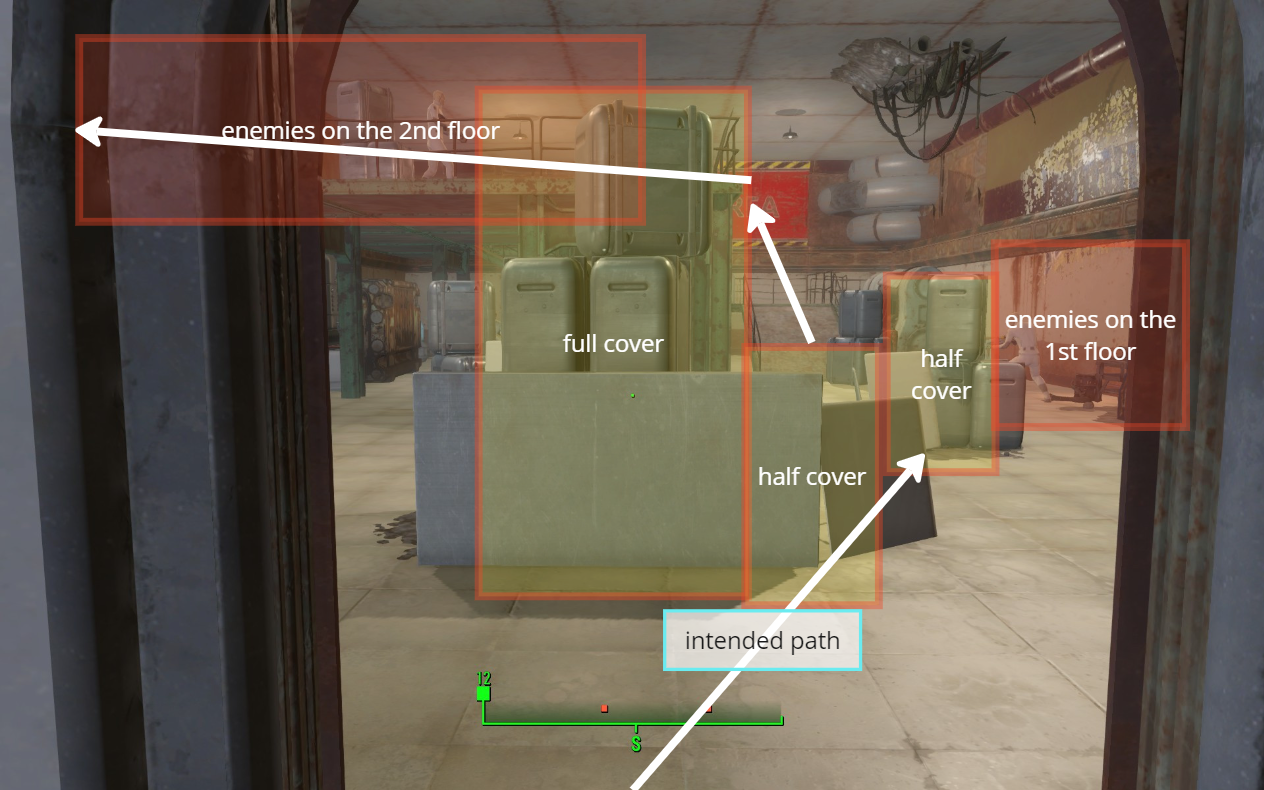
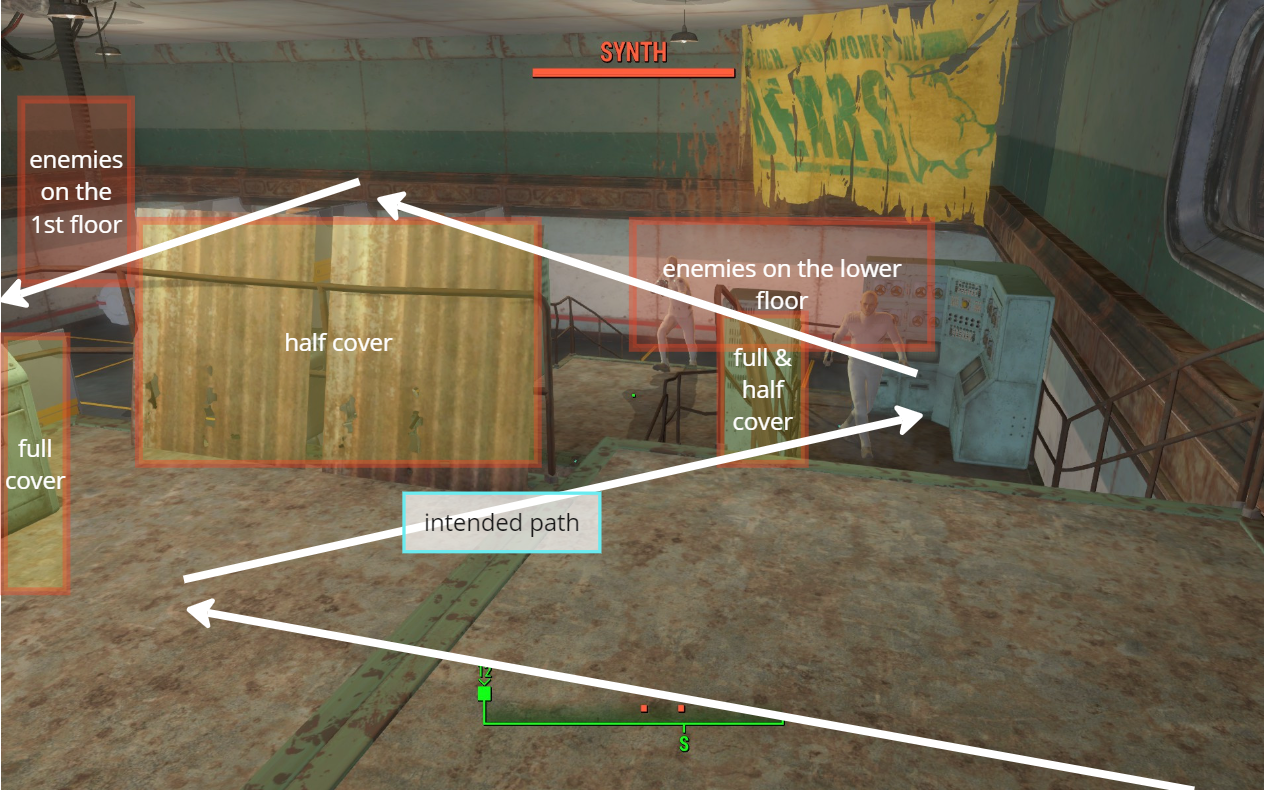
Cover Selection & Verticality
Most encounters are designed with verticality in mind. To provide a safe point of entry, several tall cover structures are strategically placed, accompanied by a series of half covers that guide players’ sightline as they move forward. This layout encourages players to utilize height advantages while navigating through the combat spaces.
Weapon Combination & Strategized Ammo Supply
- The level offers players three types of ranged weapons:
- a 10mm pistol for short-range combat
- an Institute rifle for medium-range engagements
- a combat rifle with a sniper mod for long-range attacks.
- Players can switch between these weapons to adapt their strategies for each encounter.
- Institute rifles and their ammo are primarily found on defeated enemies and within lockpick-required containers, making them valuable resources that players must gather throughout the level, adding an extra layer of challenge to encounters.
- The exterior combat space is designed with long-range enemy placements to encourage the use of the sniper mod on the combat rifle. Additionally, an alternate path is provided, offering players sniper options to take down enemies from a distance, enhancing strategic gameplay.
Reuse of Space
The level features multiple shortcut doors that enable players to revisit previously explored areas. This design allows players to easily return if they have unfinished optional objectives. When a shortcut is revealed, memorable visuals are strategically placed to remind players of their location, enhancing their navigation experience and encouraging exploration.

Shorcut from Stair Room -> Operation Room. The NPC movement helps the player memorize the place. 
Shorcut from Lab -> Stair Room. The colored lighting on the billboard helps the player memorize the place. 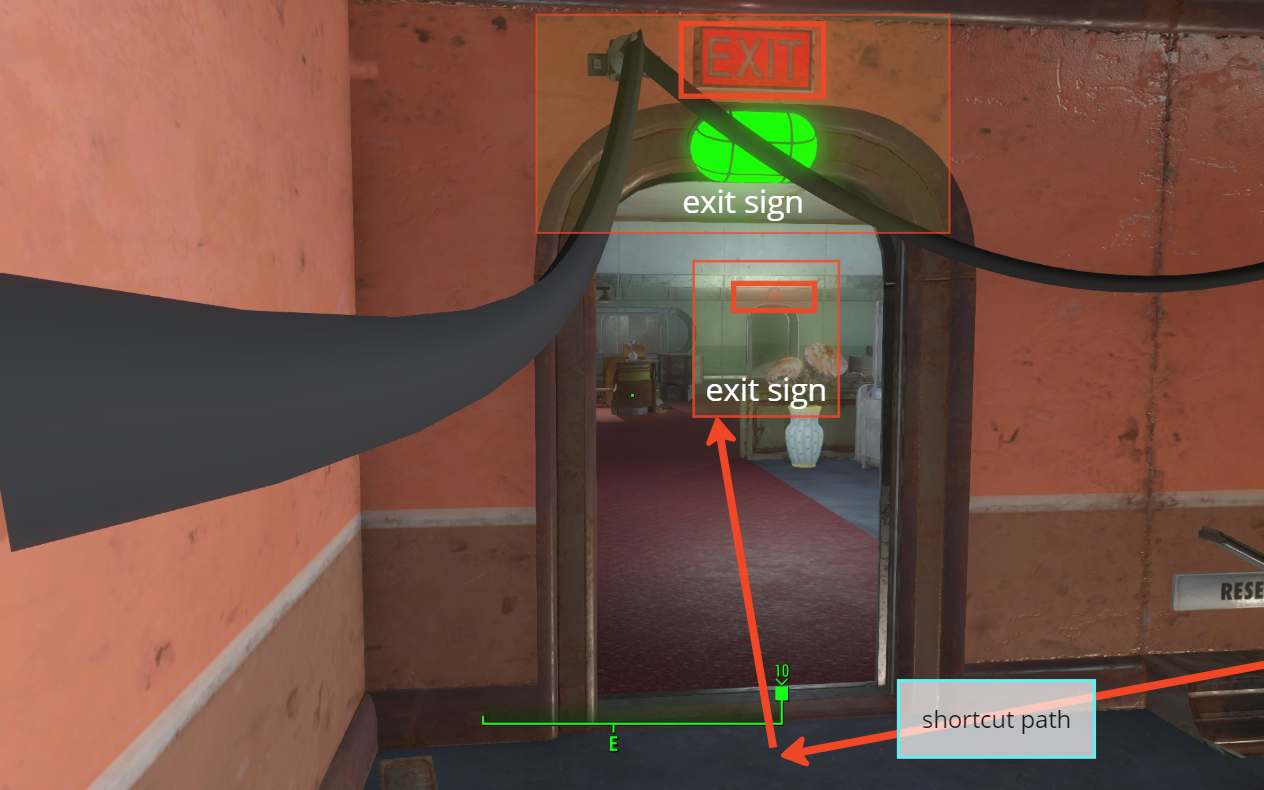
Shortcut from Stair Room -> Exit. The consistant EXIT signs help guide the player’s way. 
Shortcut from 2nd floor -> 1st floor. Provides the player with alternate flow options.
Different Perspectives of Entering the Place
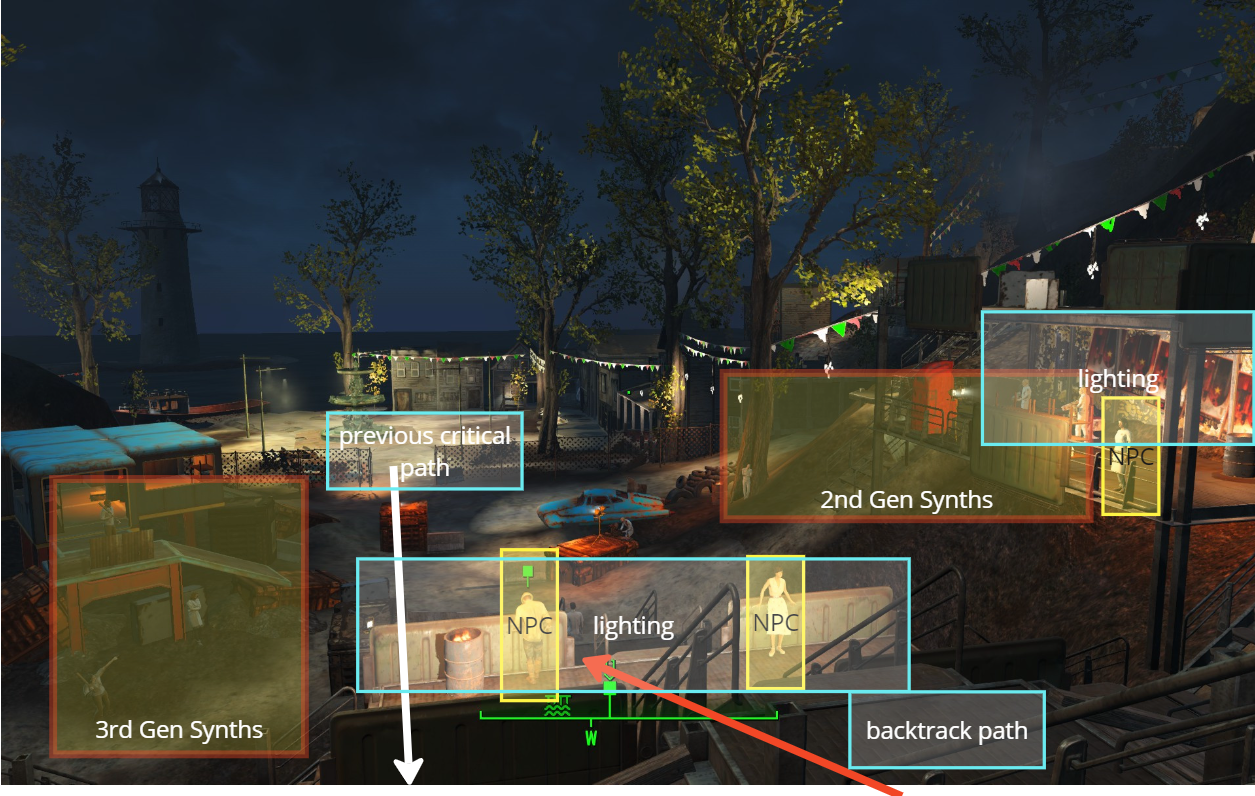
The player first enters the exterior combat space through the gate and revisits it when exiting from the interior, offering distinct perspectives of using the space and varying difficulty for each encounter.
As the player approaches this area, they’ll find the 2nd Generation Synths positioned on the right alongside Iris, while the 3rd Generation Synths await on the left. This layout provides players with a clear understanding of their options, helping them prepare for the final combat and allowing for strategic decision-making as they choose their side.
Gallery

Radio Stop, the place to start the quest -> a small scene set up at red rocket that blends in the original game context 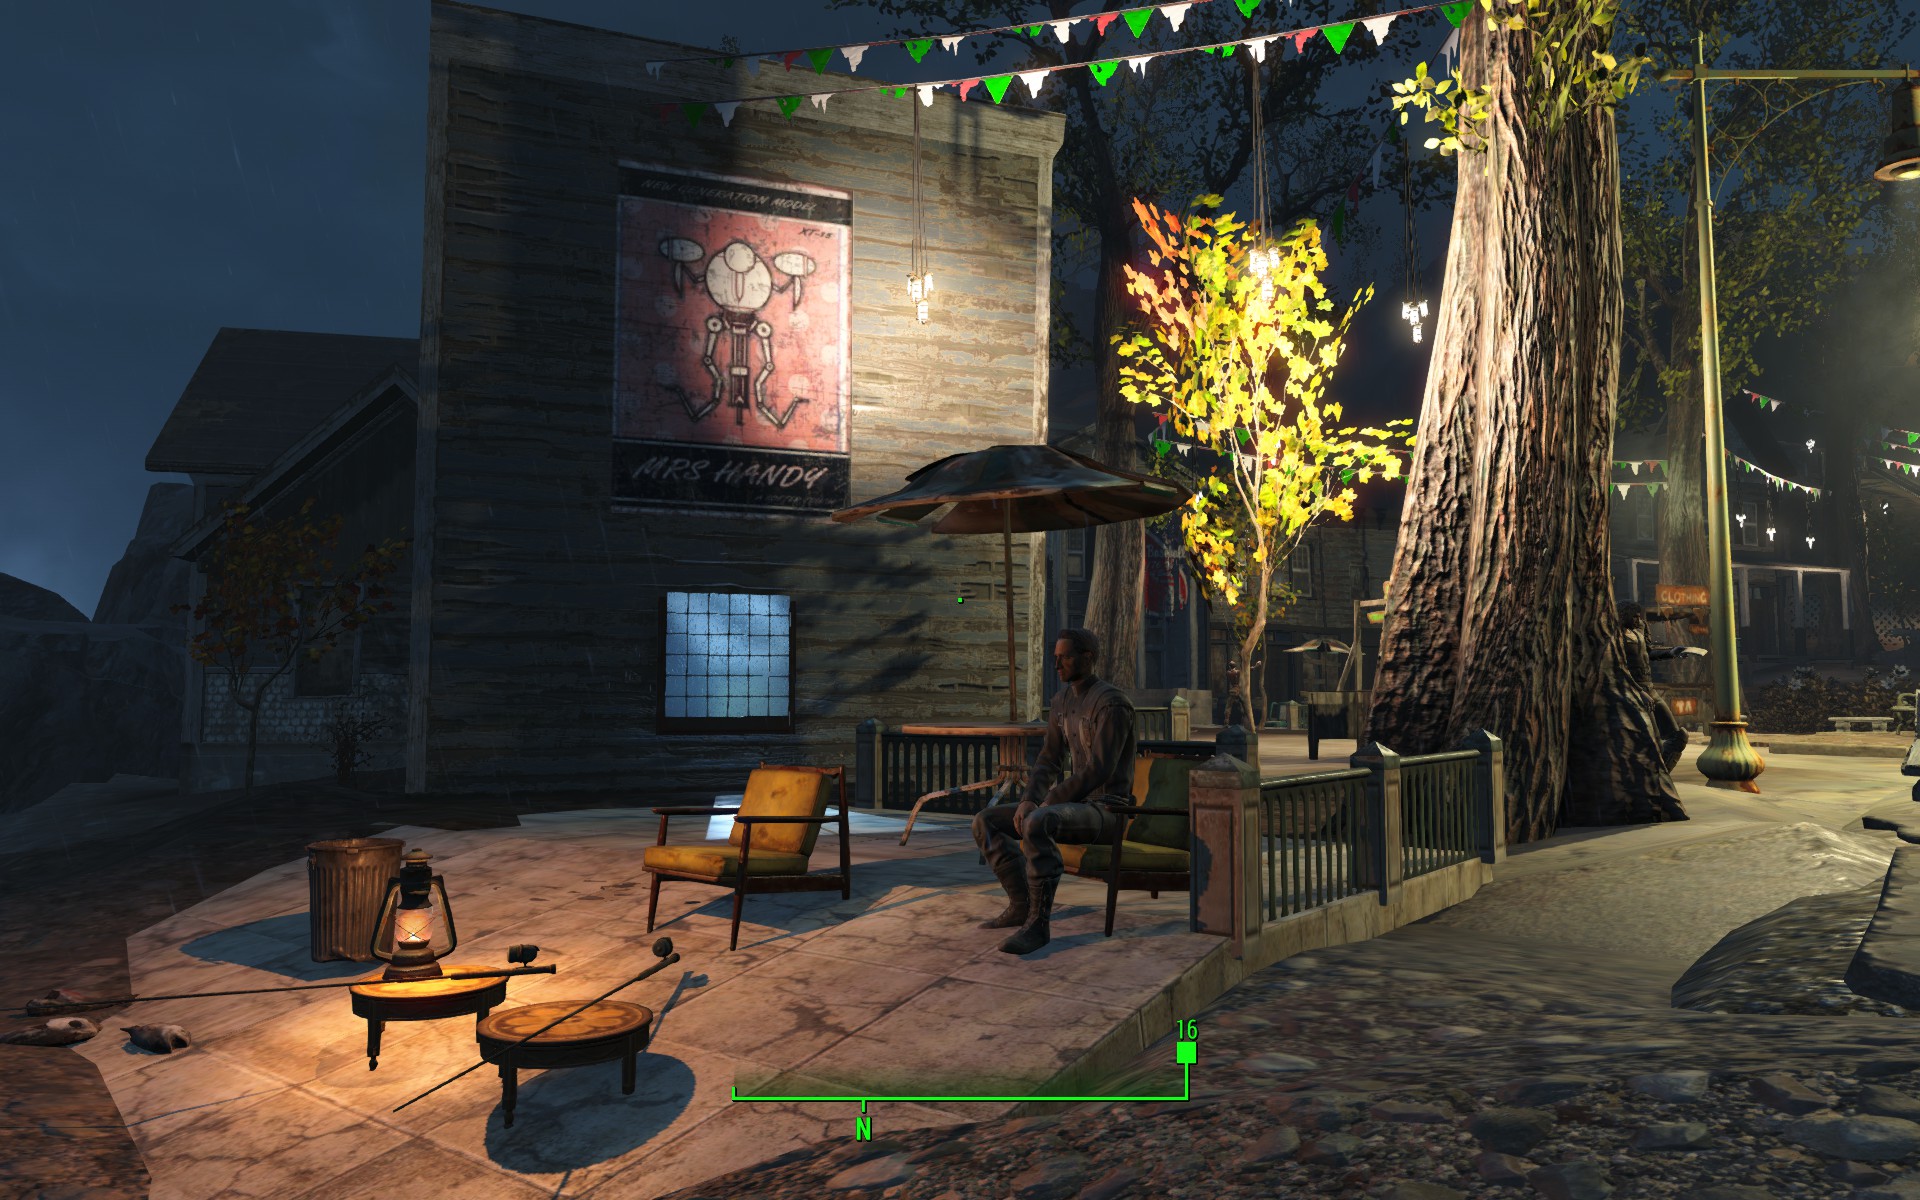
Florentia Pier, an optional NPC that provides extra story related to the main quest, adding a flavor to the story 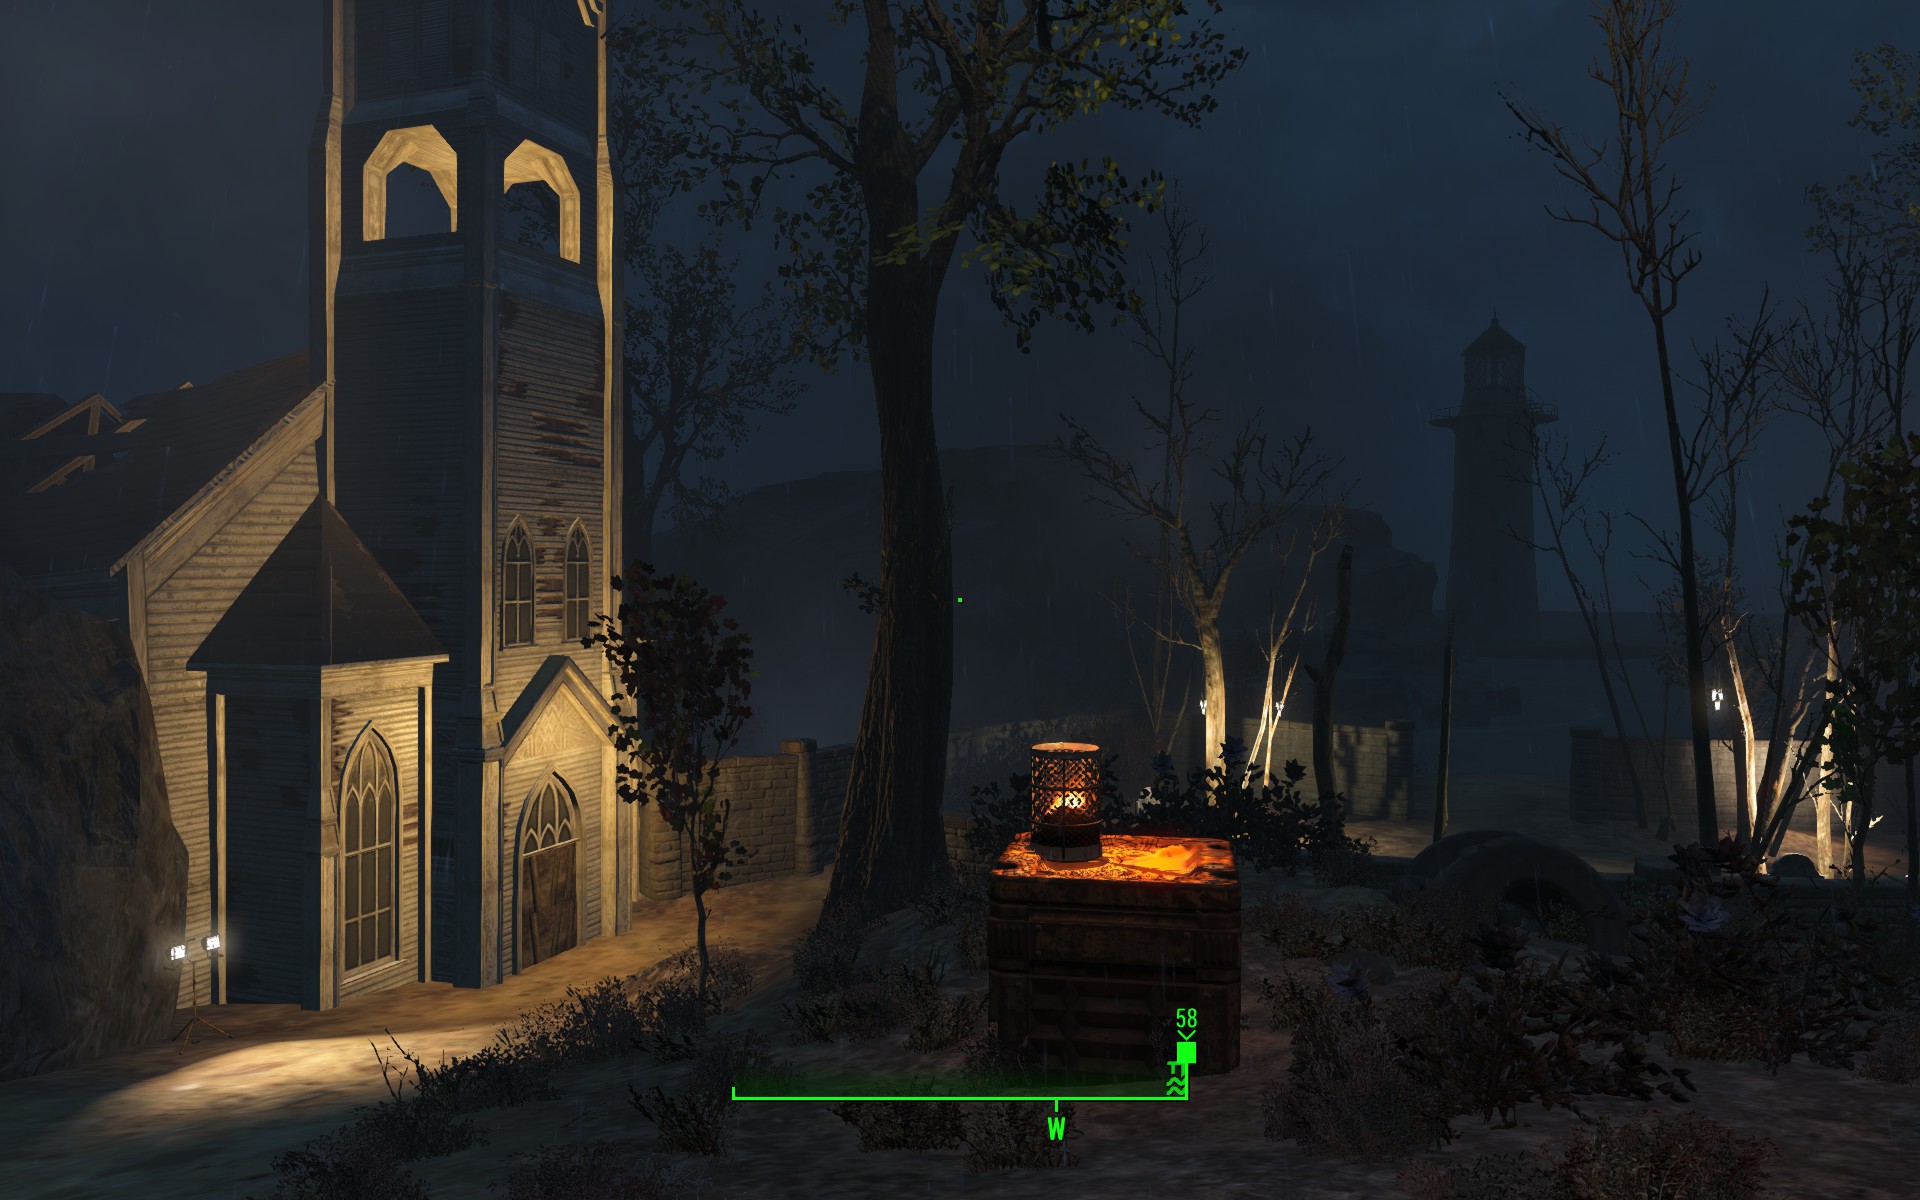
Church & Graveyard, side quest area -> adds contextual story that extends the main quest 
On the way to enter the Clinic -> Lighting contrast on the gate and the Clinic helps guide the player’s way 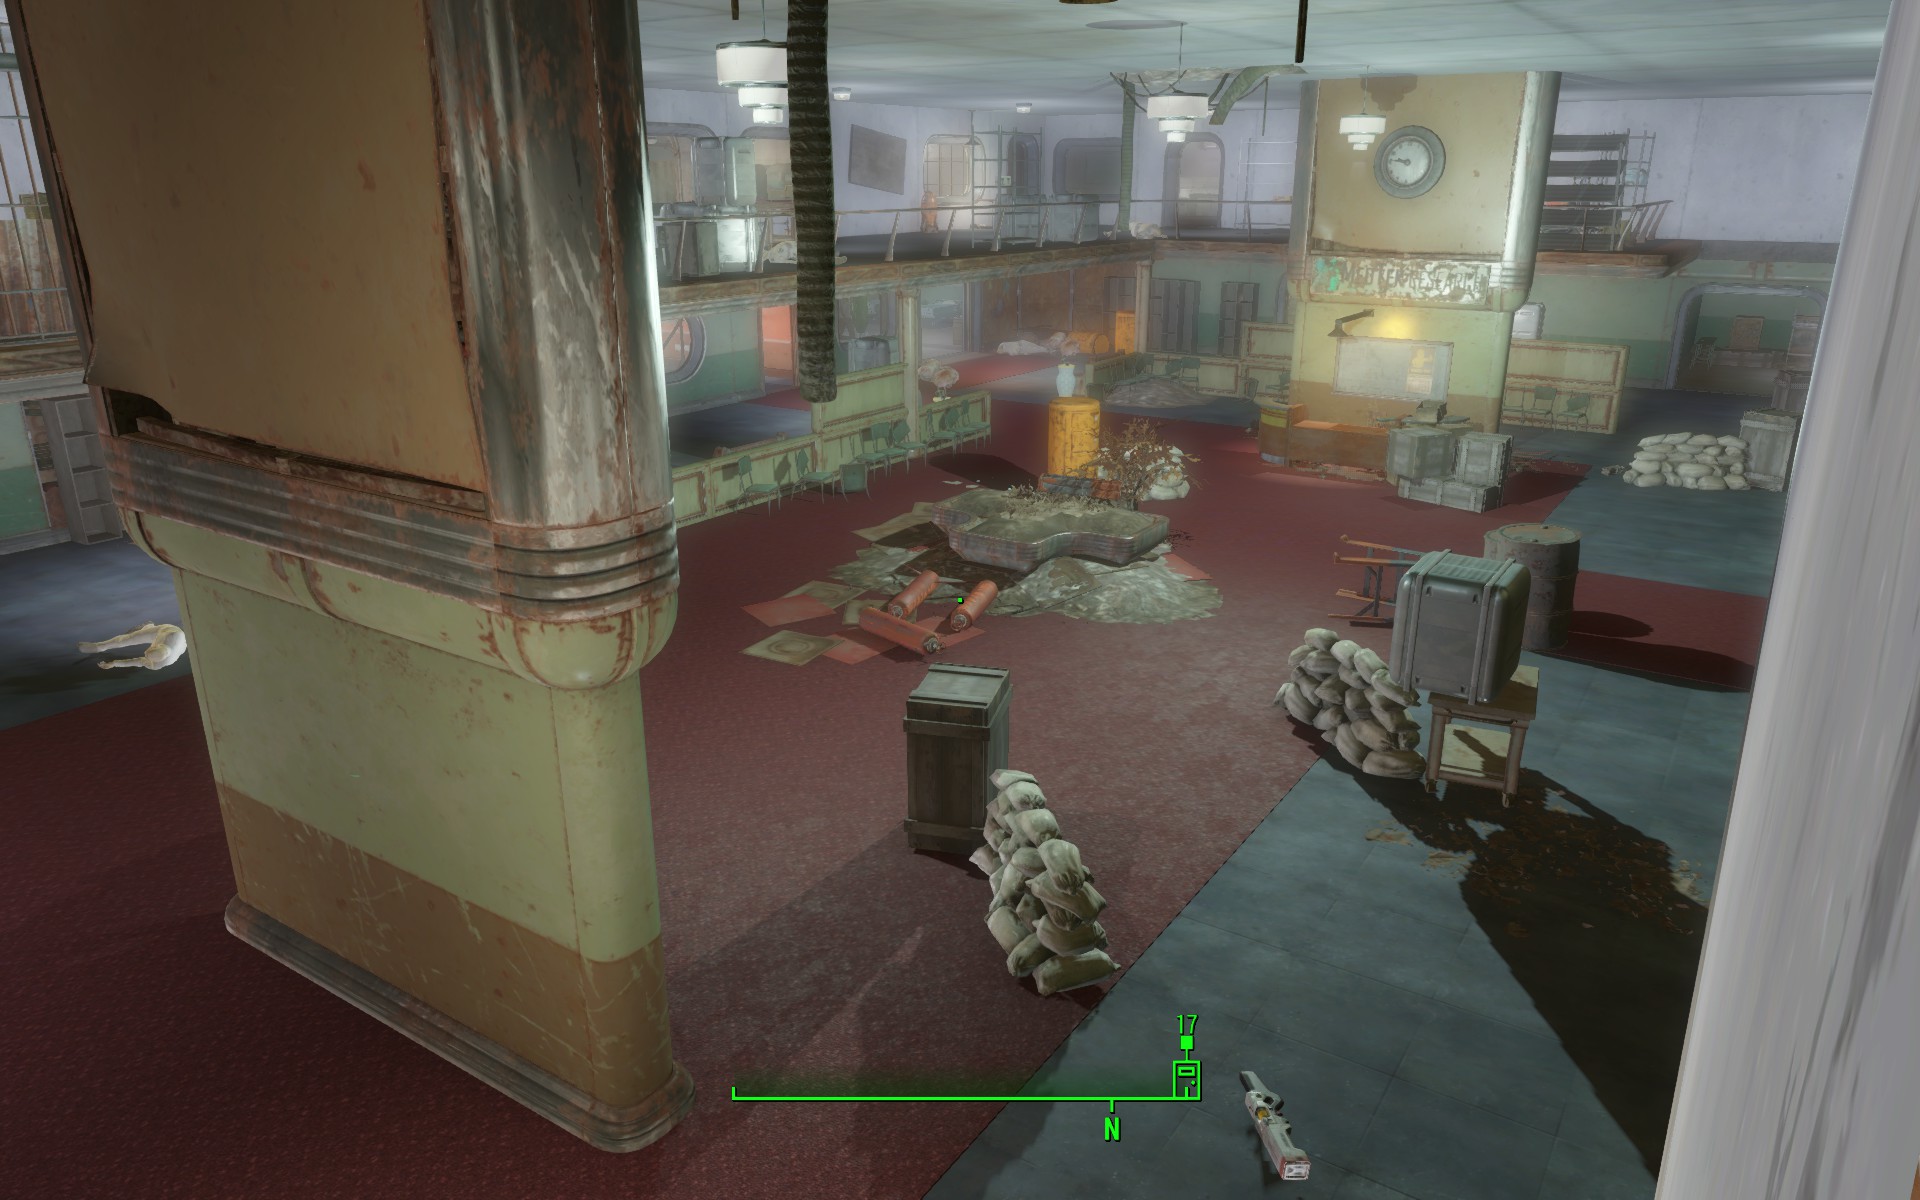
Clinic Hall -> Combat area that provides various covers and flow options 
Clinic Hall alternate view 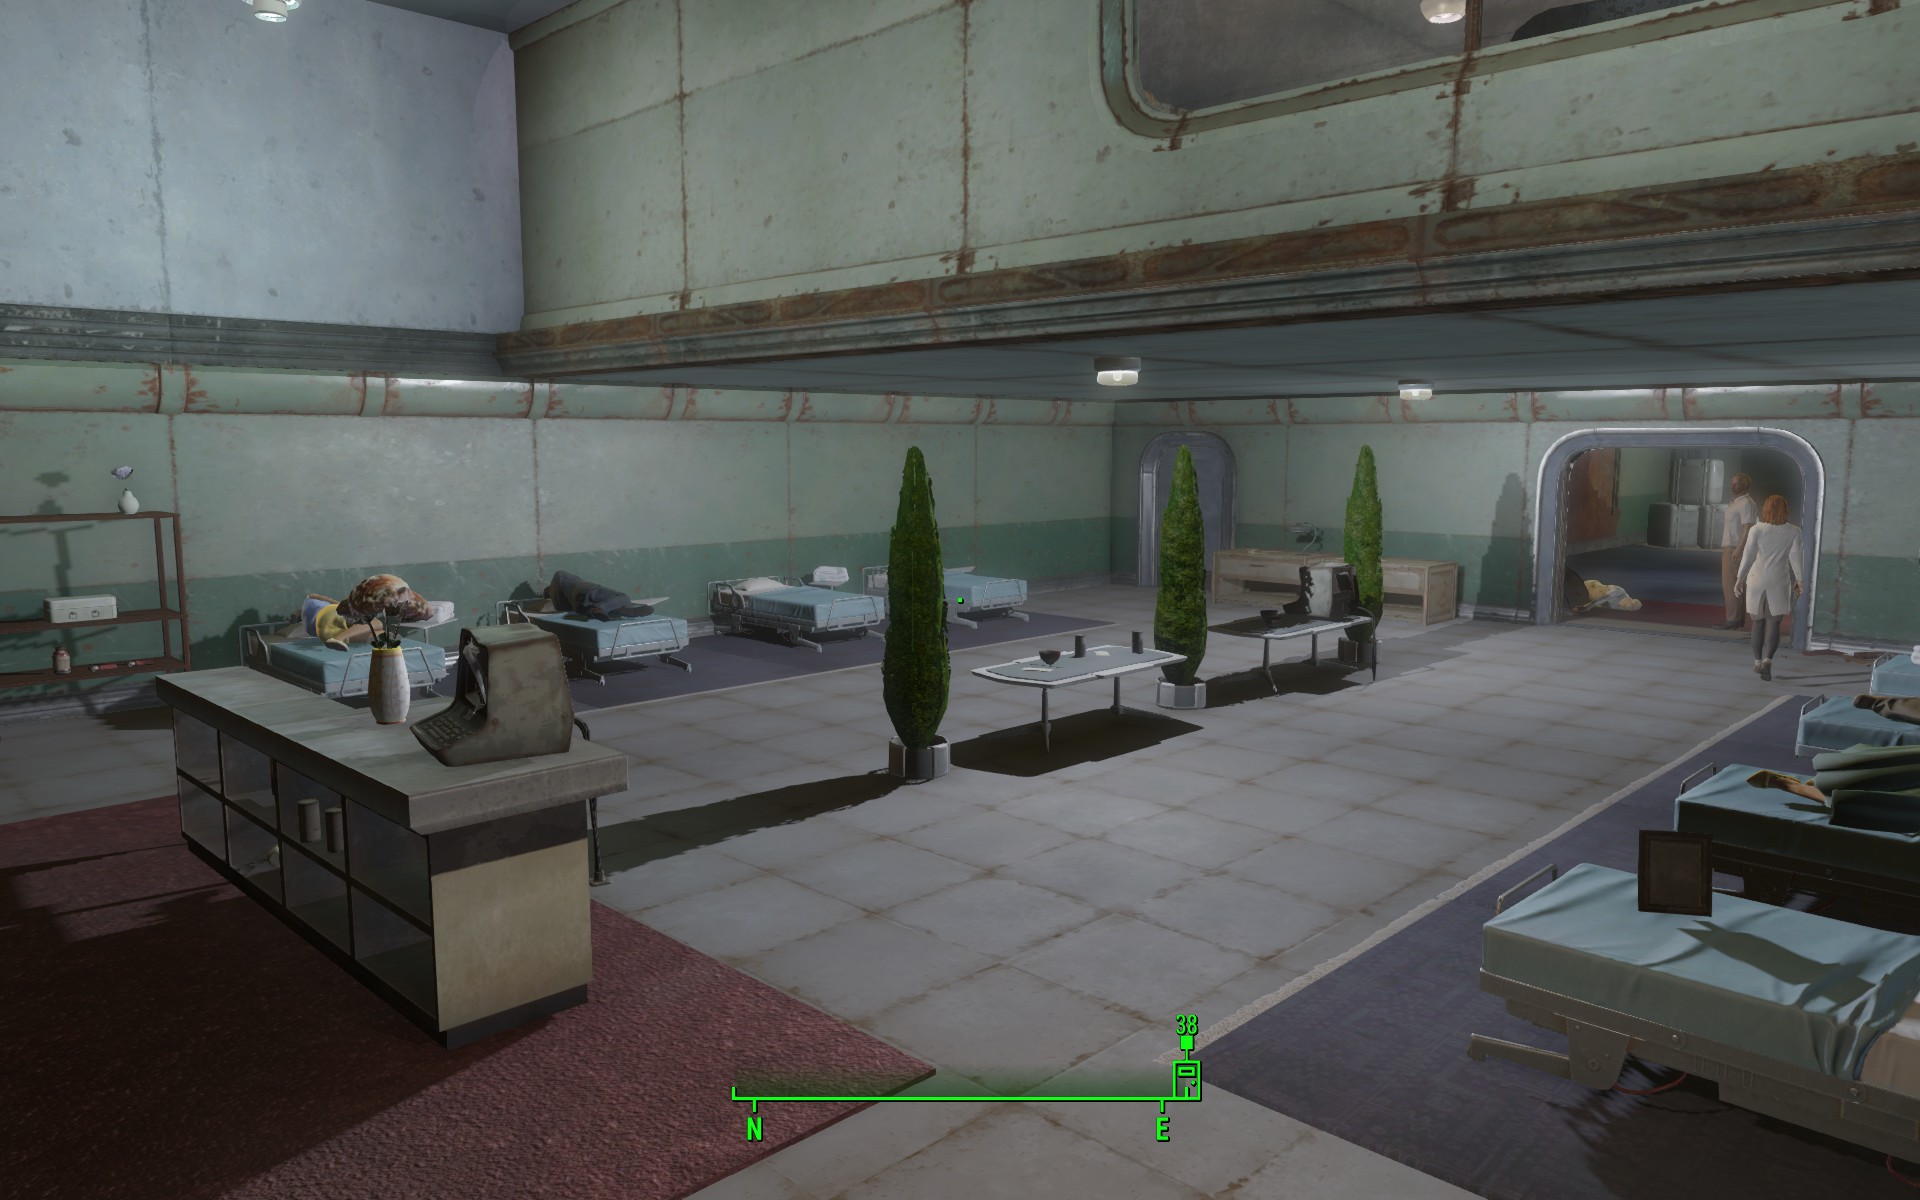
Patients’ Room, optional narrative provided to the player through the patients’ dialogues 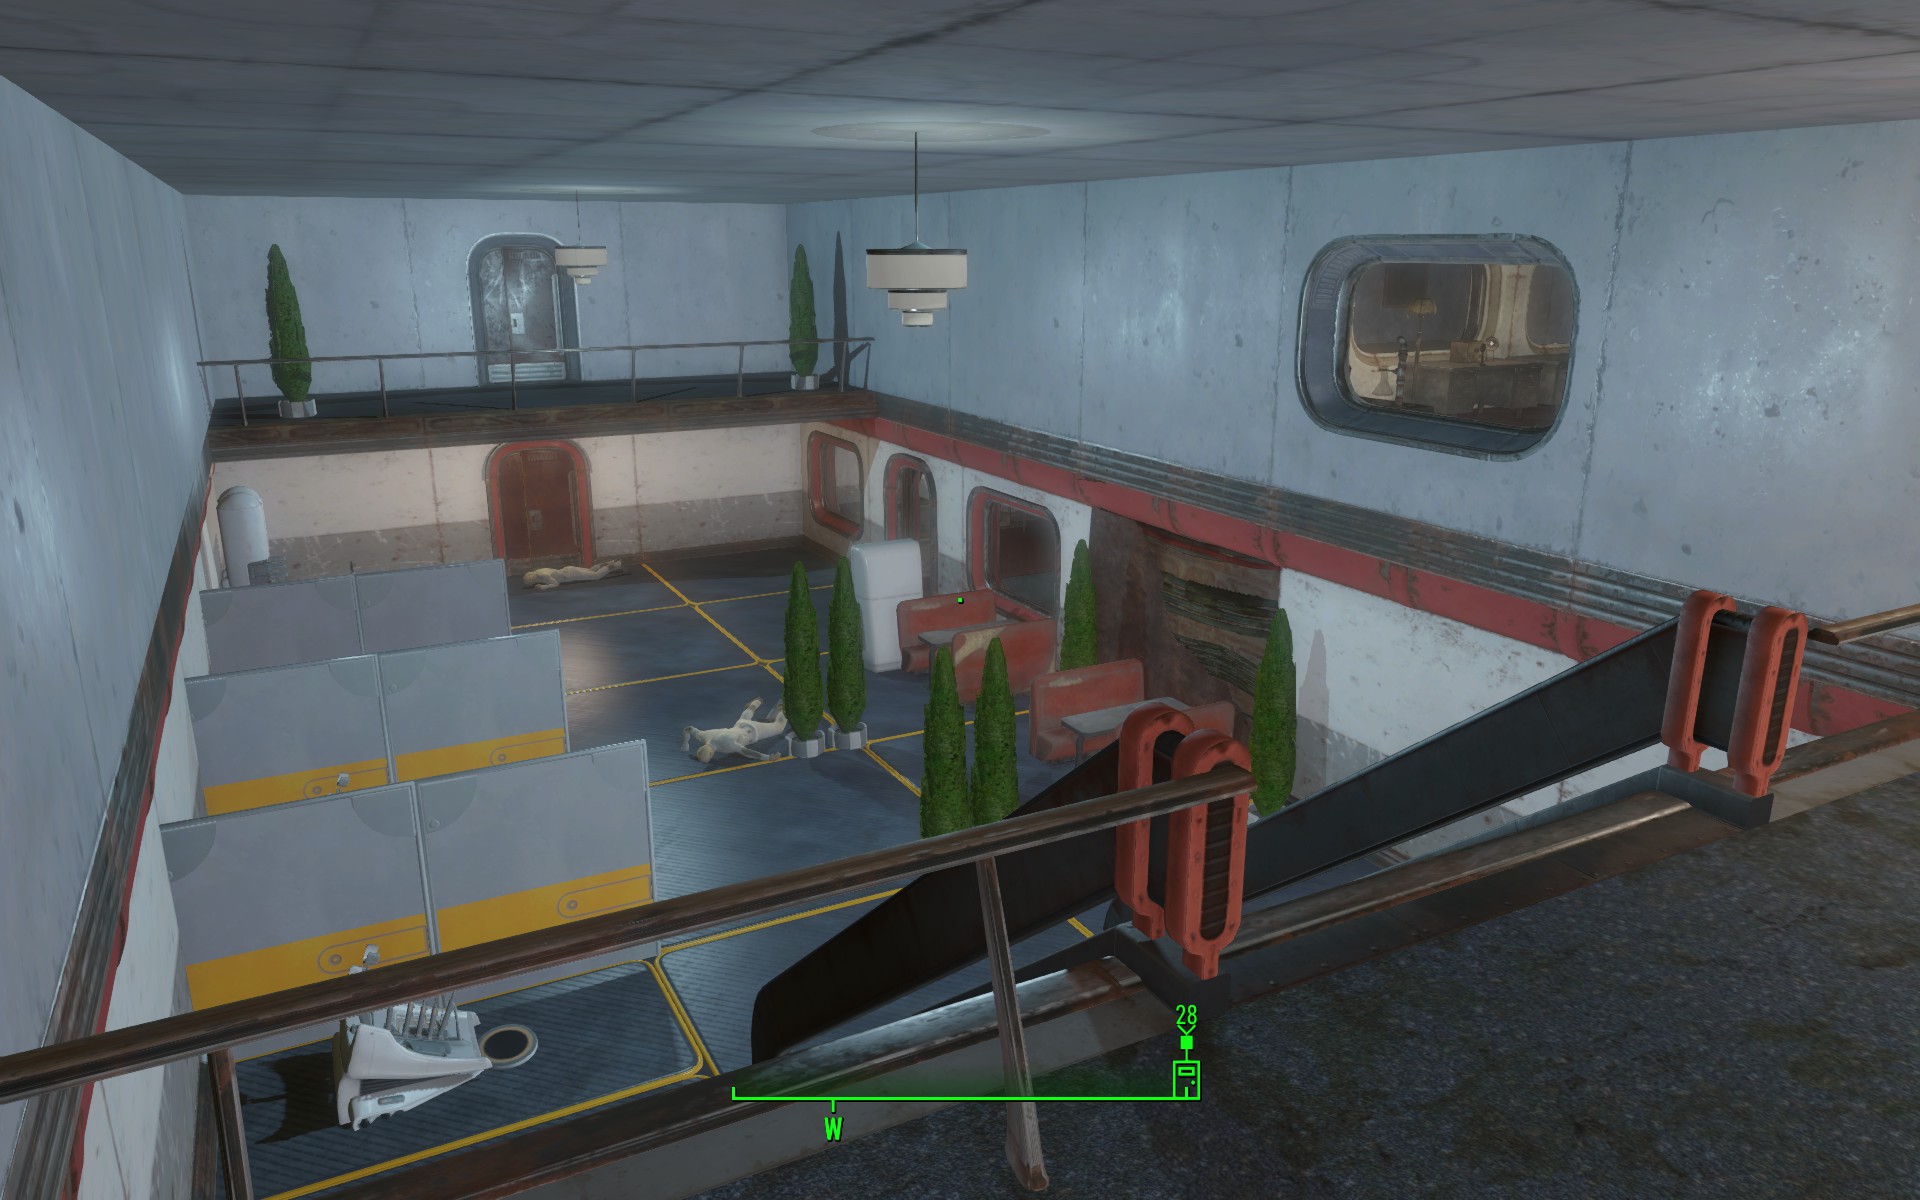
Observation Room, with a nice preview for the radio in the office (on the right) 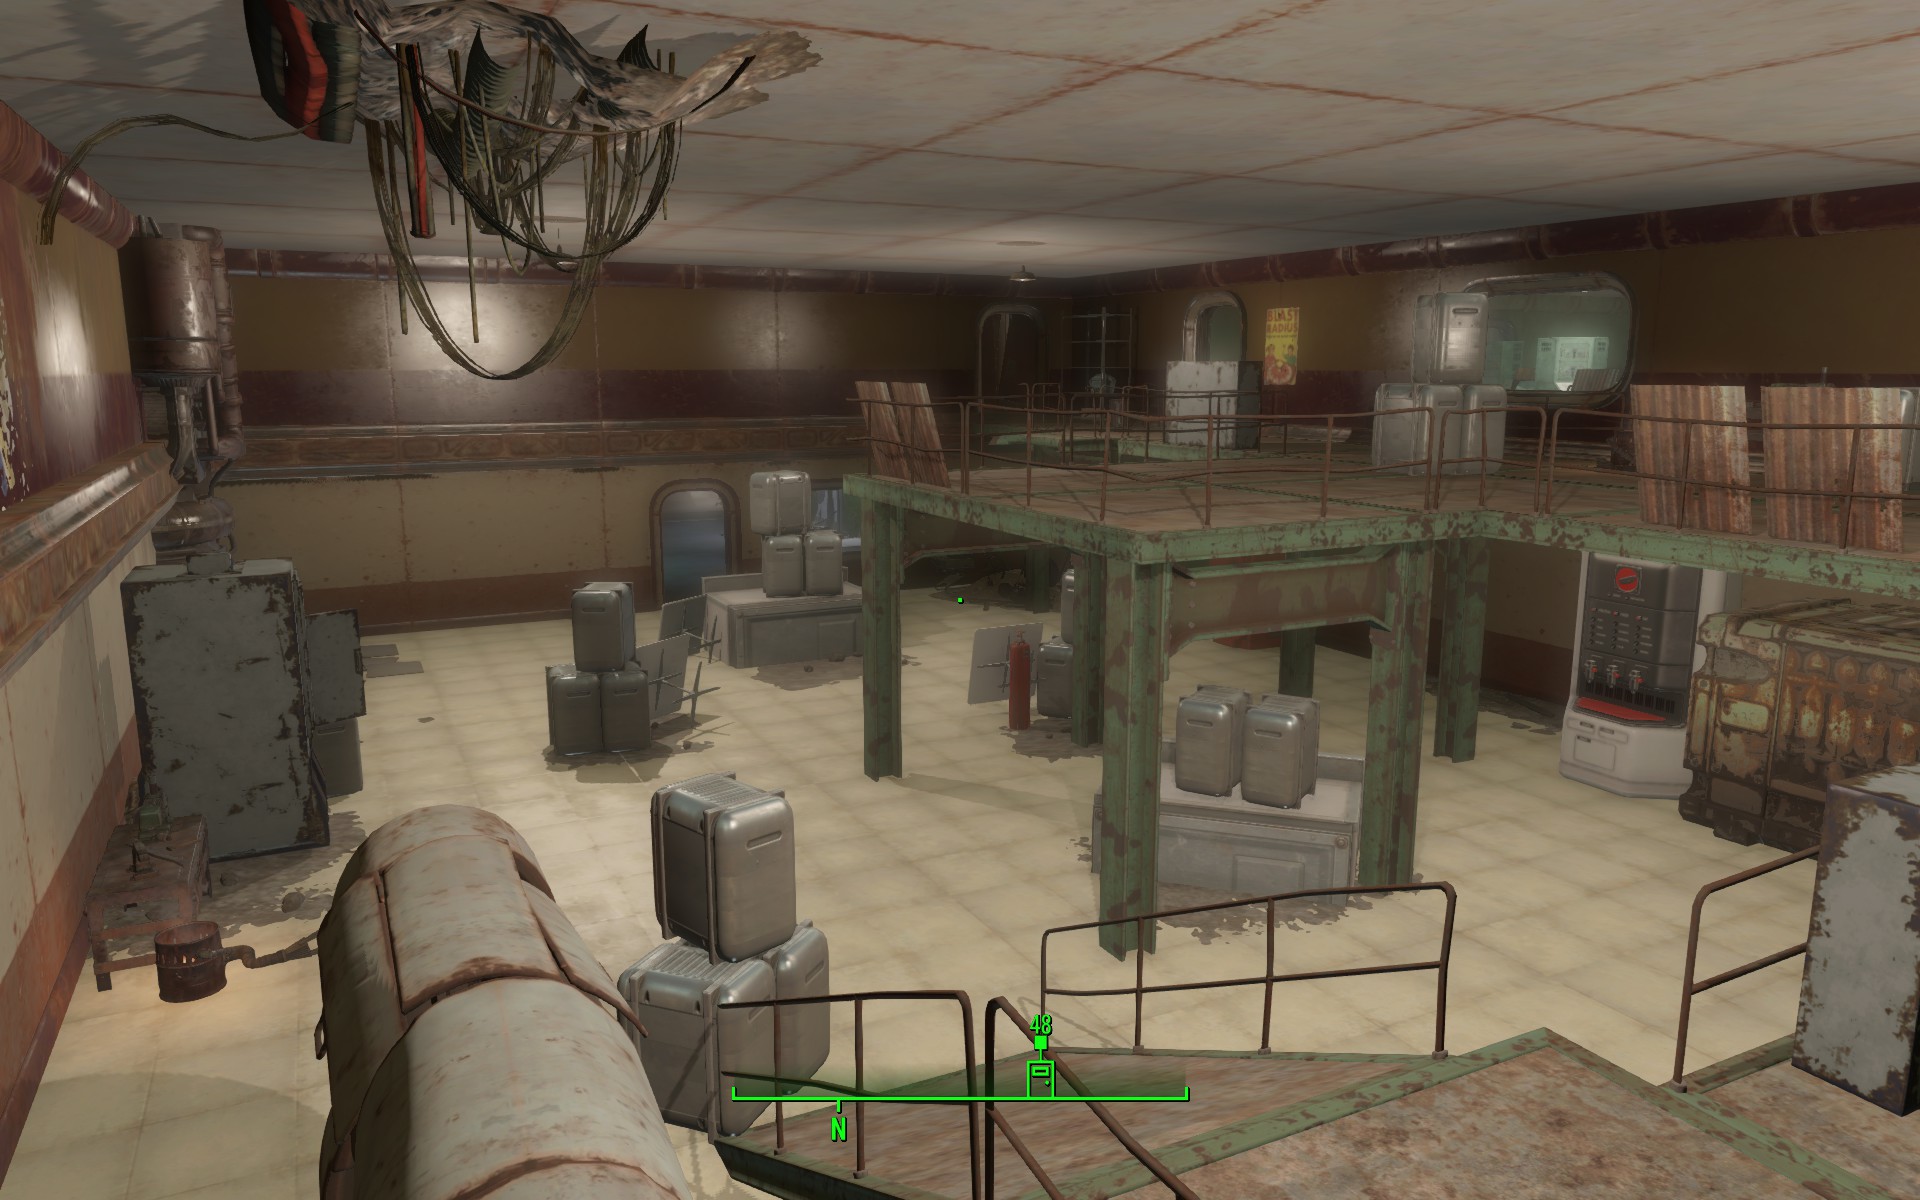
Engine Rooms, combat area, optional narrative for 3rd Gen Synths 
Engine Rooms, combat area, optional narrative for 3rd Gen Synths 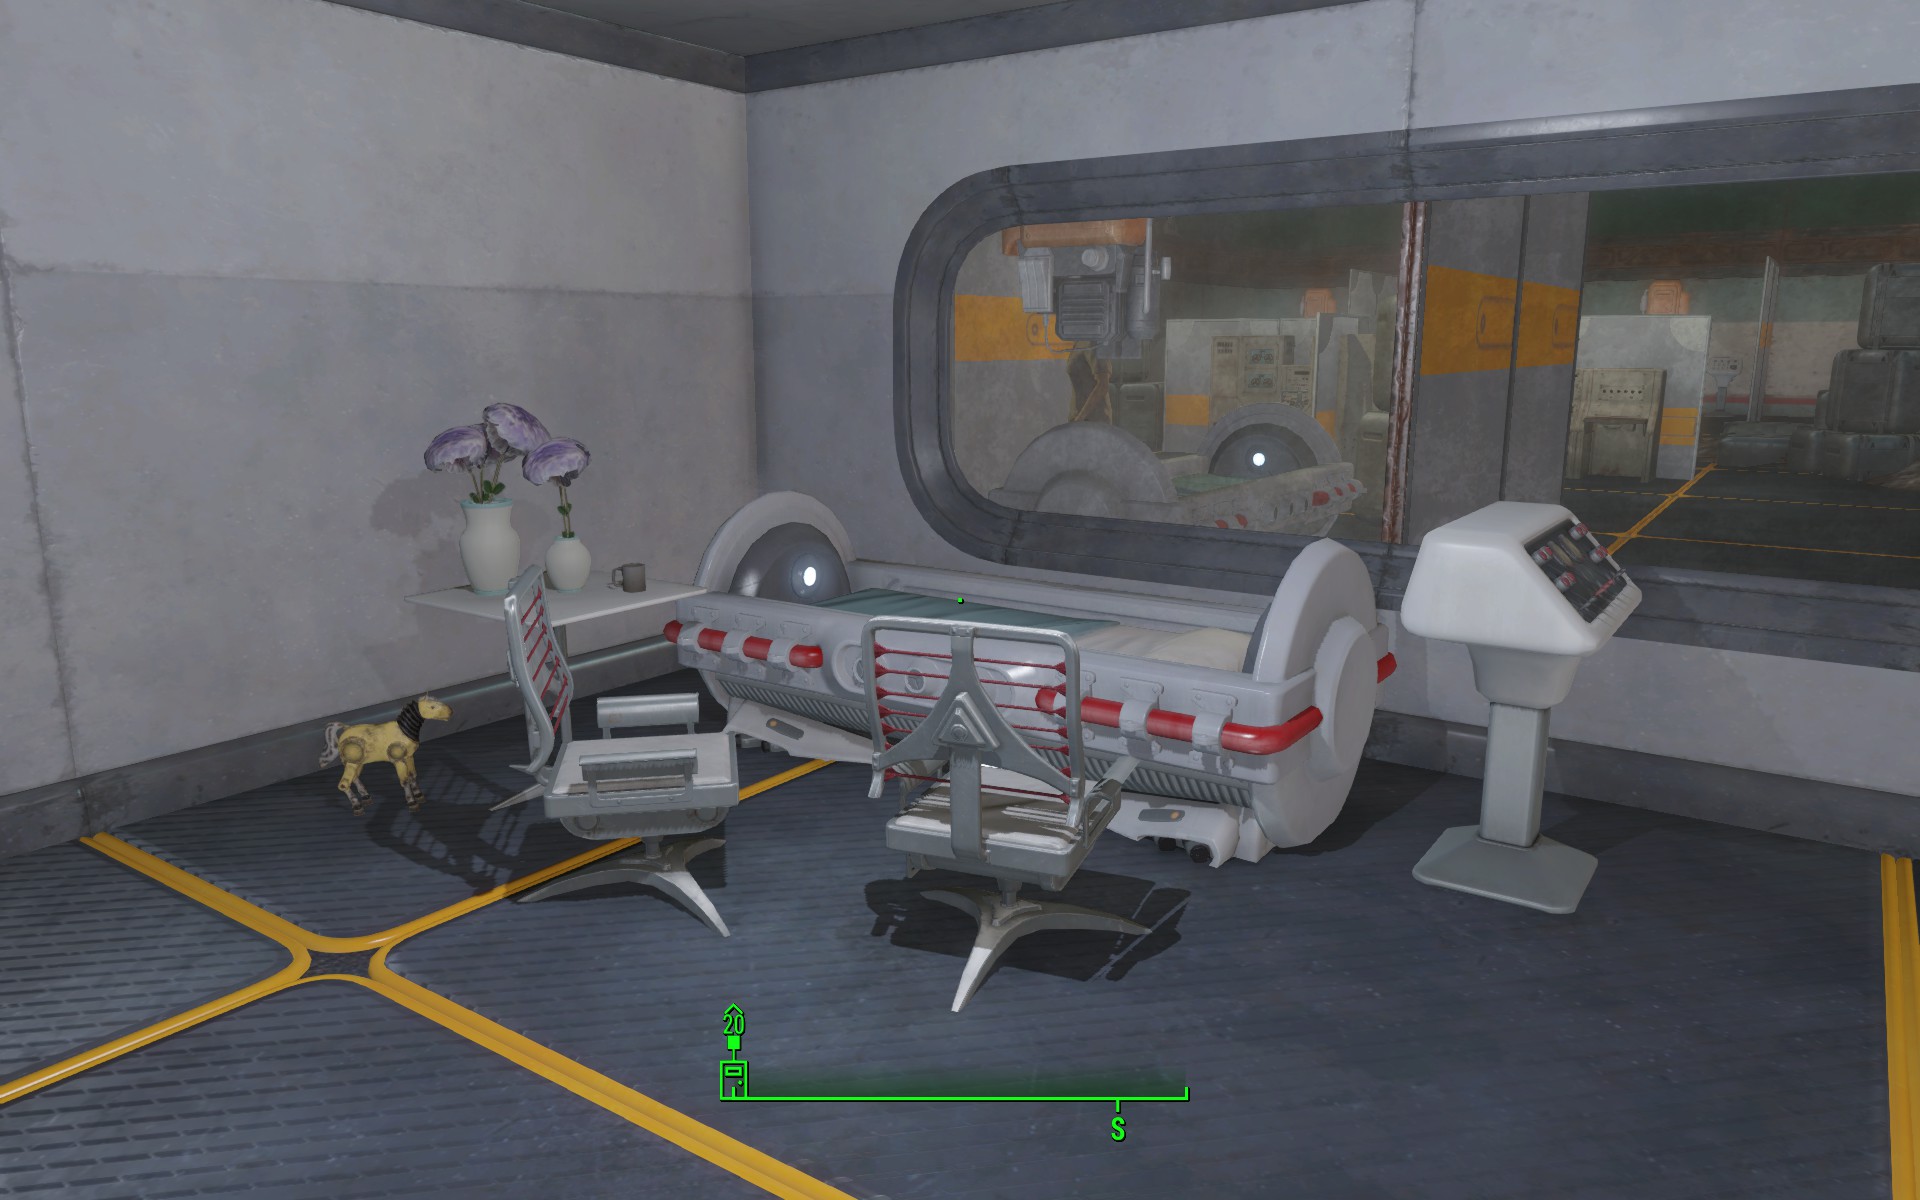
Lab, Eda’s bed -> environmental storytelling on Eda’s personality and her life
Postmortem
What Went Well?
- Polish small things as I go. These are low priorities for sure, but as I learned from the Half-Life 2 project, I found out fixing them in time would always provide a better gameplay environment, and wouldn’t cause accumulation until the last week, and got overwhelmed. So this time I did the tiny fixes during the weekdays and left the weekend for new implementations and testing, which is the most productive way for me.
- Always control the scope. I imagined the project to be time-consuming and I had an estimation of how much time I could work on it as I’m working on my TGP2 project as the lead designer at the same time. Therefore, I tried to shrink my scope from the start and did most things in the most efficient way I could, which saved me a lot of time and got me to a good spot on completeness.
- Adjust the enemy flow. My enemy flow was a little off until the aesthetic milestone, and I figured out I needed to customize the spawn time and be careful with the placement to realize my intended flow. So I implemented and iterated several times with the help and playtests from my GAs. Customization takes time but is worth implementing.
What Went Wrong?
- I went too far on some details and fell behind on some other things with higher priority. During the white box milestone, I did a bit of decoration, hoping to get more sense of the spatial scale. But then I found out that putting in M/L objects for covers is more meaningful in gameplay and would help more with feeling the size of the space.
- Keep a stable build. Since this is the first time that I am working with Creation Kit, I underestimated how hard controlling the build stable is and how much time I will need to prepare for debugging. It was always until midnight before the submission that I finished getting modifications done and started testing. But keeping the level playable is always the most important, so I should prepare more time and plan ahead.
- The lighting takes a lot of effort. I started working on lighting as early as I could during GC interim milestones since I knew I was not good at this. But still, though fixing the lighting each week, it didn’t get much better. I probably need to learn about it more by checking out the lighting in the original game and other people’s levels.
What I Learned?
- Design the narrative with scenes (actions) and fill in atmospheric pieces (generic NPCs). During multiple playtests and feedback sessions, people mentioned my narrative is easy to miss and many places are not memorable enough. After I added the Jessica fixing Ben scene and more NPCs around the town, people started to feel more immersive and engaged. So I would try to design my narrative in the future with acting scenes and juicy NPCs to create a consistent and info-abundant experience.
- Fill in the requirements for each milestone as much as I can. This is a project that takes up a whole semester to work on and has many interim milestones, so it is easy to fall behind and accumulate work till later. What I tried is to list the things I want to do for each week and next week and implement as much as I can, hoping to get ahead and save time for testing in the last weeks. Though I did as much as I could, I figured there would always be endless refinements I could do. But starting early won’t harm anyway.
- Get a lot of playtests in the later weeks. As I get familiar with the level each week, it is hard to think out of the box and test out strange bugs that would affect gameplay experiences. So I asked GAs and other friends to play, which helped me to figure out a lot of things I could fix.
Play The Level
Download from HERE> https://drive.google.com/file/d/1Aet-yvyeCPh423jBJcpJJ5g2bxFD4pyr/view?usp=sharing
Download Level Design Document:

Leave a comment